
File Upload Configuration
Configuration File Location PicList
The configuration file location of PicList varies depending on the operating system:
- Windows:
%APPDATA%\piclist\data.json - Linux:
$XDG_CONFIG_HOME/piclist/data.jsonor~/.config/piclist/data.json - macOS:
~/Library/Application\ Support/piclist/data.json
For example, on Windows, you can find it at:
C:\Users\YourUserName\AppData\Roaming\piclist\data.json
On Linux, you can find it at:
~/.config/piclist/data.json
The location on macOS is similar to Linux.
Note
The configuration file name of PicList-core is config.json.
Function Interface Partition
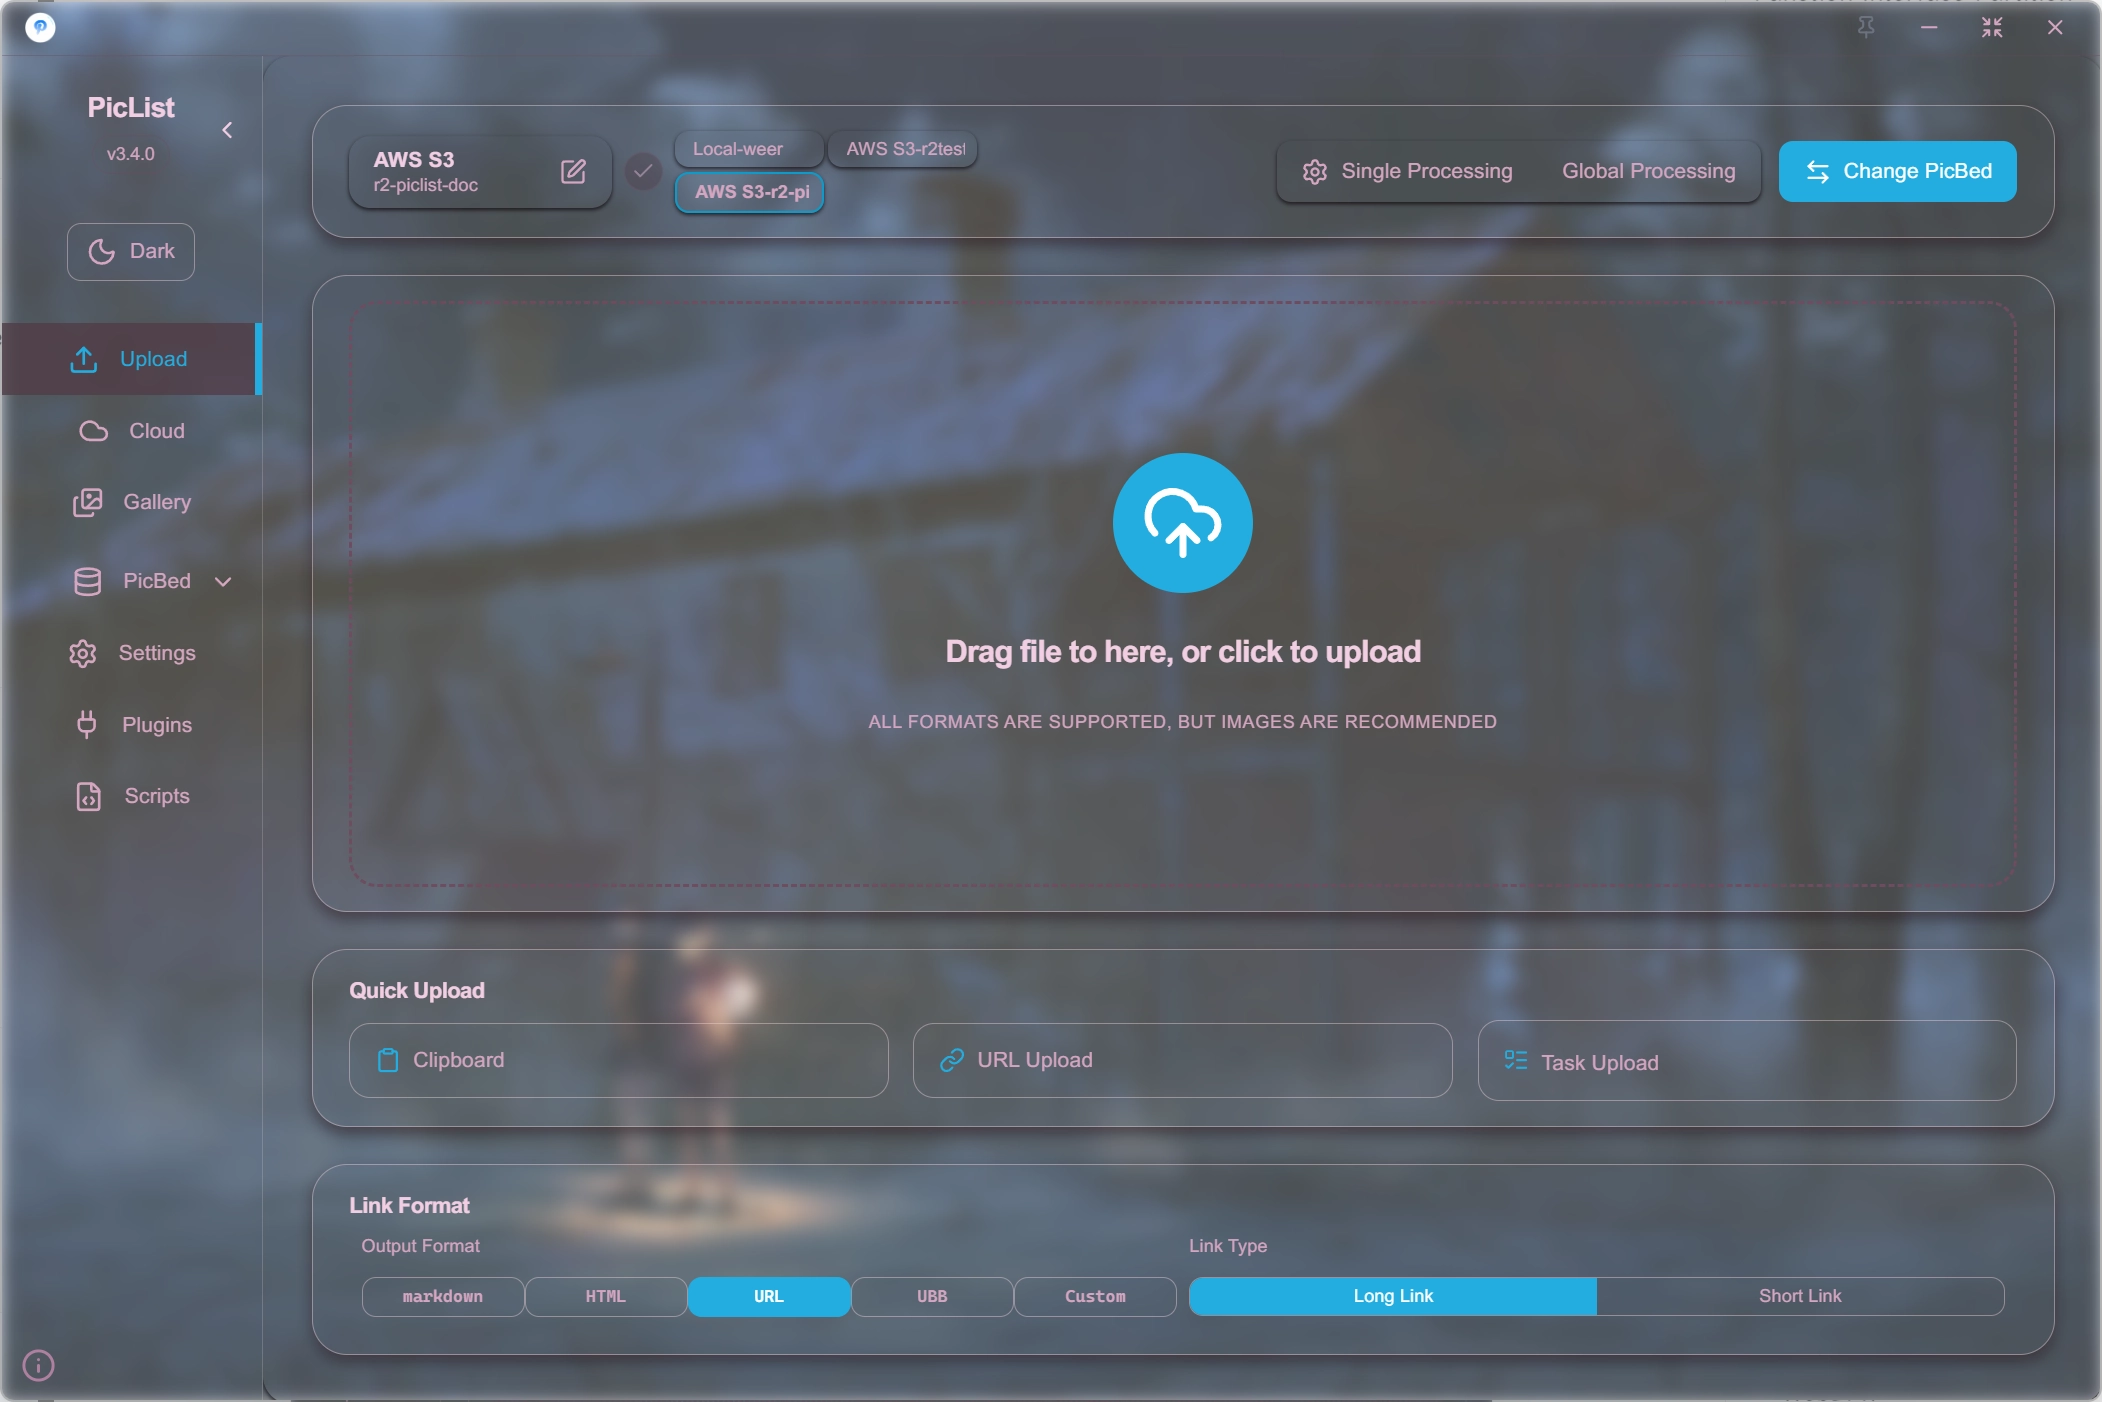
PicList supports collapsible menus and switching between light and dark themes.
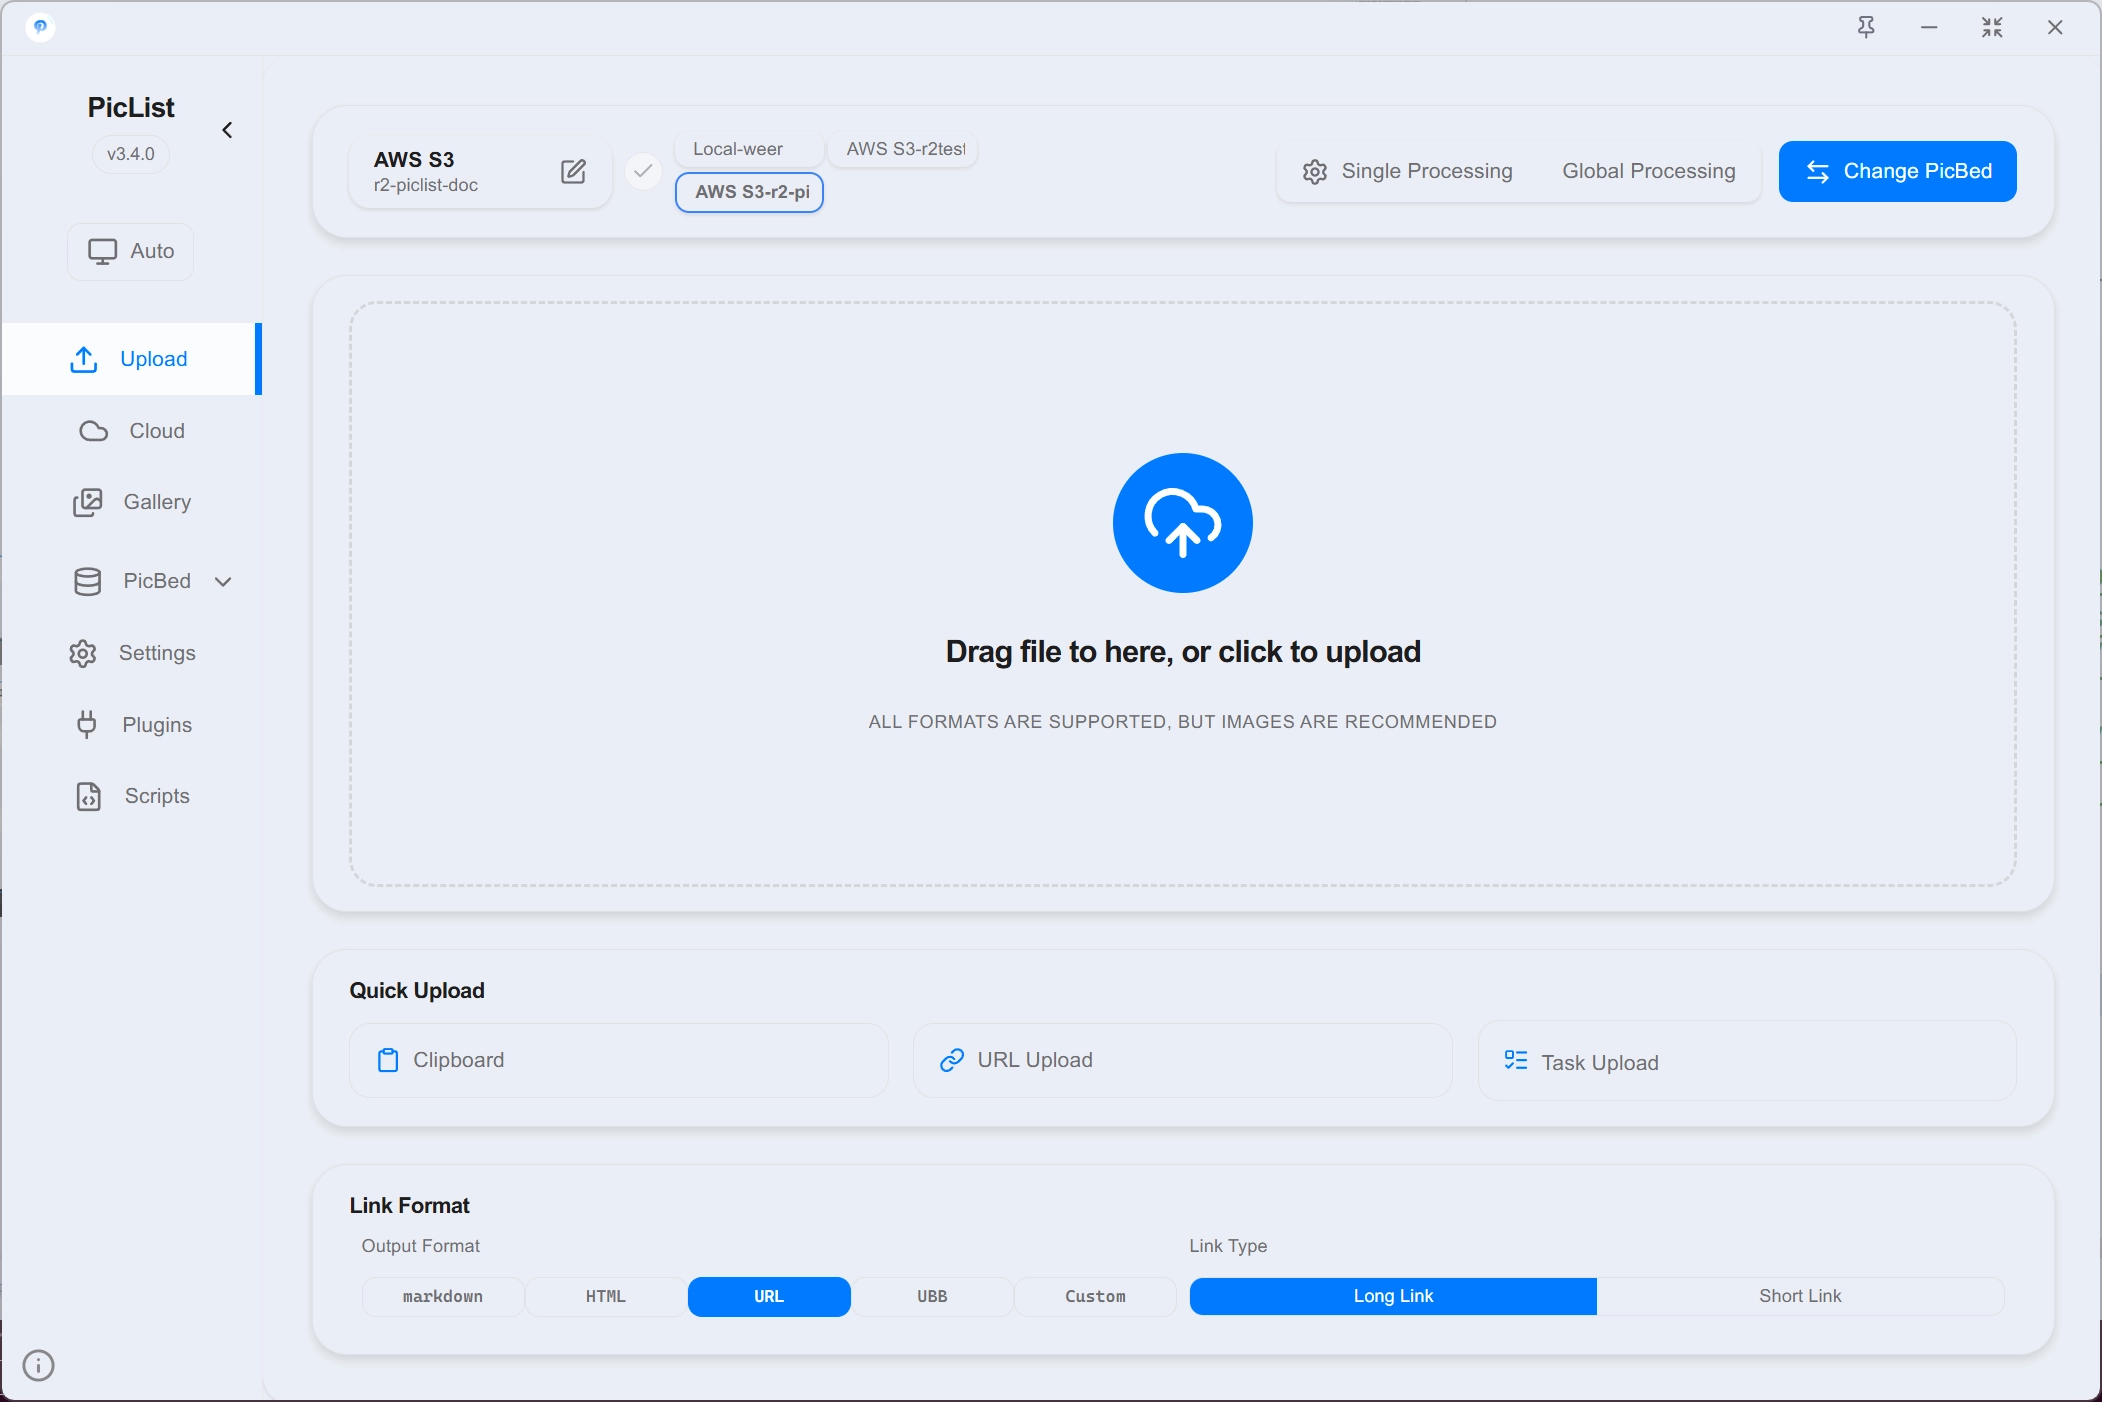
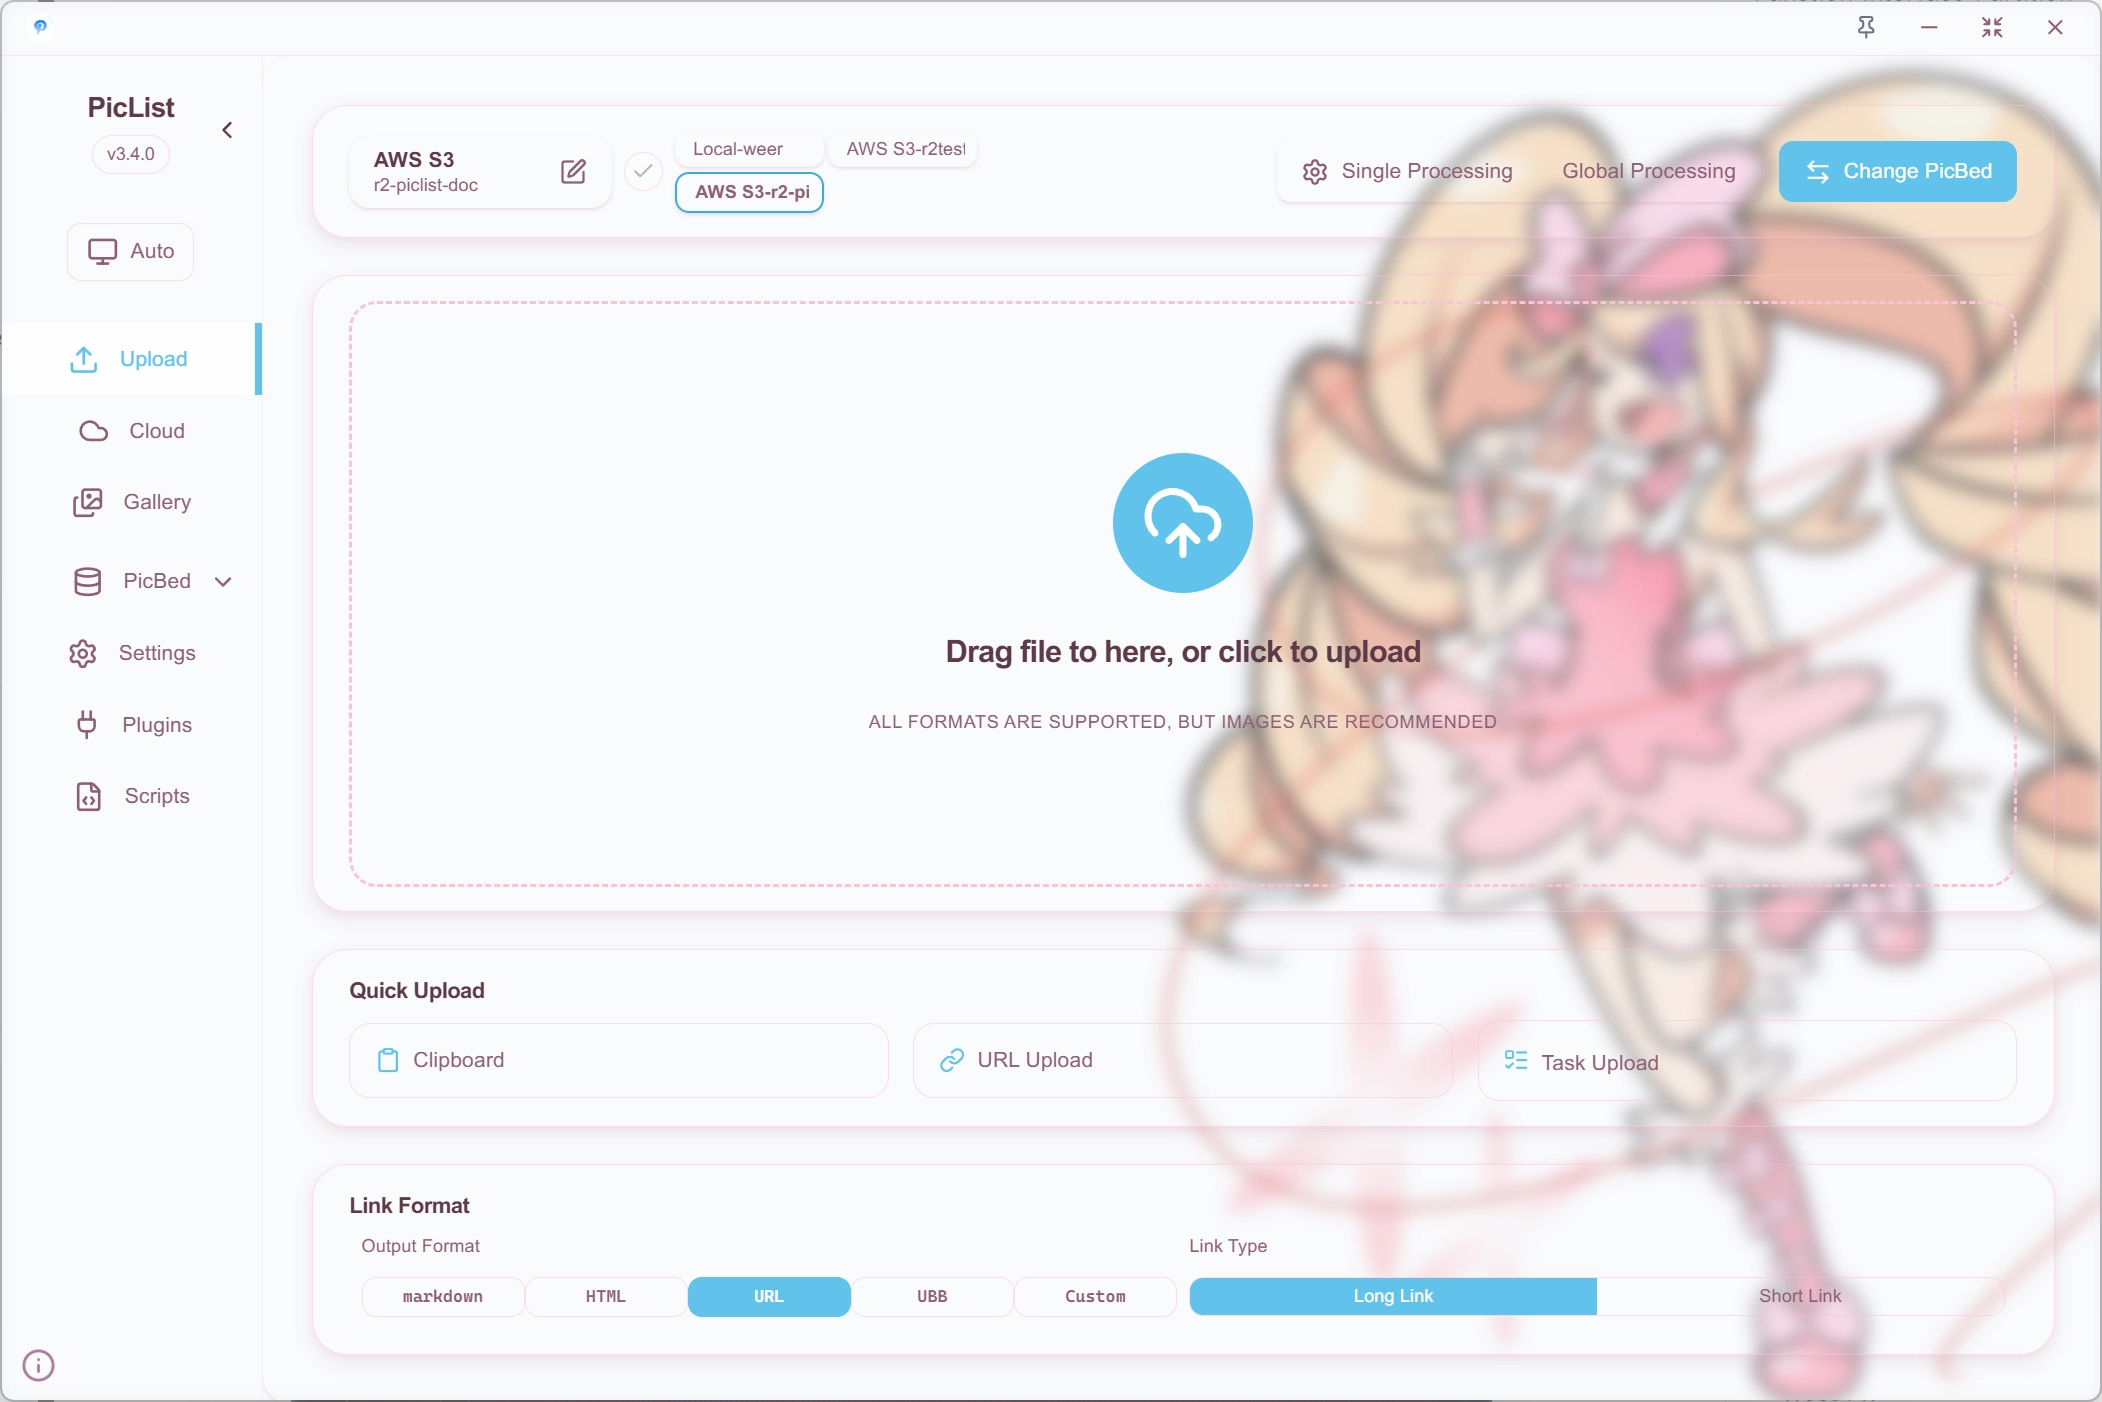
Upload Area
The upload area supports drag and drop uploading or clicking to open the file upload dialog.
It also supports uploading from the clipboard, uploading via URL, uploading via task system, and other functions.
Image Host Quick Switch 3.2.1+
PicList supports adding the current image host to the favorites list, up to 6, and displays them at the top of the upload area. You can quickly switch the default image host by clicking on the image host badge, and long press to remove it from the favorites list.

Image Preprocessing Settings 1.4.0+
PicList supports built-in image preprocessing functions before uploading, including:
- Adding watermarks
- Image compression
- Image scaling
- Image rotation
- Format conversion
- Remove EXIF information
These functions are designed to help users perform image preprocessing before uploading, reducing the space occupation in cloud storage.
Some PicGo plugins, such as picgo-plugin-watermark and picgo-plugin-compress, can also provide similar functionalities. However, these plugins have not been maintained for a long time and may not be as efficient as the built-in preprocessing functions in PicList. We recommend that you use the built-in module rather than the plugins.
Adding Watermarks
PicList supports two types of watermark adding: text watermark and image watermark.
The Json path is buildin.watermark. The supported configuration parameters are:
"isAddWatermark": boolean, // Whether to add watermarks
"watermarkType": "text" | "image", // Watermark type
"isFullScreenWatermark": boolean, // Whether to add full-screen watermarks
"watermarkDegree": number, // Watermark rotation angle
"watermarkText": string, // Watermark text
"watermarkFontPath": string, // Watermark font path
"watermarkScaleRatio": number, // Watermark scale ratio relative to the original image
"watermarkColor": string, // Watermark color
"watermarkImagePath": string, // Watermark image path
"watermarkPosition": string // Watermark position
"watermarkImageOpacity": number // Watermark image opacity
Besides, PicList also supports configuring different watermark settings for different uploaders. You can set the corresponding parameters by adding Map after the above parameters. For example, isAddWatermarkMap, watermarkTypeMap, etc.
{
  "isAddWatermarkMap": {
    "smms": true,
    "imgur": false
  }
}
This indicates that when using the smms uploader, watermarks will be added, while when using the imgur uploader, watermarks will not be added.
Global-level and image host-level configurations can be set in the Upload Page - Global Processing button to open the settings page. The Per-PicBeds Settings button behind each option column can open the image host-level settings page, which is the above Map configuration.
Text Watermark
Supported configurable parameters include:
- Watermark text
- Watermark font
- Watermark color
- Watermark rotation angle
- Scale ratio of the watermark to the original image
- Watermark position
The default font for text watermarks is simhei.ttf. The font will download from the network the first time you use the image uploading function.You can also provide your own font.
Before adding a watermark, PicList will first check if the font file exists. If it does not exist, it will automatically download the font file. However, due to network issues, the font file download may fail, and in this case, the addition of the watermark will be skipped.
Please check if the font file exists in the corresponding path according to your system. If it does not exist, please manually download the font file and then place it in the corresponding path.
Windows: %APPDATA%\piclist\assets\simhei.ttf Linux: $XDG_CONFIG_HOME/piclist/assets/simhei.ttf or ~/.config/piclist/assets/simhei.ttf macOS: ~/Library/Application\ Support/piclist/assets/simhei.ttf
Font file download link: https://release.piclist.cn/simhei.ttf
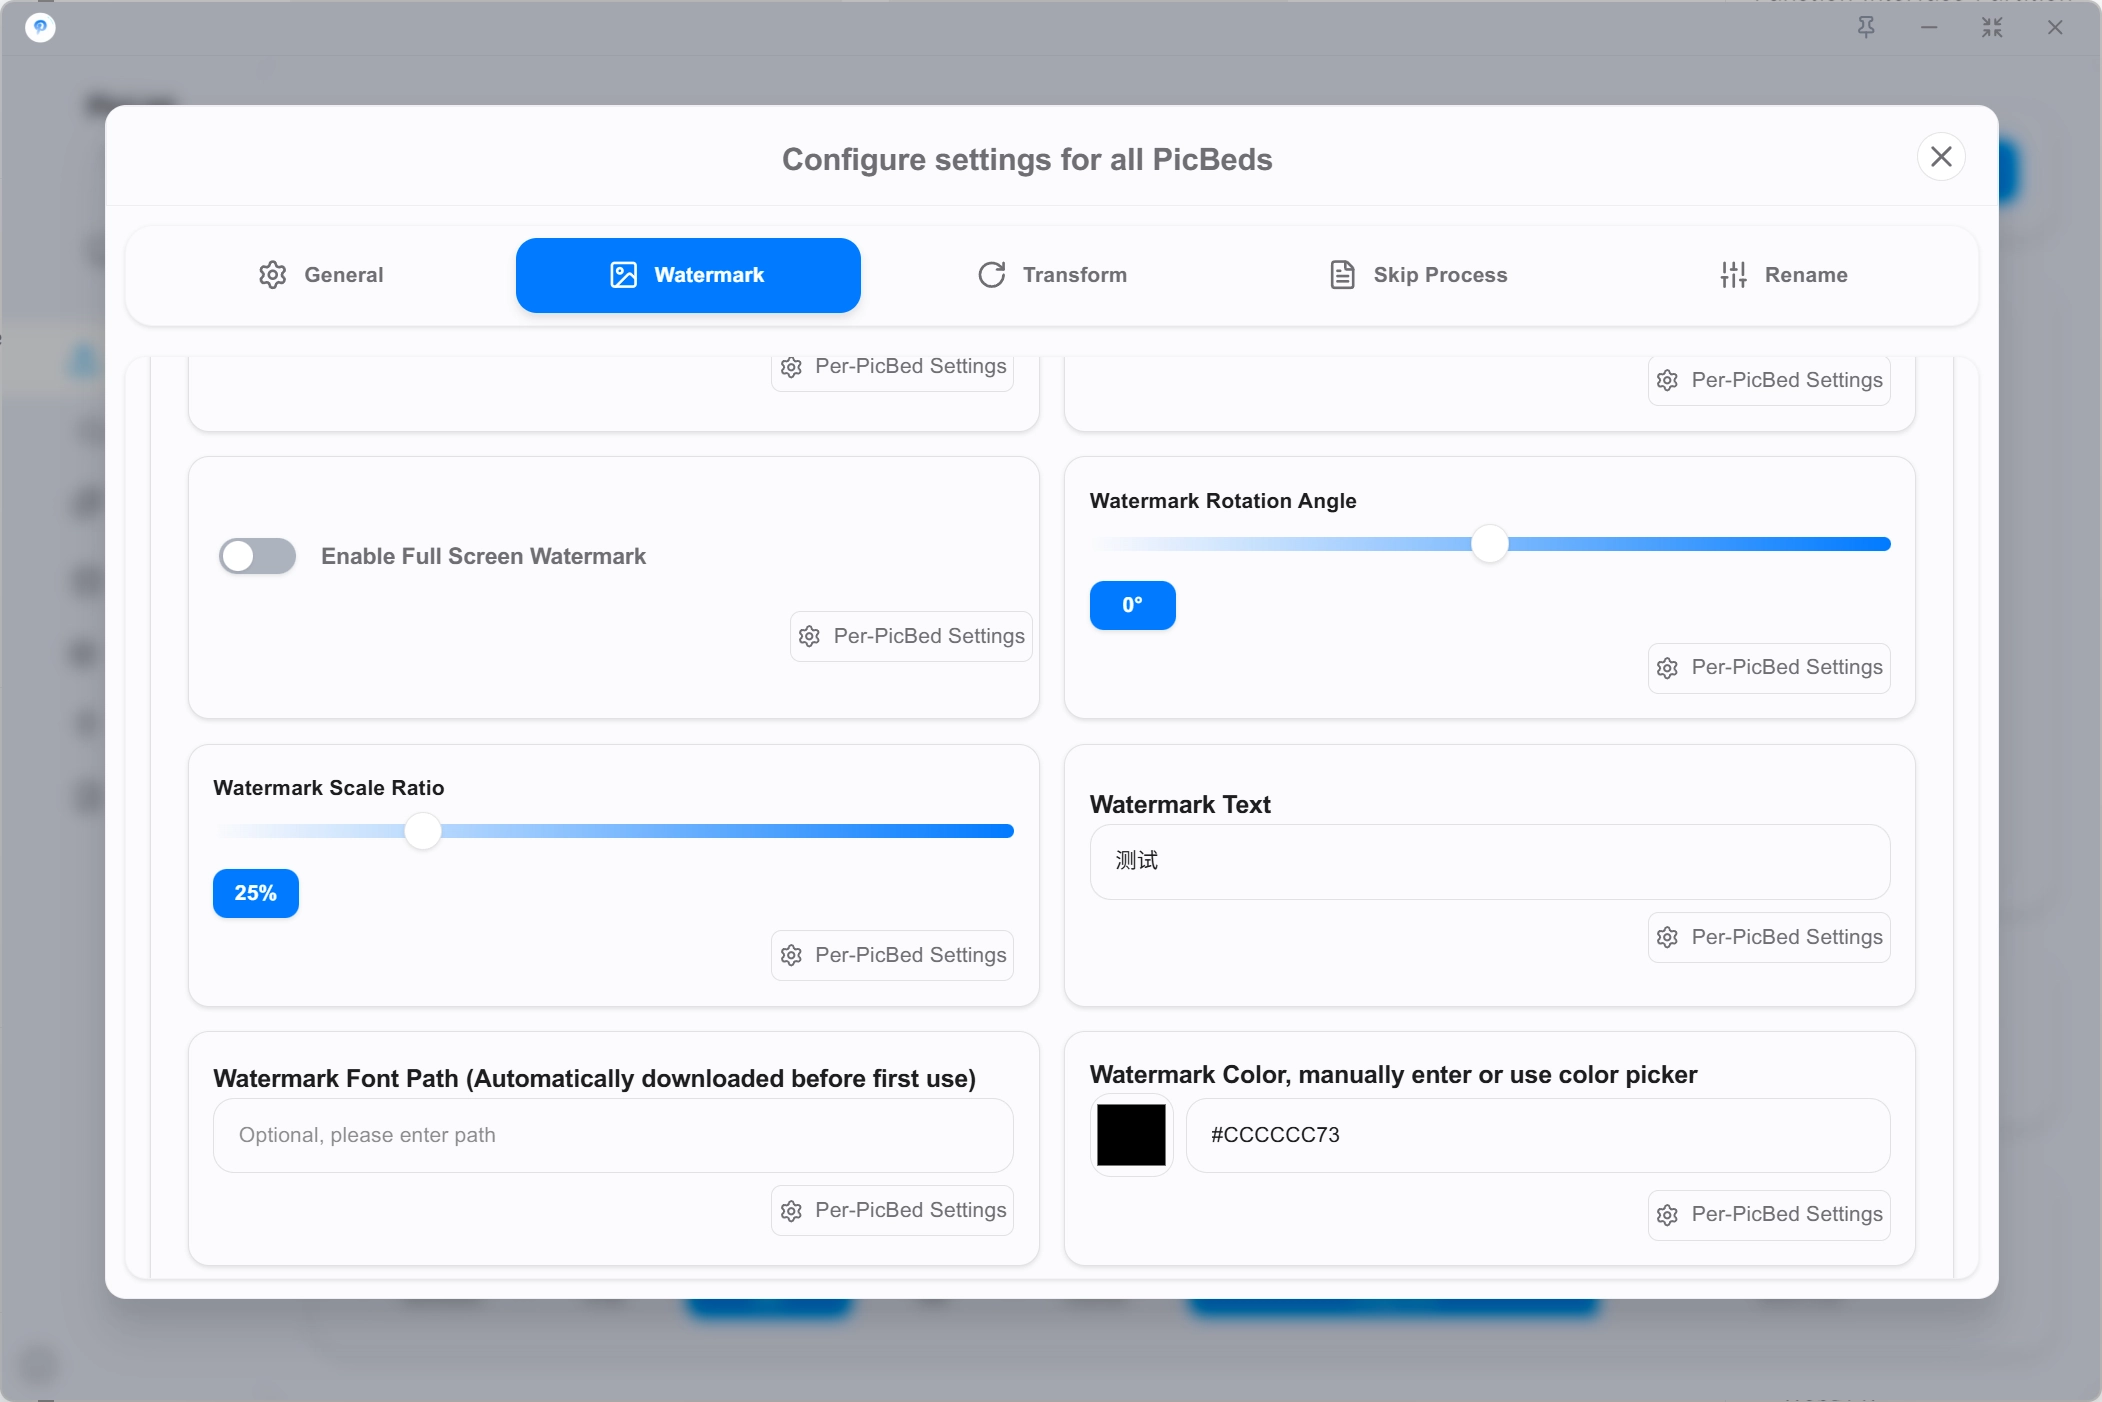
Image Watermark
Supported configurable parameters for image watermarks include:
- Watermark image path
- Watermark rotation angle
- Scale ratio of the watermark to the original image
- Watermark position
The default image watermark is PicList's text logo, but you can provide your own image watermark.
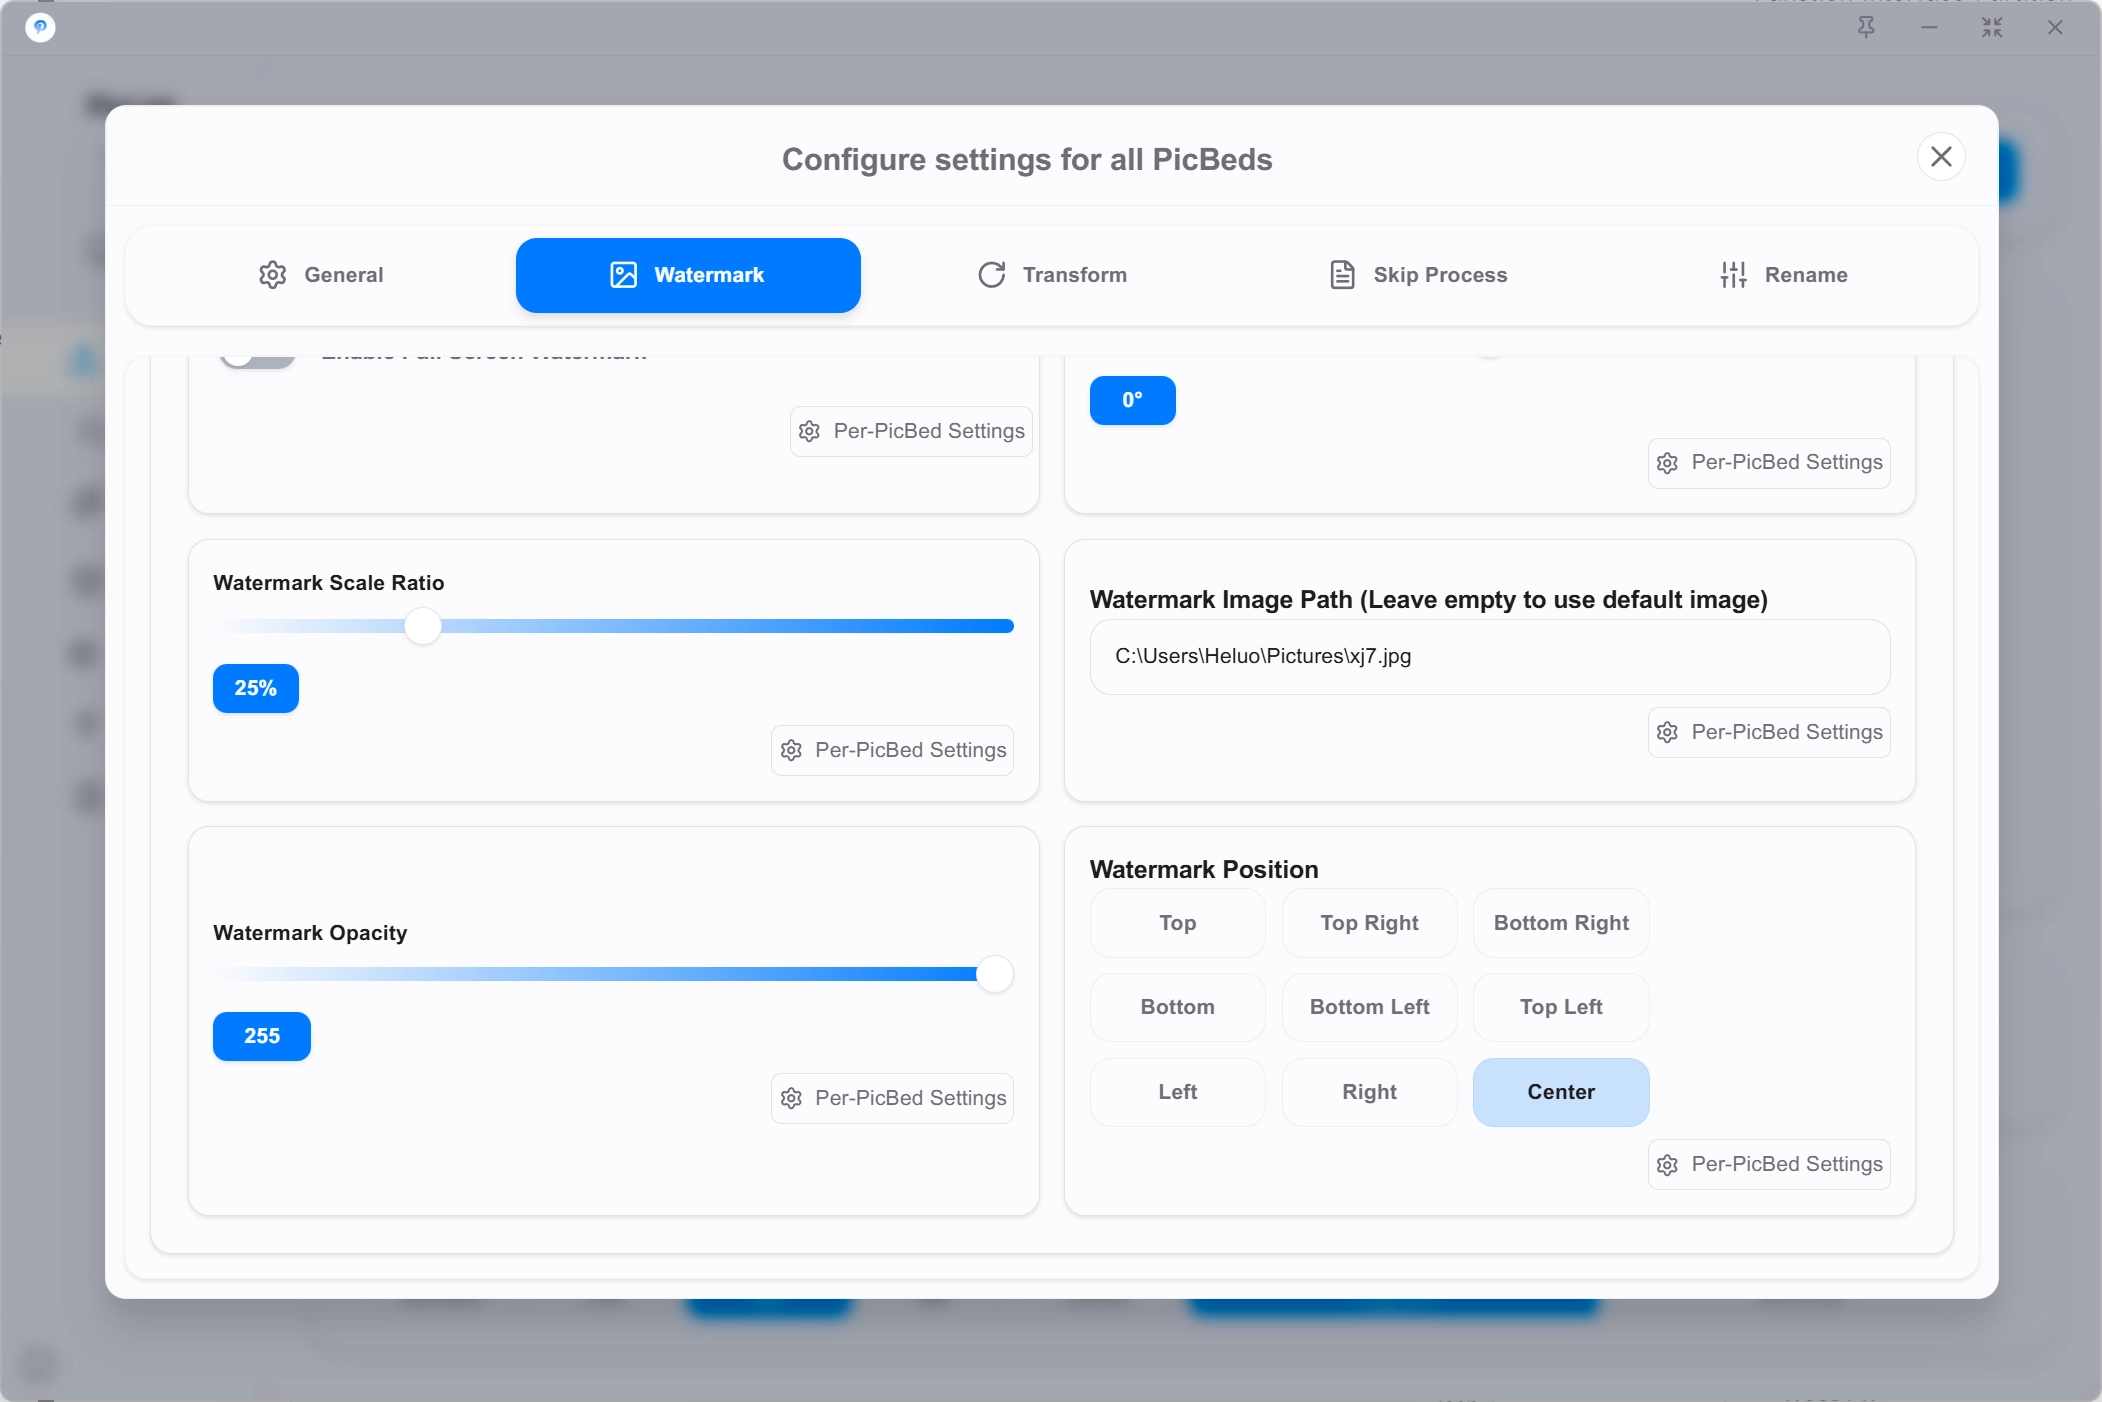
Image Editing
Image editing includes image compression, image scaling, and image rotation. Supported configurable parameters include:
"quality": number, // Image compression quality 0-100
"isReSize": boolean, // Whether to resize by a fixed size
"reSizeWidth": number, // Resized width, if set to 0, it will be automatically calculated according to the height
"reSizeHeight": number, // Resized height, if set to 0, it will be automatically calculated according to the width
"skipReSizeOfSmallImg": boolean, // Whether to skip resizing for small images
"isReSizeByPercent": boolean, // Whether to resize by percentage
"reSizePercent": number, // Scaling percentage
"isRotate": boolean, // Whether to rotate
"rotateDegree": number, // Rotation angle
"isFlip": boolean, // Whether to flip vertically
"isFlop": boolean // Whether to flip horizontally
Note that PicList provides two scaling modes: scaling by a fixed size and scaling by percentage. These two scaling modes are mutually exclusive, so you can only choose one.
The priority is: scaling by percentage > scaling by fixed size.
Similarly, PicList also supports configuring different image editing settings for different uploaders. You can set the corresponding parameters by adding Map after the above parameters. For example, qualityMap, isReSizeMap, etc.
{
  "qualityMap": {
    "smms": 80,
    "imgur": 90
  }
}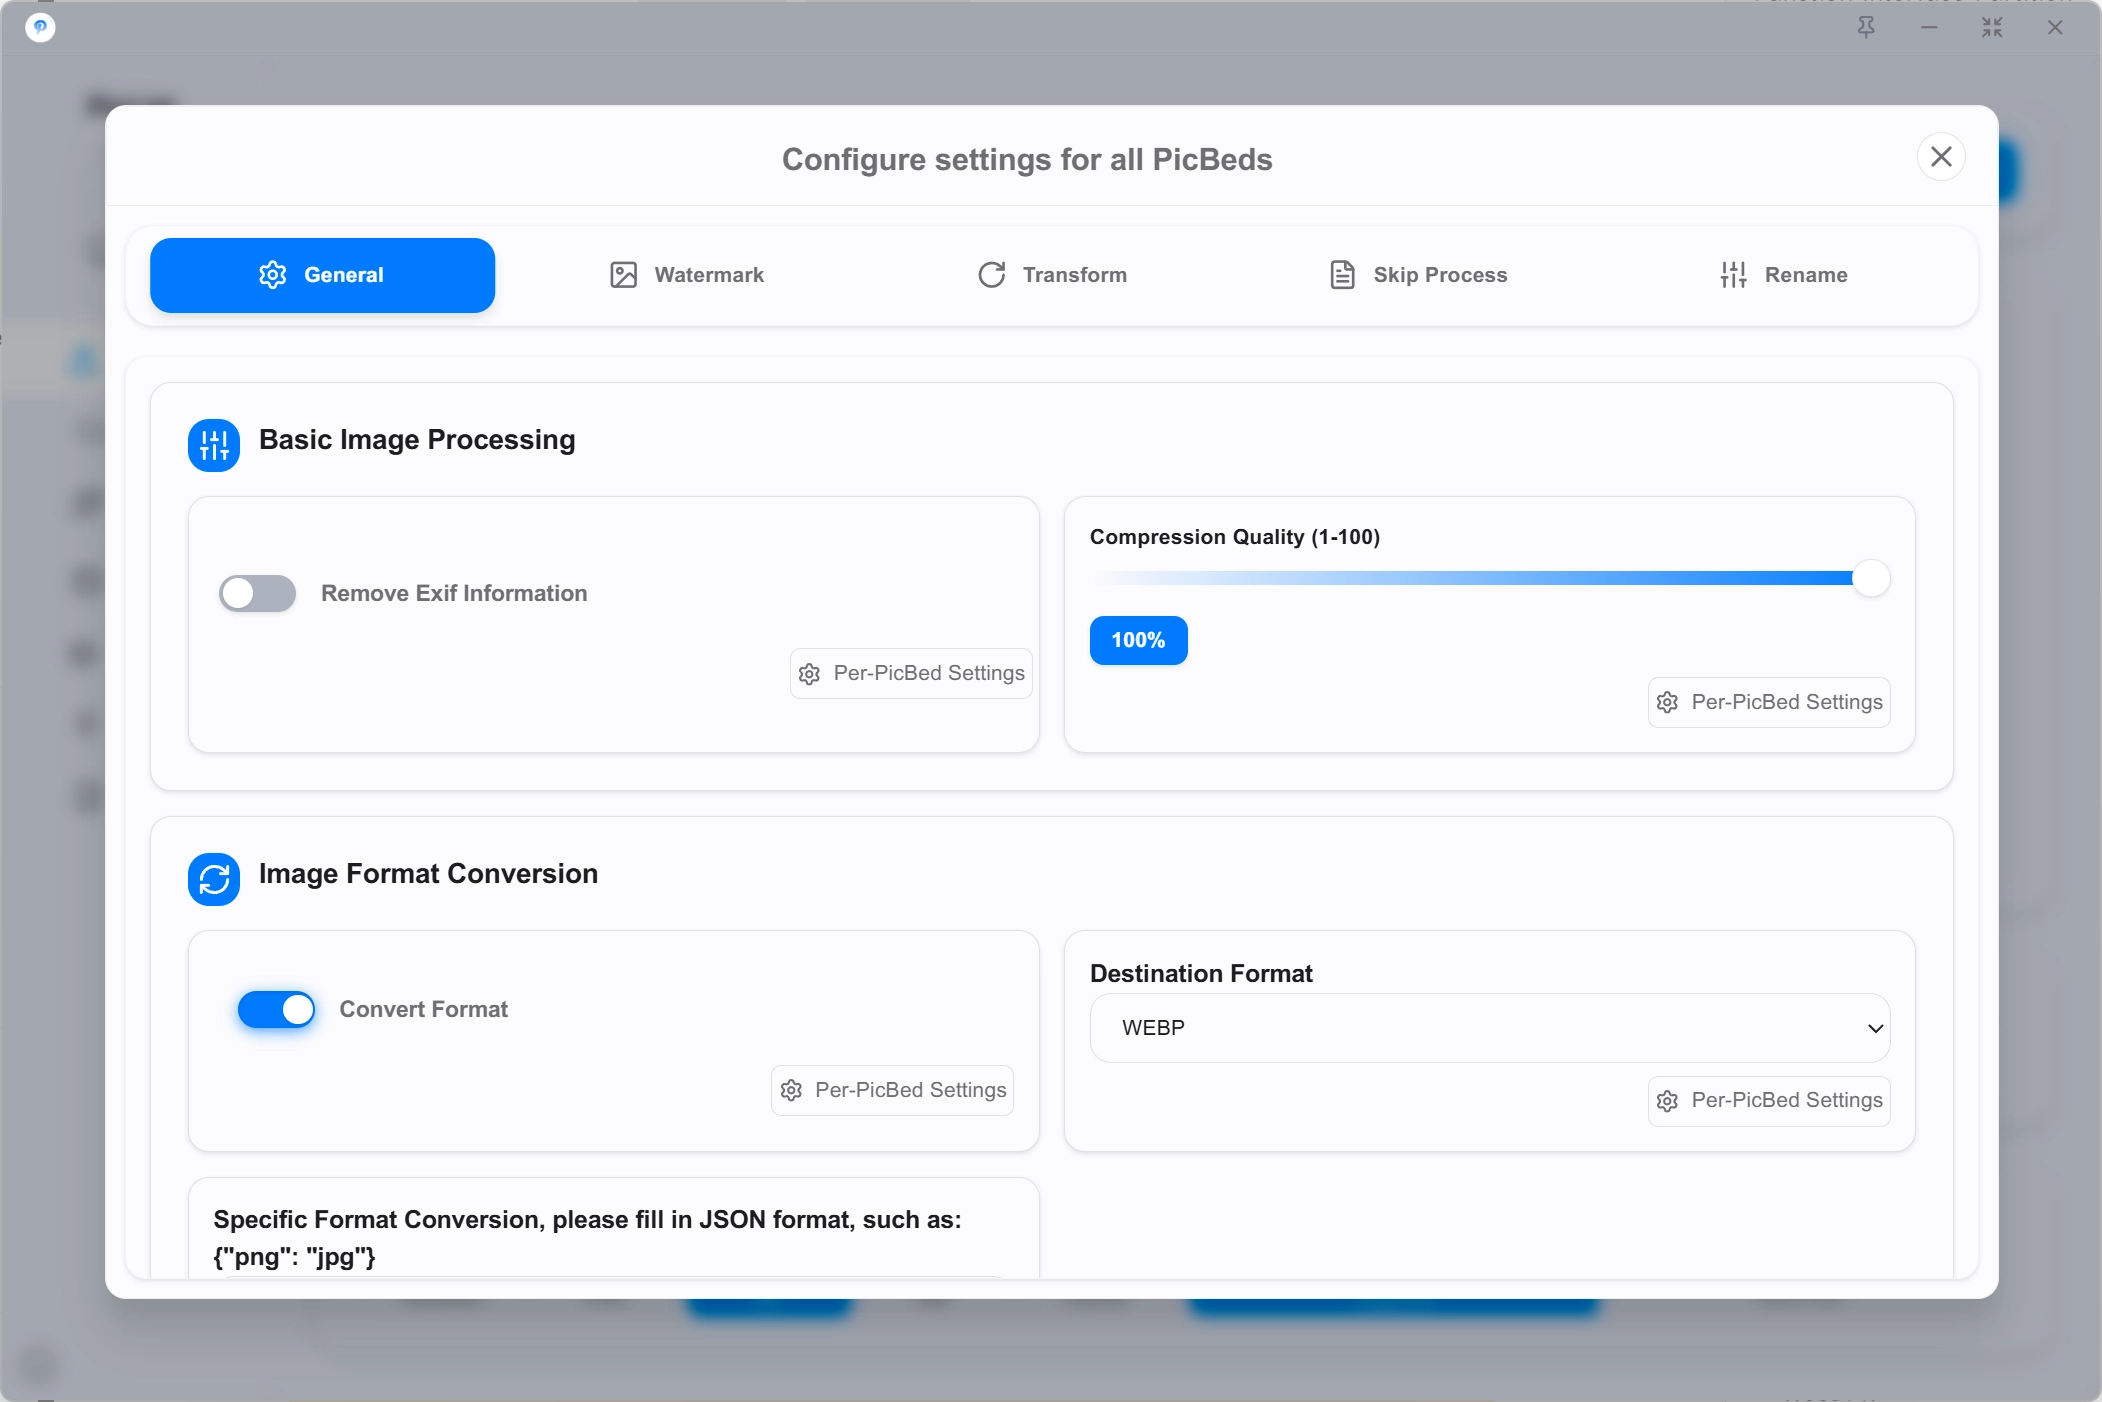
Format Conversion
Warning
Some platforms only support specific image formats, please be aware of platform restrictions. When converting to jpg format, PicList use mozJPEG by default.
Supported configurable parameters include:
"isConvertFormat": boolean, // Whether to convert format
"convertFormat": string // Converted format
"formatConvertObj": Object // Format conversion parameters
Supported formats for conversion include:
| Format | Extension |
|---|---|
| AVIF | avif |
| DeepZoom | dz |
| FITS | fits |
| HEIF | heif |
| Input | input |
| JPEG | jpeg, jpg |
| JPEG 2000 | jp2 |
| JPEG XL | jxl |
| ImageMagick | magick |
| OpenSlide | openslide |
| PNG | png |
| PPM | ppm |
| Raw image data | raw |
| SVG | svg |
| TIFF | tiff, tif |
| Vicar | v |
| WebP | webp |
formatConvertObj is an object used for detailed conversion configuration for different image formats, for example:
{
  "isConvert": true,
  "convertFormat": "webp",
  "formatConvertObj": {
    "jpg" : "png",
    "png" : "jpg"
  }
}
In this case, during the conversion, images in jpg format will be converted to png format, images in png format will be converted to jpg format, and all other image formats will be converted to webp format.
Remove EXIF Information
"isRemoveExif": boolean // Whether to remove EXIF informationEXIF information is the metadata of the image, including shooting time, shooting equipment, shooting location, etc. Sometimes we do not want this information to be leaked, so PicList provides the function of removing EXIF information.
When enabled, the uploaded image will not contain EXIF information.
Using CLI Command Line
PicList's image preprocessing feature supports command line usage, and you need to install PicList Core. Please refer to the README for specific installation methods.
After installation, you can use the picgo set buildin watermark command to set the watermark adding function and the picgo set buildin compress command to set the image editing function. Then, you can upload images by using the picgo upload command.
Clipboard Image Upload
By clicking the Clipboard Image button, you can upload images in the clipboard.
By default, the script is used to get clipboard images. You can open Use Built-in Clipboard Upload in the settings to use Electron's built-in clipboard module to obtain them.
Besides, you can open or close the auto-clipboard upload function by right-clicking the taskbar tray icon, mini window, or MacOS's top bar and dock icon. When it is turned on, PicList will monitor the images in the clipboard. When an image is detected, it will be uploaded automatically.
Upload via URL
Tip
PicList removes the limitation of PicGo, which can only upload images via URL.
You can upload images via URL, and the URL must start with "http" or "https". You can upload multiple URLs by entering them on separate lines.
URLs must contain the image extension, such as https://example.com/test.jpg, otherwise the upload may fail.
PicList will specially process the image extension for images from WeChat official accounts, so you can directly copy the image link from WeChat official accounts to upload.

Task Upload 3.2.0+
From version 3.2.0, PicList supports the task upload feature.
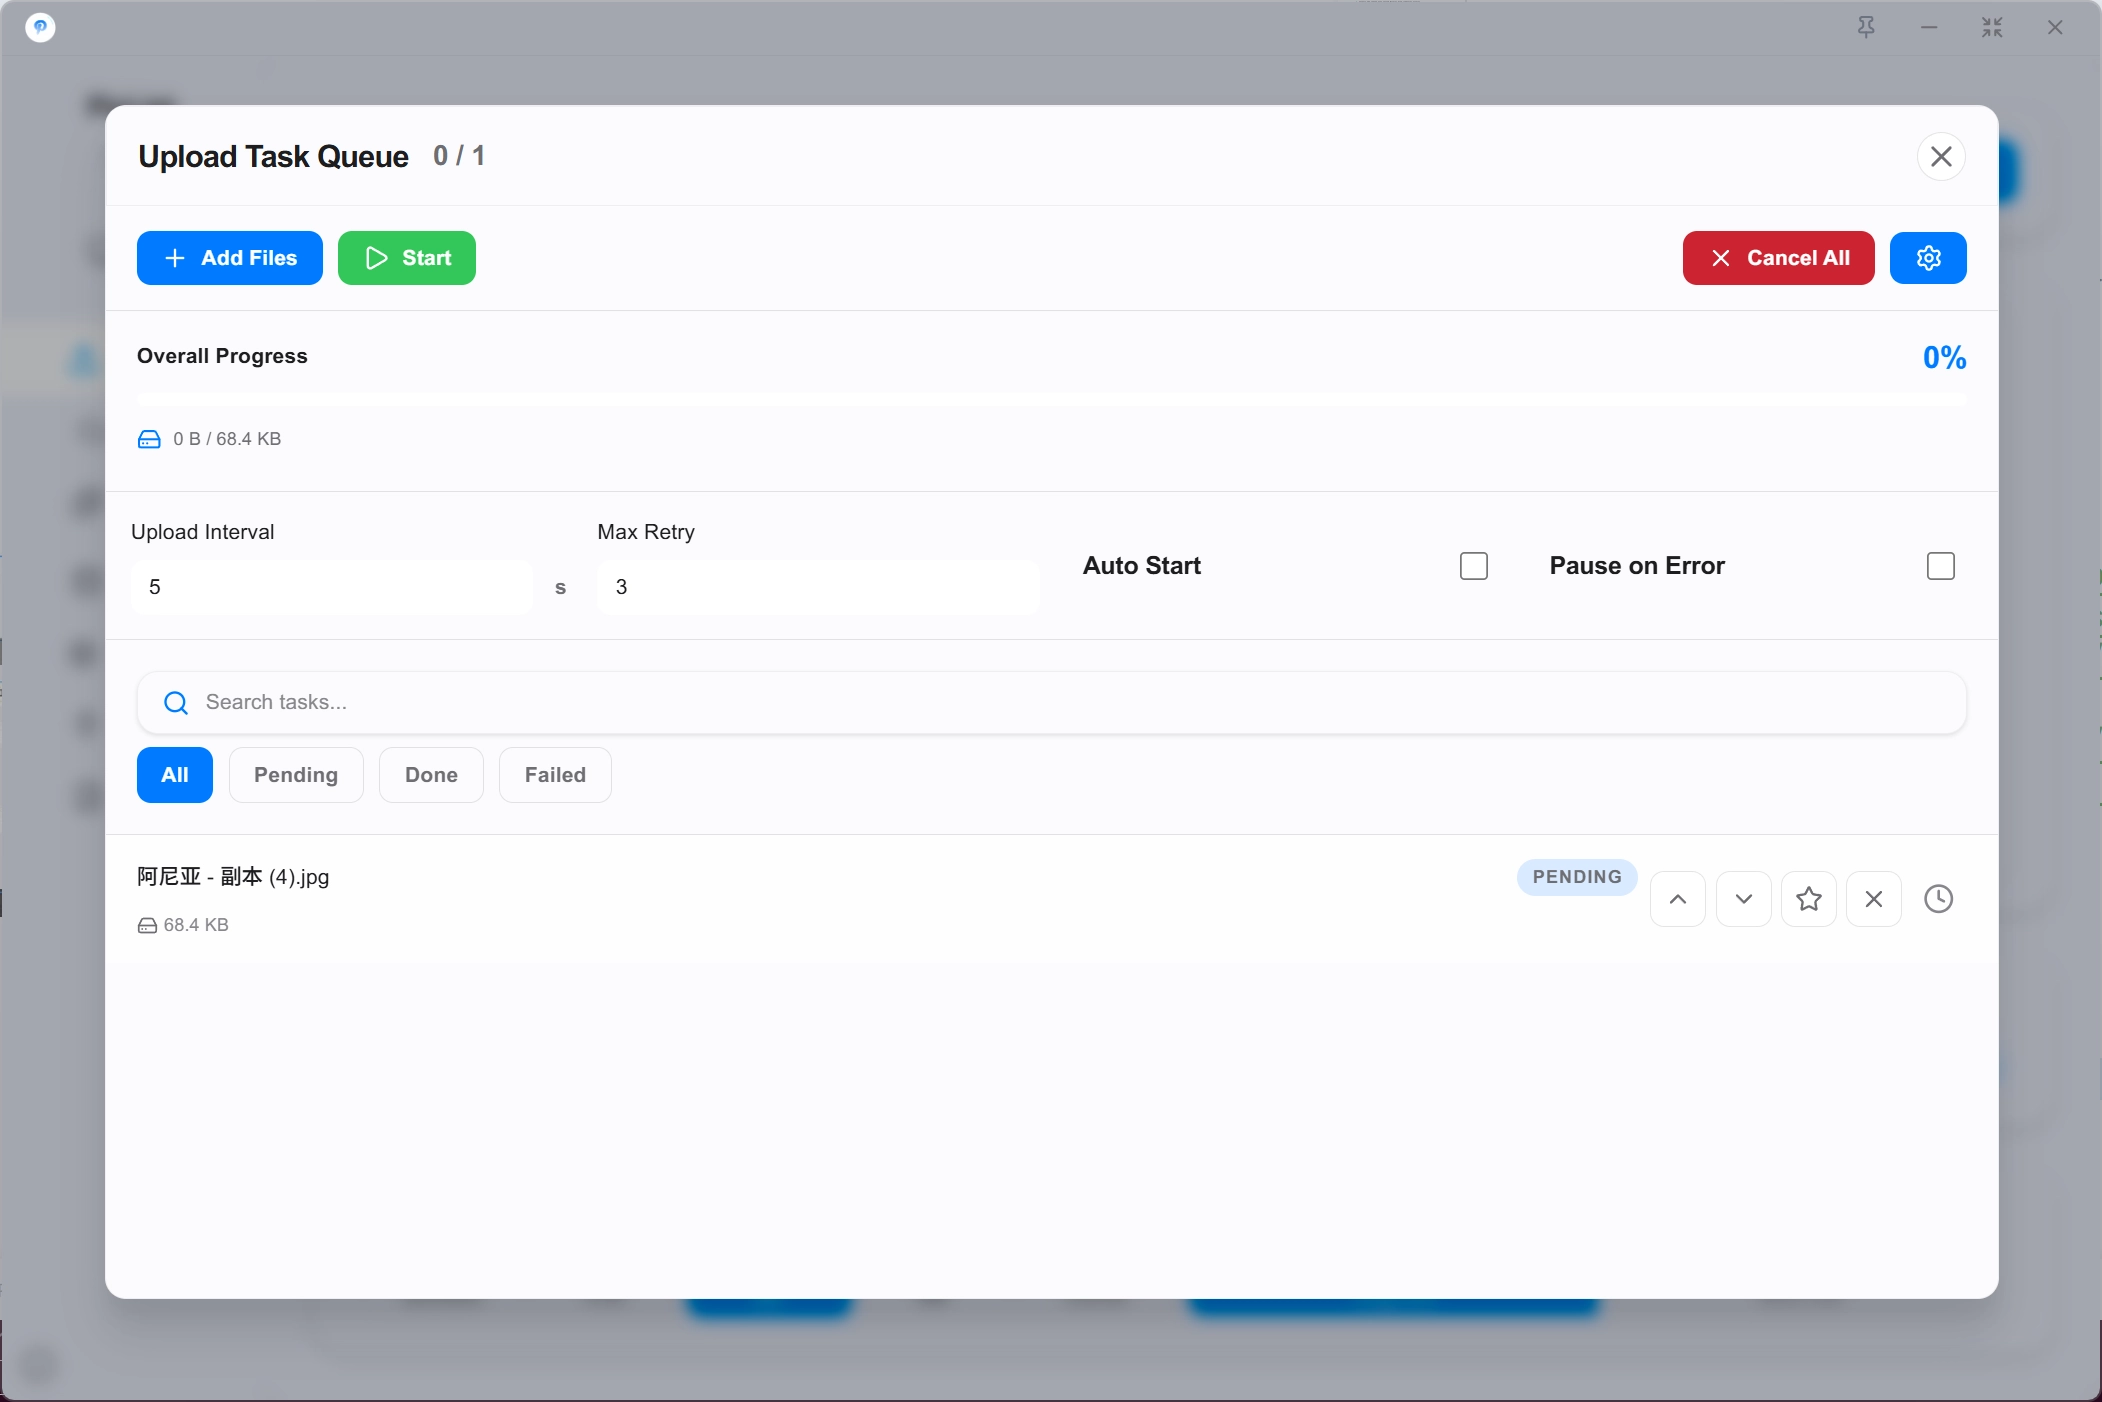
By adding files to the task list and setting the upload interval and retry count, you can achieve the function of scheduled uploading of files, and it can also be used to avoid upload frequency limits of some image hosts.
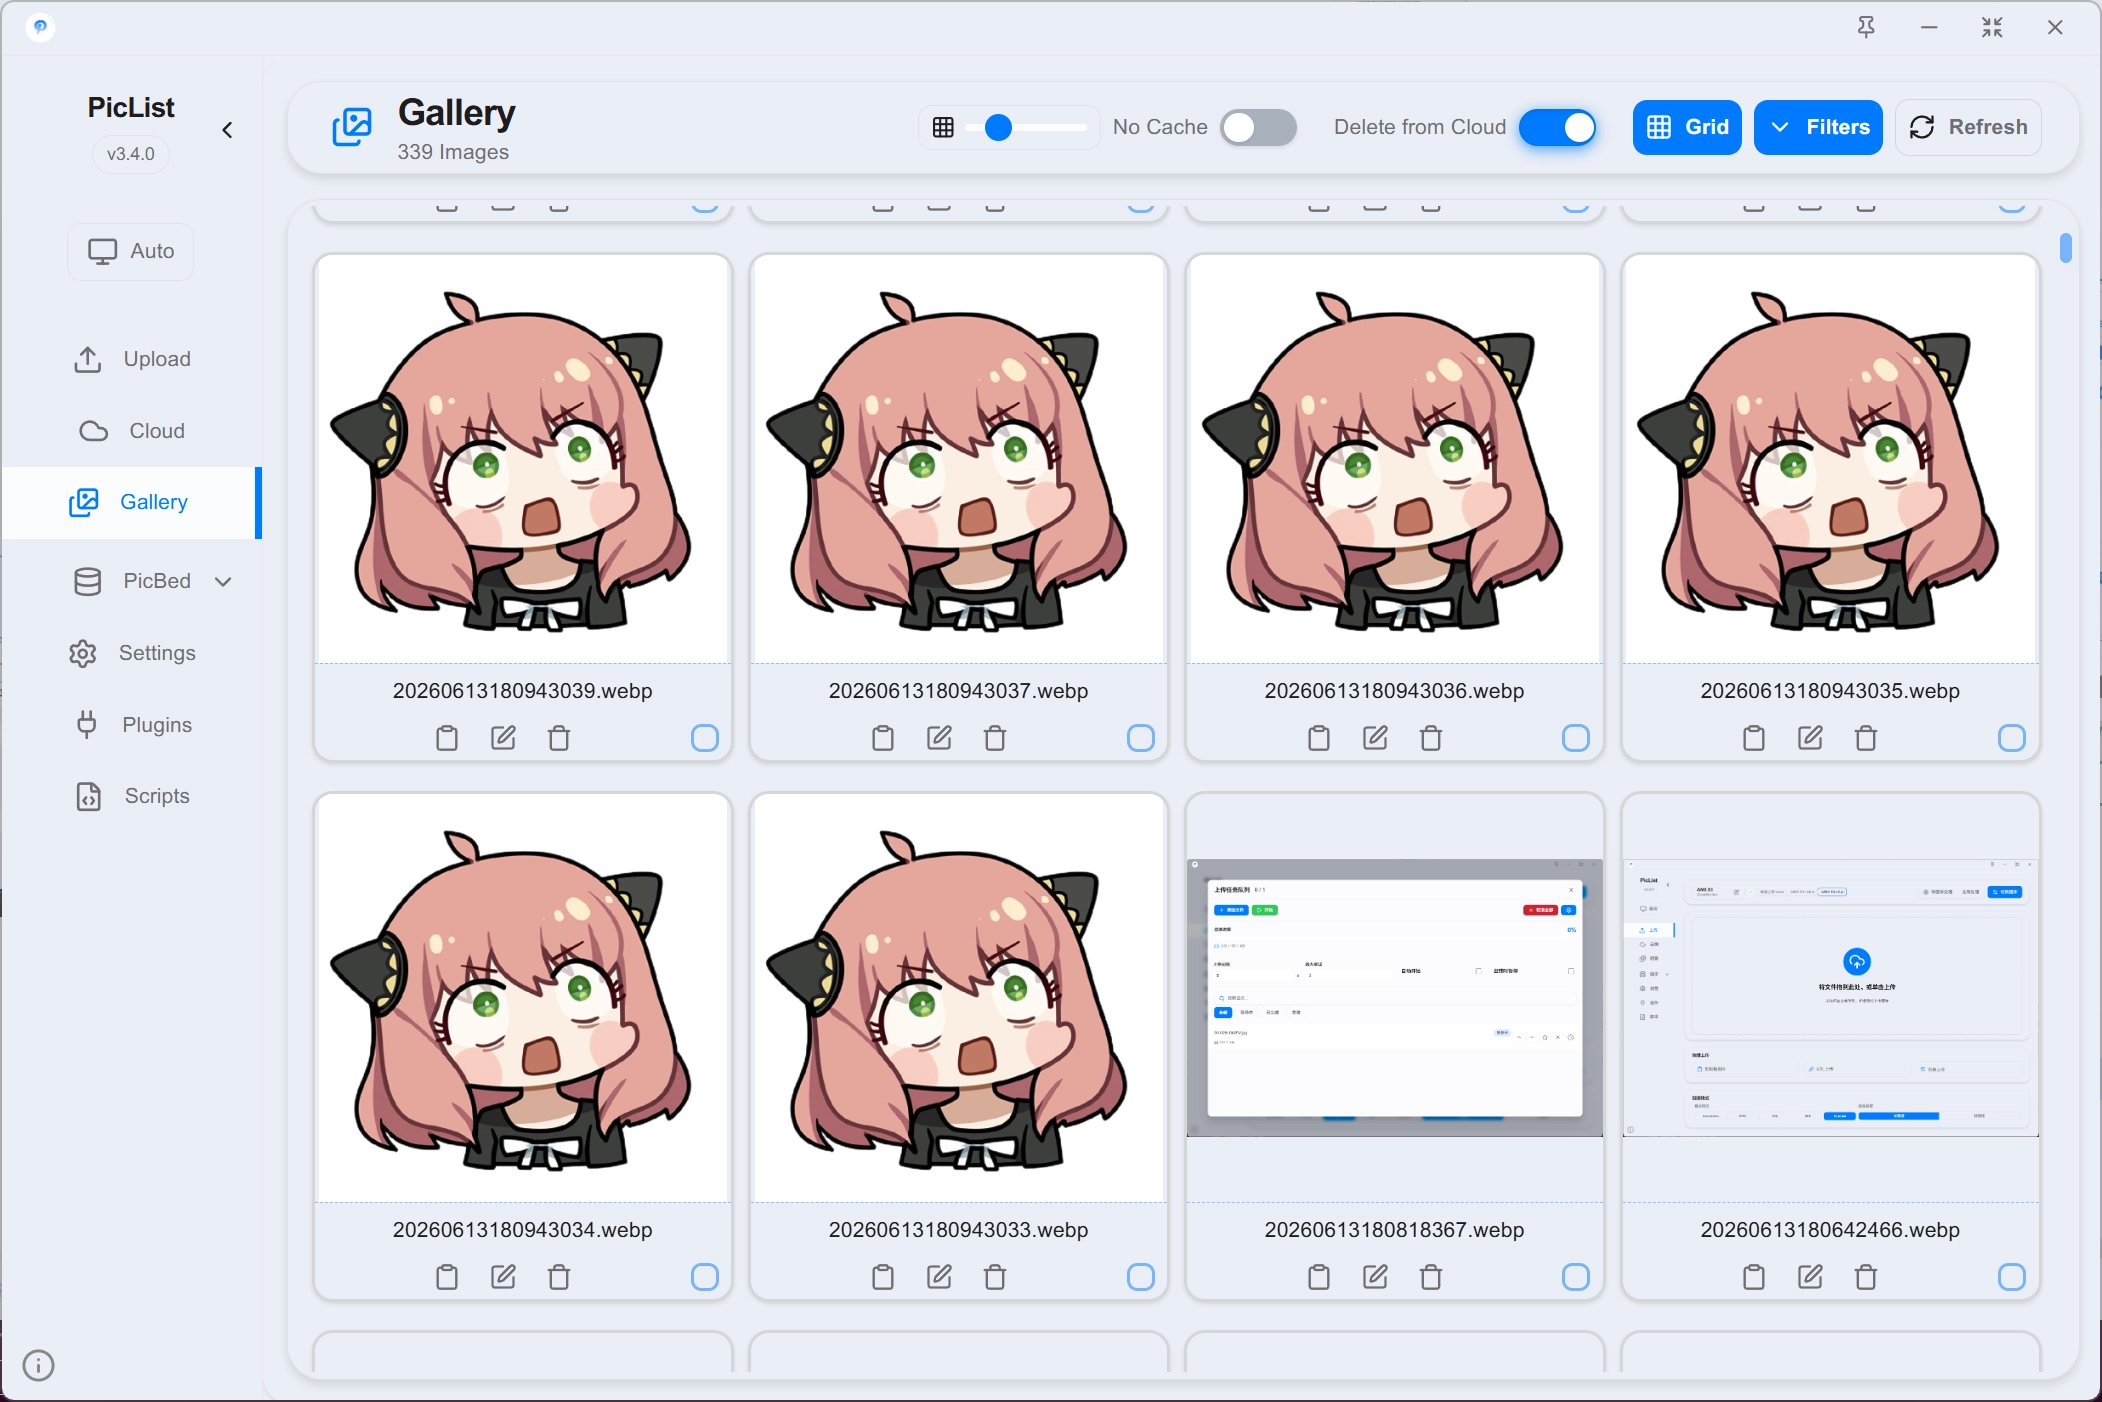
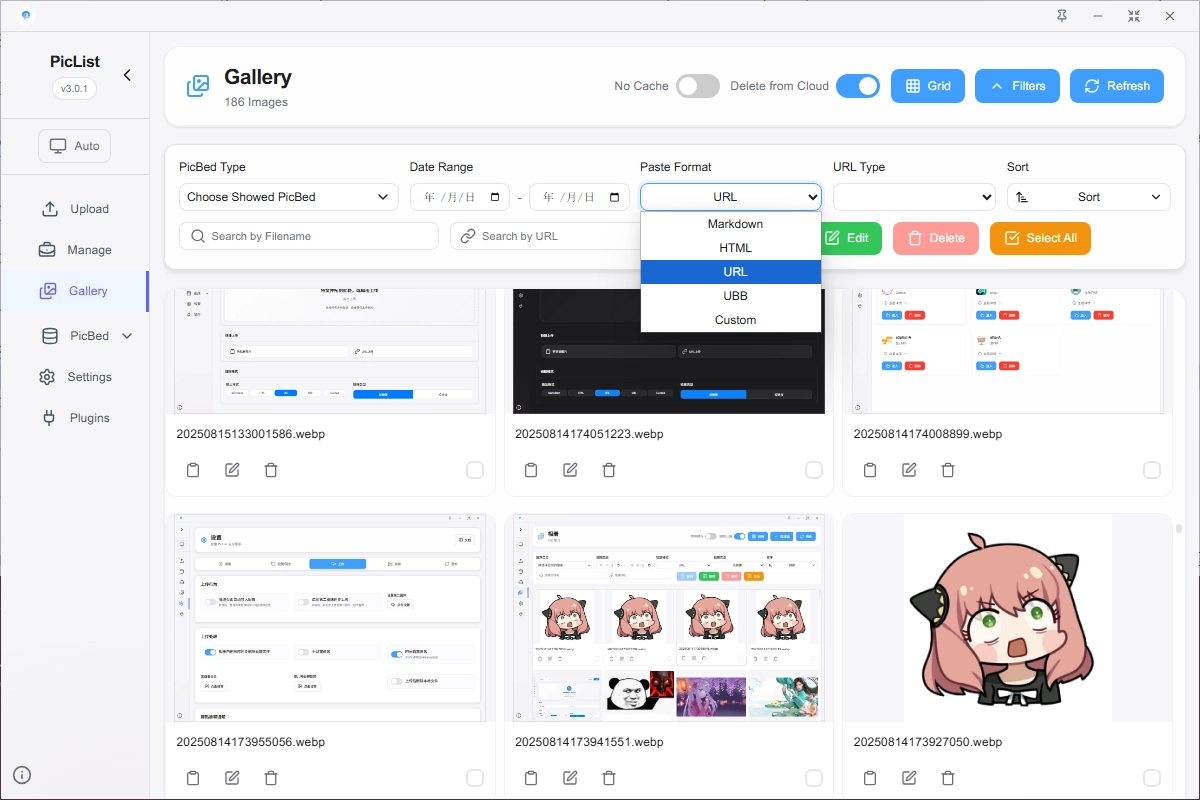
Gallery Area
It supports viewing all the images you have successfully uploaded, The top bar of the album will display the number of pictures in the current album.
Clicking on an image allows you to preview it. Clicking the icon below the image allows you to copy the link or delete the image. You can control whether to delete cloud images by selecting the Delete From Cloud option in the upper right corner.
If you enable the No Cache option, PicList will add the cbplist= parameter to each link when fetching images, bypassing the browser cache mechanism to obtain the latest images. This option will consume more traffic and request times, so please do not enable it unless necessary.
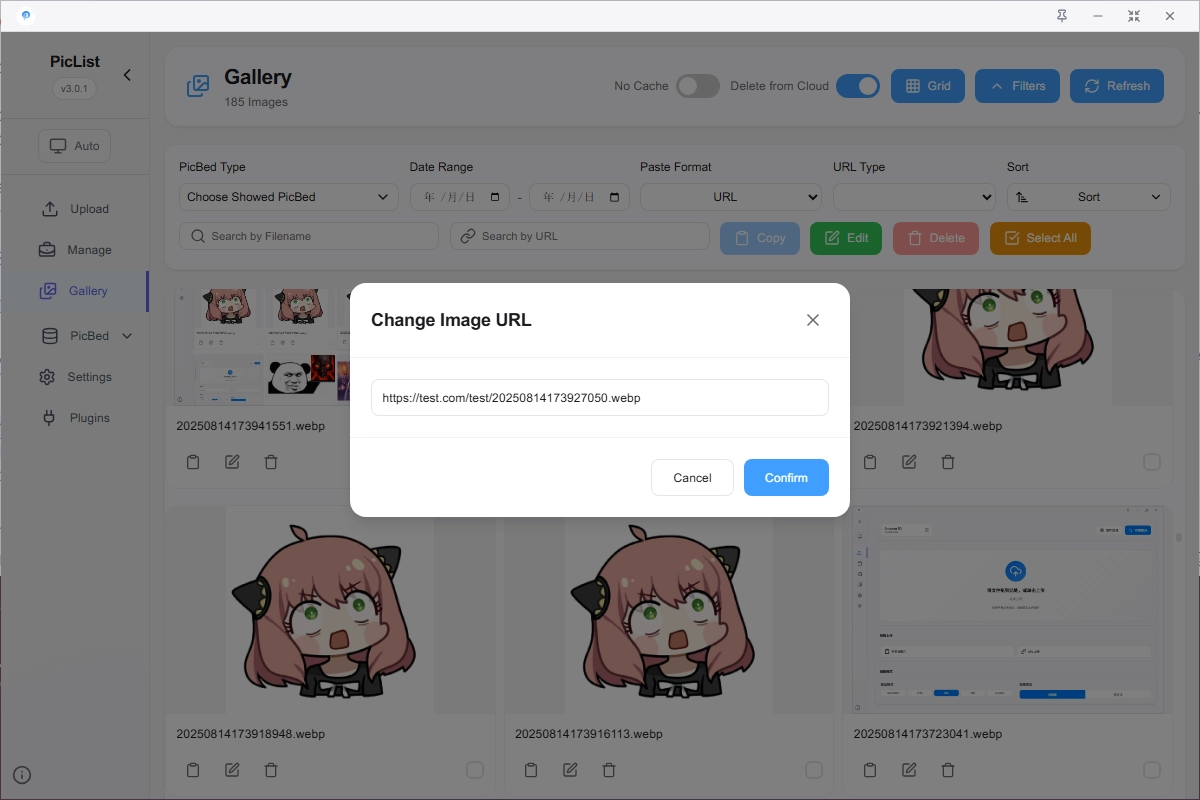
Edit Image Information
Sometimes, you may need to modify the URL of the uploaded image later, such as changing "http" to "https", or adding some operation suffixes (e.g., ?imgslim supported by Qiniu). You can click the "Edit" button to modify it.
Select Link Format to Copy
You can quickly switch the link format you want to copy in the album area.
Select All and Shift Multi-selection Support
The album operation area supports Select All operation and also supports simple multi-selection across images using the Shift key.
Cloud Delete PicList+
In PicList, you can control whether to delete cloud images by selecting the Sync Delete Cloud option in the upper right corner of the album.
Currently supported image hosts or plugins include:
- SM.MS
- Imgur
- Github
- Tencent Cloud COS V5
- Ali Cloud OSS
- Qiniu Cloud KODO
- Upyun
- WebDAV
- local path
- Doge Cloud
- Lsky Pro
- PicList
- picgo-plugin-s3
- picgo-plugin-alist
- picgo-plugin-huawei-uploader
- picgo-plugin-dogecloud
Advanced Search and Sort PicList+
Advanced features can be found in the toolbar at the top of the album.
In PicList, in addition to the basic cloud classification and file name search of PicGo, there are also functions of searching by upload time and searching by URL.
Additionally, both file name and URL searches support regular expressions. For example, \d{4}-\d{2}-\d{2} can match date formats such as 2020-01-01.
The final result is the intersection of all search conditions.
In addition, PicList adds sorting functions in the album, which supports sorting by file name, file extension, upload time, or selected status.
Clicking again in the same way can toggle the sort direction.

Batch Modify URL PicList+
Click the Modify button in the toolbar at the top of the album to pop up the dialog for batch modifying the URL.
Batch modification is performed by matching the URL with a regular expression and then replacing it with a specified string. In the string, special placeholders can be used for replacement.
The supported placeholders are:
| Placeholder | Description |
|---|---|
{Y} | Year, 4 digits |
{y} | Year, 2 digits |
{m} | Month, 2 digits |
{d} | Date, 2 digits |
{h} | Hour, 2 digits |
{i} | Minute, 2 digits |
{s} | Second, 2 digits |
{ms} | Millisecond, 3 digits |
{timestamp} | Timestamp (milliseconds) |
{timestampS} | Timestamp (seconds) |
{md5} | Random MD5 string |
{md5-16} | Random MD5 string (16 digits) |
{sha1} | Random SHA1 string |
{sha1-num} | Random SHA1 string, num is number, indicates the length to be intercepted |
{sha256} | Random SHA256 string |
{sha256-num} | Random SHA256 string, num is number, indicates the length to be intercepted |
{uuid} | UUID string |
{ulid} | ULID string |
{str-number} | Random string, length is number |
{filename} | Original file name |
{auto} | Incremental number |
Short Link PicList+
PicList supports short link function, which can be found in the top toolbar of the album, supporte c1n.cn, Yourls and xyTom/Url-Shorten-Worker.
After enabling the short link function, when copying the image link, the image link will be automatically converted to a short link.
Image Host Settings
SM.MS
SM.MS has migrated to S.EE.
Official website: https://s.ee.
Official documentation: https://s.ee
Configuration
{
  "_configName": "", // Image host configuration name
  "token": "", // S.EE token, required
}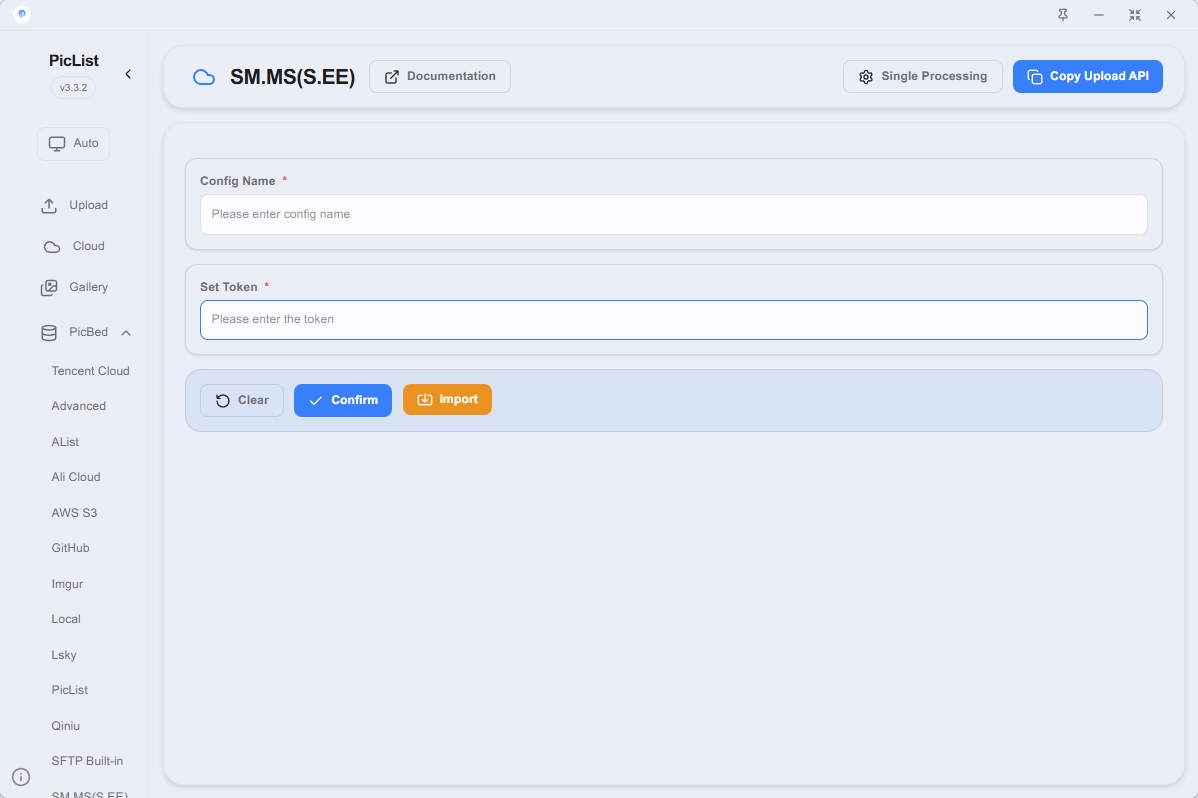
Explanation
Register and log in to the S.EE backend to obtain the token value.

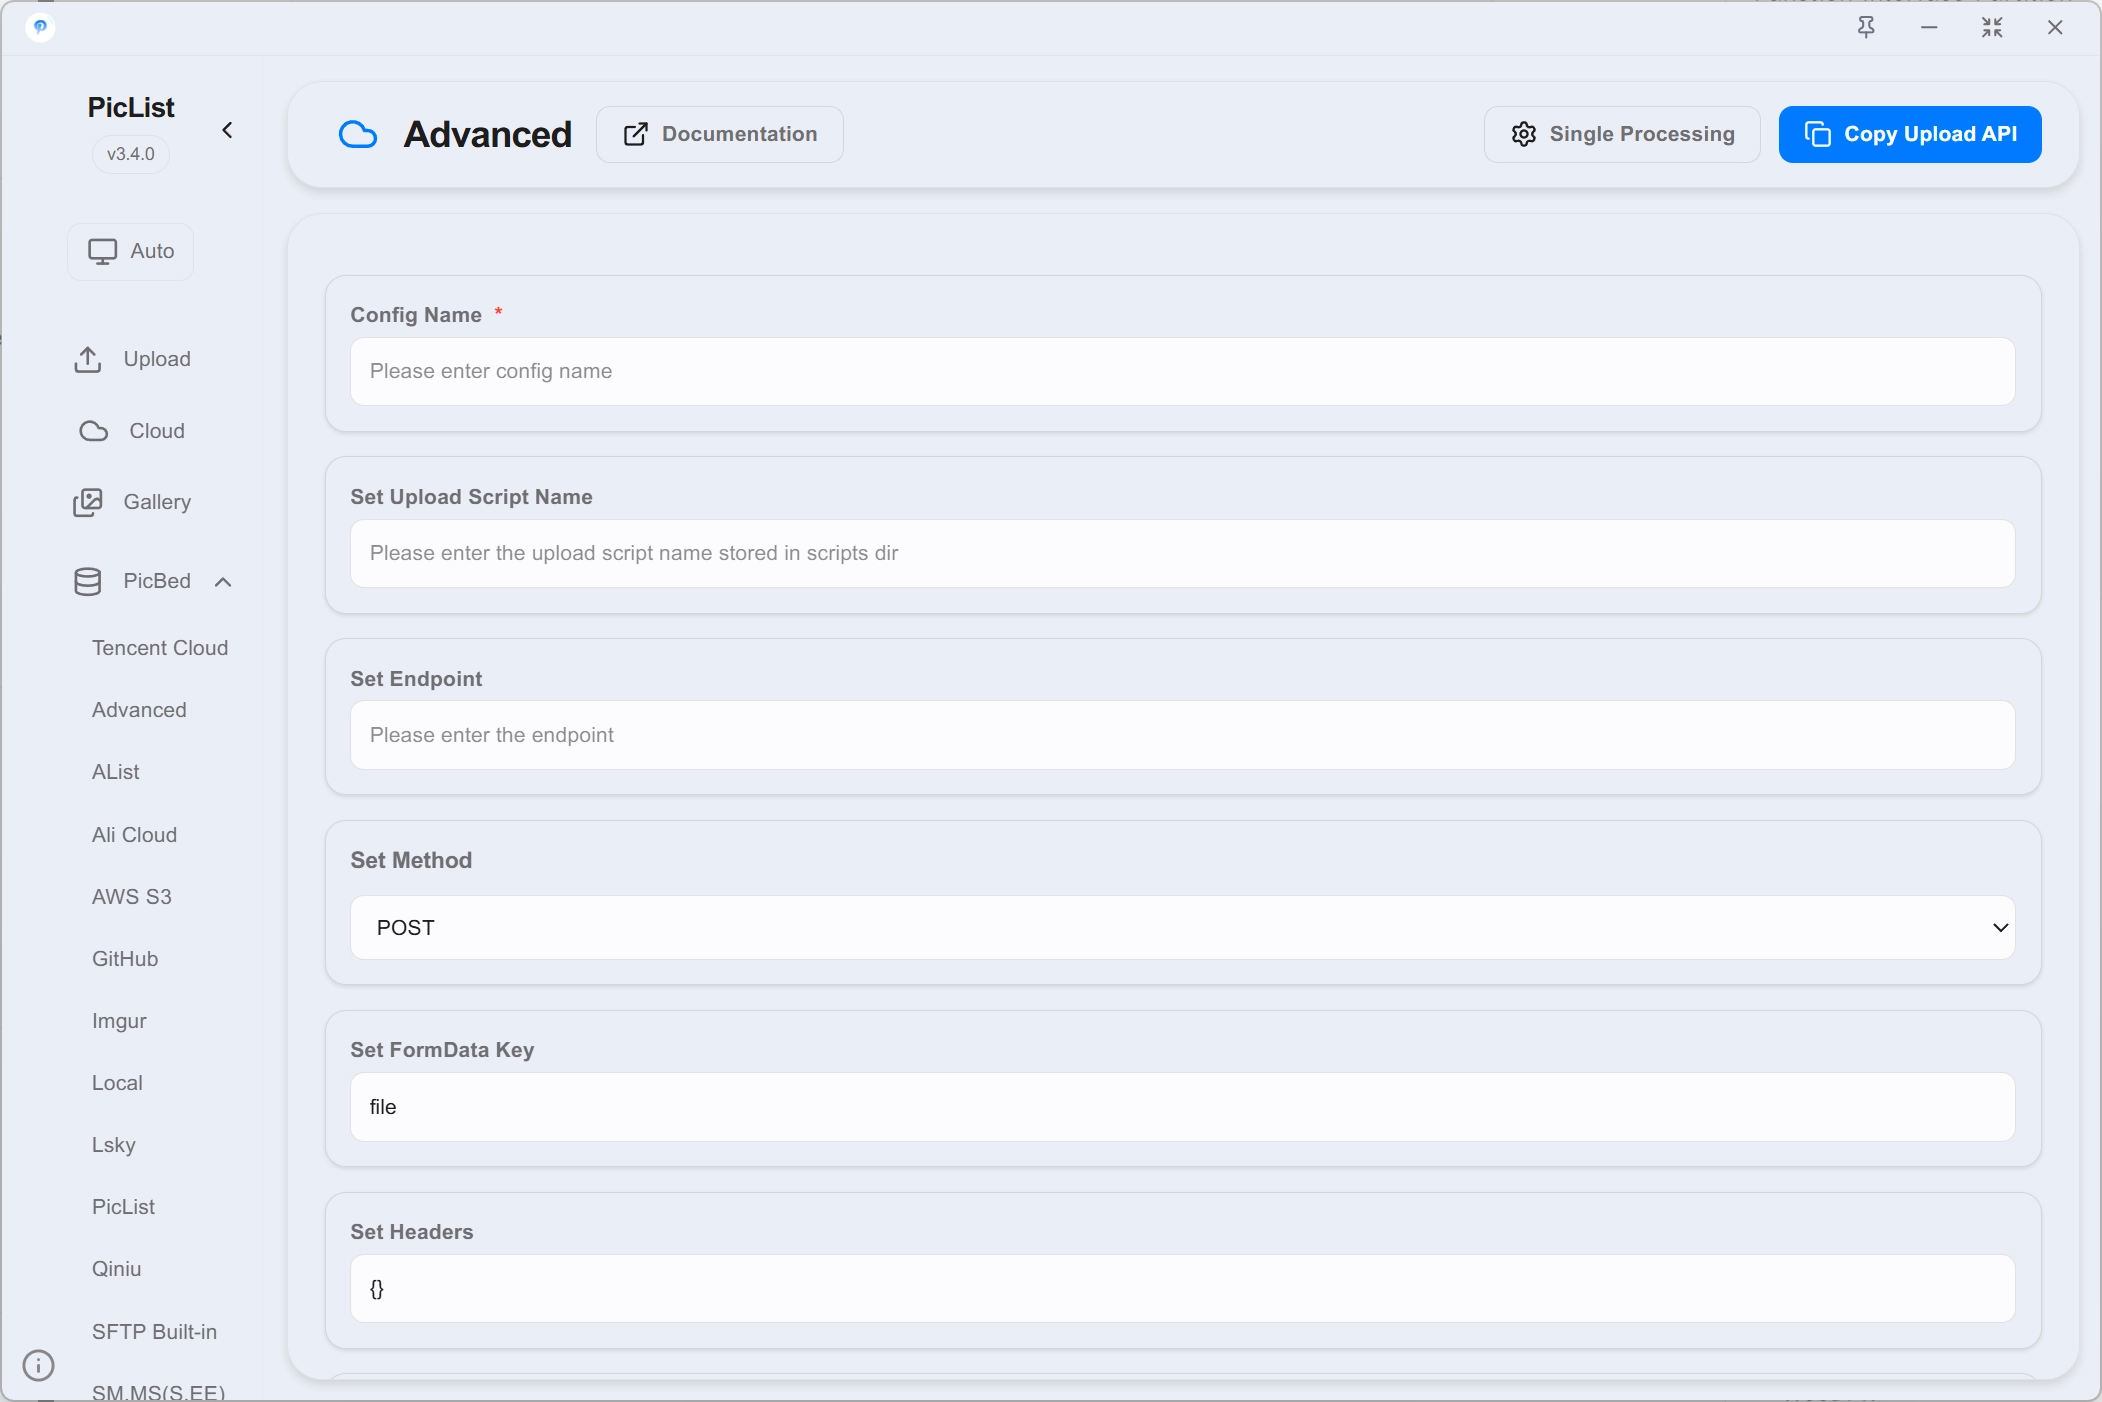
Advanced
Similar to the plugin picgo-plugin-web-uploader, PicList supports setting various image hosting parameters independently. Only use it when you have a certain understanding of network requests and image hosting.
Configuration
{
  "_configName": "", // Configuration name
  "uploadScriptName": "", // upload script name
  "endpoint": "", // endpoint
  "method": "", // method
  "formDataKey": "", // key of form data
  "headers": "{}", // headers
  "body": "{}", // body
  "customPrefix": "", // custom prefix
  "webPath": "", // web path
  "resDataPath": "", // path of response data
}
Explanation
uploadScriptName
Fill in the upload script name, which is used to customize the upload logic. If this setting is filled, Piclist will ignore other upload parameters and directly call the script for uploading.
endpoint
Please fill in the image hosting upload interface address, which can generally be found in the API documentation of the image hosting.
method
Please fill in the request method, such as POST, PUT, etc.
formDataKey
Please fill in the key of the form data, which is generally used for file uploads.
headers
Fill in the request header, JSON format, for example:
{
  "Authorization": "Bearer token"
body
Fill in the request body, JSON format, for example:
{
  "key": "value"
}
customPrefix
Custom prefix, after filling in, the image link after successful upload will be prefixed with this prefix.
webPath
Web path, after filling in, PicList will generate the image link according to this path.
resDataPath
PicList will obtain the image link according to this path. For example, if the return data is:
{
  "code": 200,
  "data": {
    "url": "https://example.com/image.jpg"
  }
}
Then you need to fill in data.url.
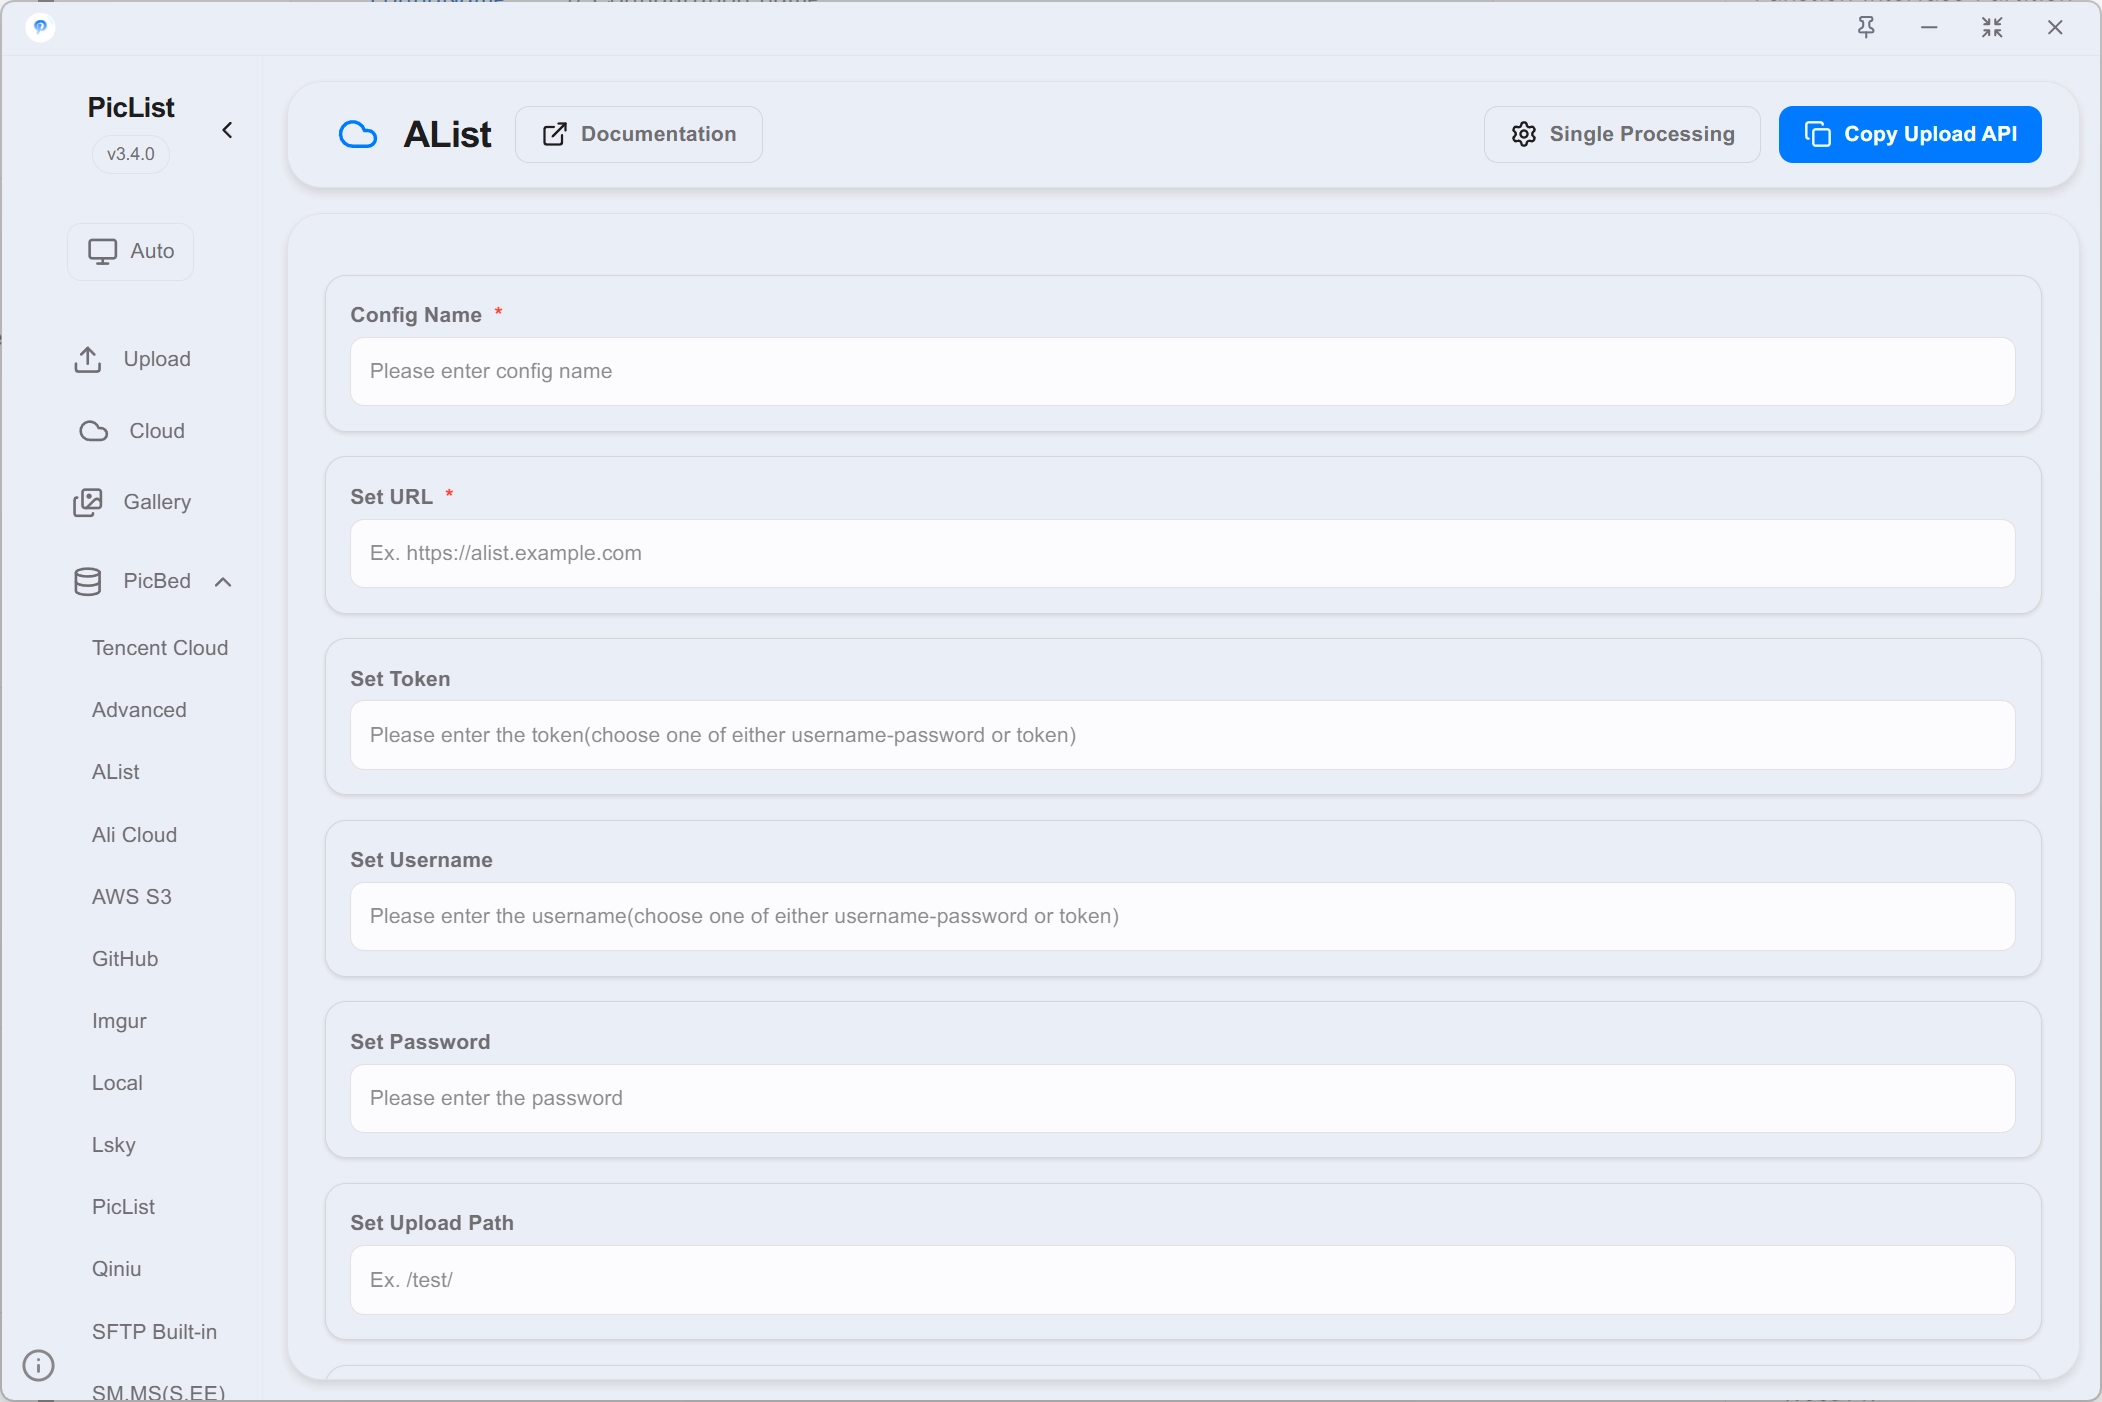
AList
PicList supports AList internally, please refer to the official documentation for setup.
Configuration
{
  "_configName": "", // Configuration name
  "url": "", // AList URL
  "token": "", // Administrator token, choose between username/password and token
  "username": "", // Username, choose between token and username/password
  "password": "", // Password, choose between token and username/password
  "uploadPath": "", // Upload path, optional
  "webPath": "", // Web path, optional
  "customUrl": "" // Custom domain name, optional
}
Explanation
url
Please fill in your AList URL, for example https://alist.example.com, be sure to include http:// or https://.
token & username & password
AList supports two upload methods: using an administrator token or using a username and password.
If you use an administrator token, fill in the token, which can be obtained by entering the admin backend and clicking Settings -> Other -> Token.
If you are not an administrator, you can log in using your username and password, and PicList will automatically obtain and refresh the token.
uploadPath
uploadPath is an optional field. If not filled in, the file will be stored in the root directory of AList by default.
For example, if you fill in images/test/, the file will be stored in the corresponding test directory.
webPath
webPath is an optional field. If not filled in, it will default to the same as the upload path.
For example, if you fill in images/test/, the external network access address of the file will be https://alist.example.com/images/test/filename.
customUrl
customUrl is an optional field. If not filled in, the domain name filled in the url parameter will be used when copying links, previewing images, etc.
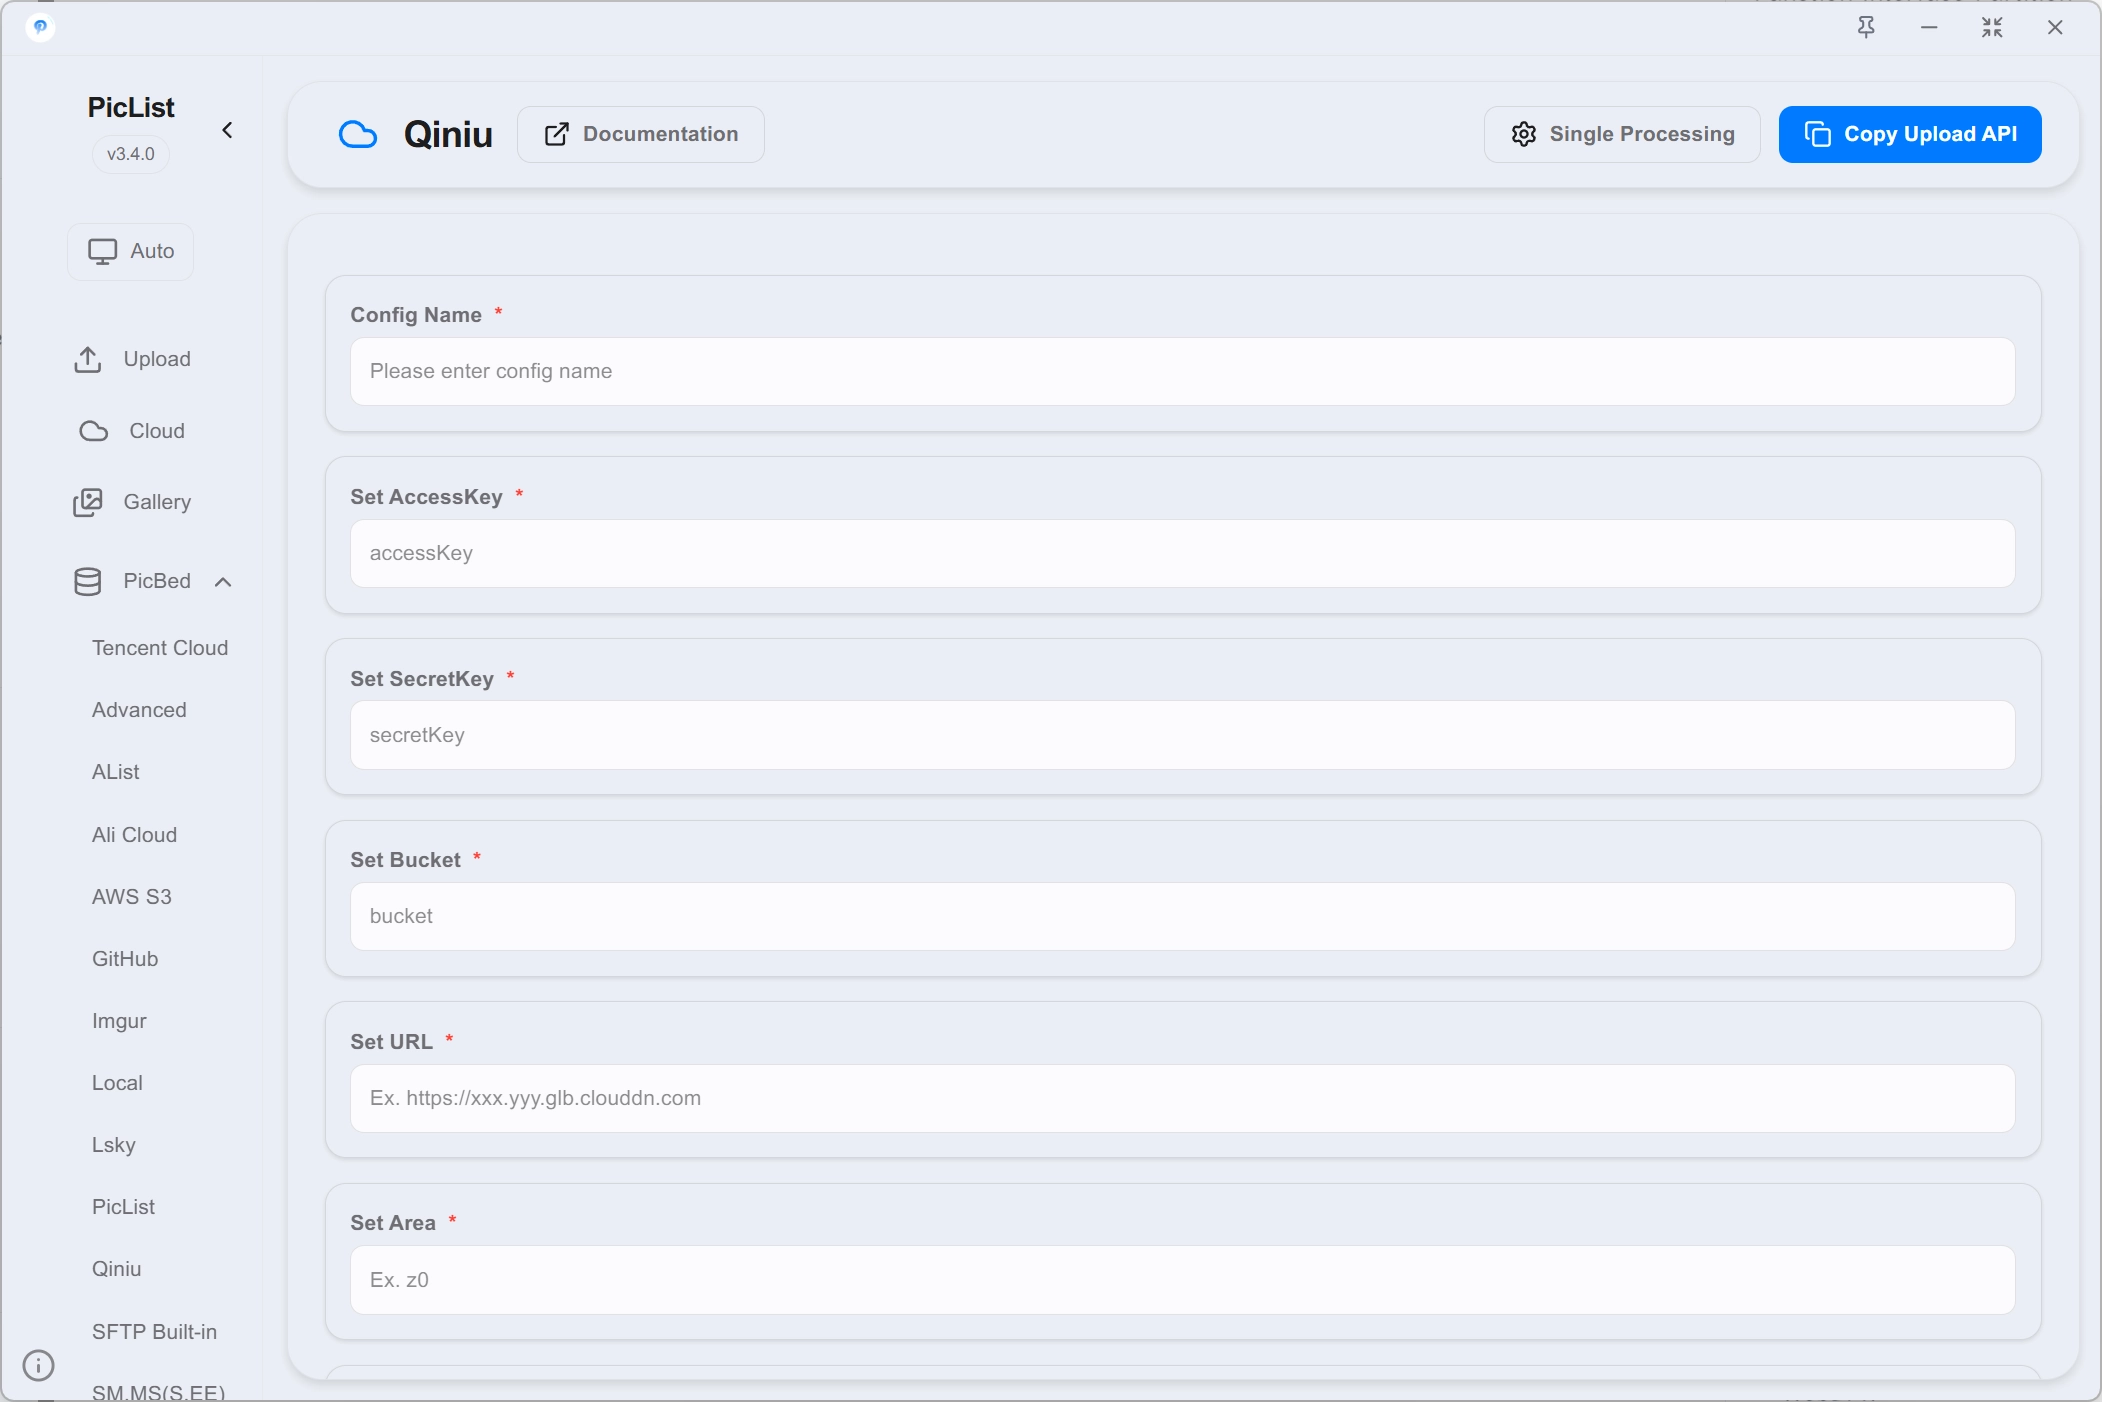
Qiniu Cloud
Official website: https://www.qiniu.com/
Official documentation: https://developer.qiniu.com/kodo
Configuration
{
  "_configName": "", // Configuration name
  "accessKey": "",
  "secretKey": "",
  "bucket": "", // Bucket name
  "url": "", // Access URL
  "area": "", // Storage area code
  "options": "", // URL suffix, such as ?imgslim
  "path": "" // Custom storage path, such as img/
}
Explanation
accessKey & secretKey
You need to create or view your accessKey and secretKey in the Qiniu Cloud
bucket & area
Access https://portal.qiniu.com/kodo/bucket to create buckets, view your bucket list and corresponding storage areas.
Please set the bucket permissions to public read, otherwise the uploaded images cannot be displayed in the album.
Note
The storage area code filled in the app is a region code, not the actual Chinese name.
Please visit the Qiniu Cloud official documentation - Storage Region or refer to the table below for codes.
| Region | Region Code |
|---|---|
| East China-Zhejiang | z0 |
| East China-Zhejiang2 | cn-east-2 |
| North China-Hebei | z1 |
| South China-Guangdong | z2 |
| North America-Los Angeles | na0 |
| Asia-Pacific-Singapore | as0 |
| Asia-Pacific-Hanoi | ap-southeast-2 |
| Asia-Pacific-Ho Chi Minh | ap-southeast-3 |
url
The access URL is the test domain name assigned by Qiniu Cloud or the domain name you bind yourself. If you have not bound a domain name, you can see how to bind a domain name in the Qiniu Cloud official documentation - Binding Domain Name.
The bound domain name must be a domain name that has been filed, otherwise it cannot be accessed normally.
When filling in, be sure to add http:// or https://.
path/Storage Path
The storage path is an optional field. If it is not filled out, it will be stored in the root directory of the bucket by default.
For example, if you fill in images/test/, the file will be stored in the corresponding test directory.
Don't forget the trailing /.
options/Website suffix
Qiniu Cloud provides image processing functions, which are generally used for operations such as cropping, scaling, rotating, and adding watermarks to images.
Usage: add the website suffix to the external network access address of the file, for example: http://xxx.com/xxx.jpg?imageView2/2/w/500/h/500, which will crop the image to a thumbnail of 500x500.
For detailed usage of website suffixes, please refer to Image Style.
If the usage of this function exceeds the free quota, additional processing fees will be incurred. For specific fees, please refer to Image Processing Fees.
The website suffix is an optional field. If it is not filled out, the original address will be copied.
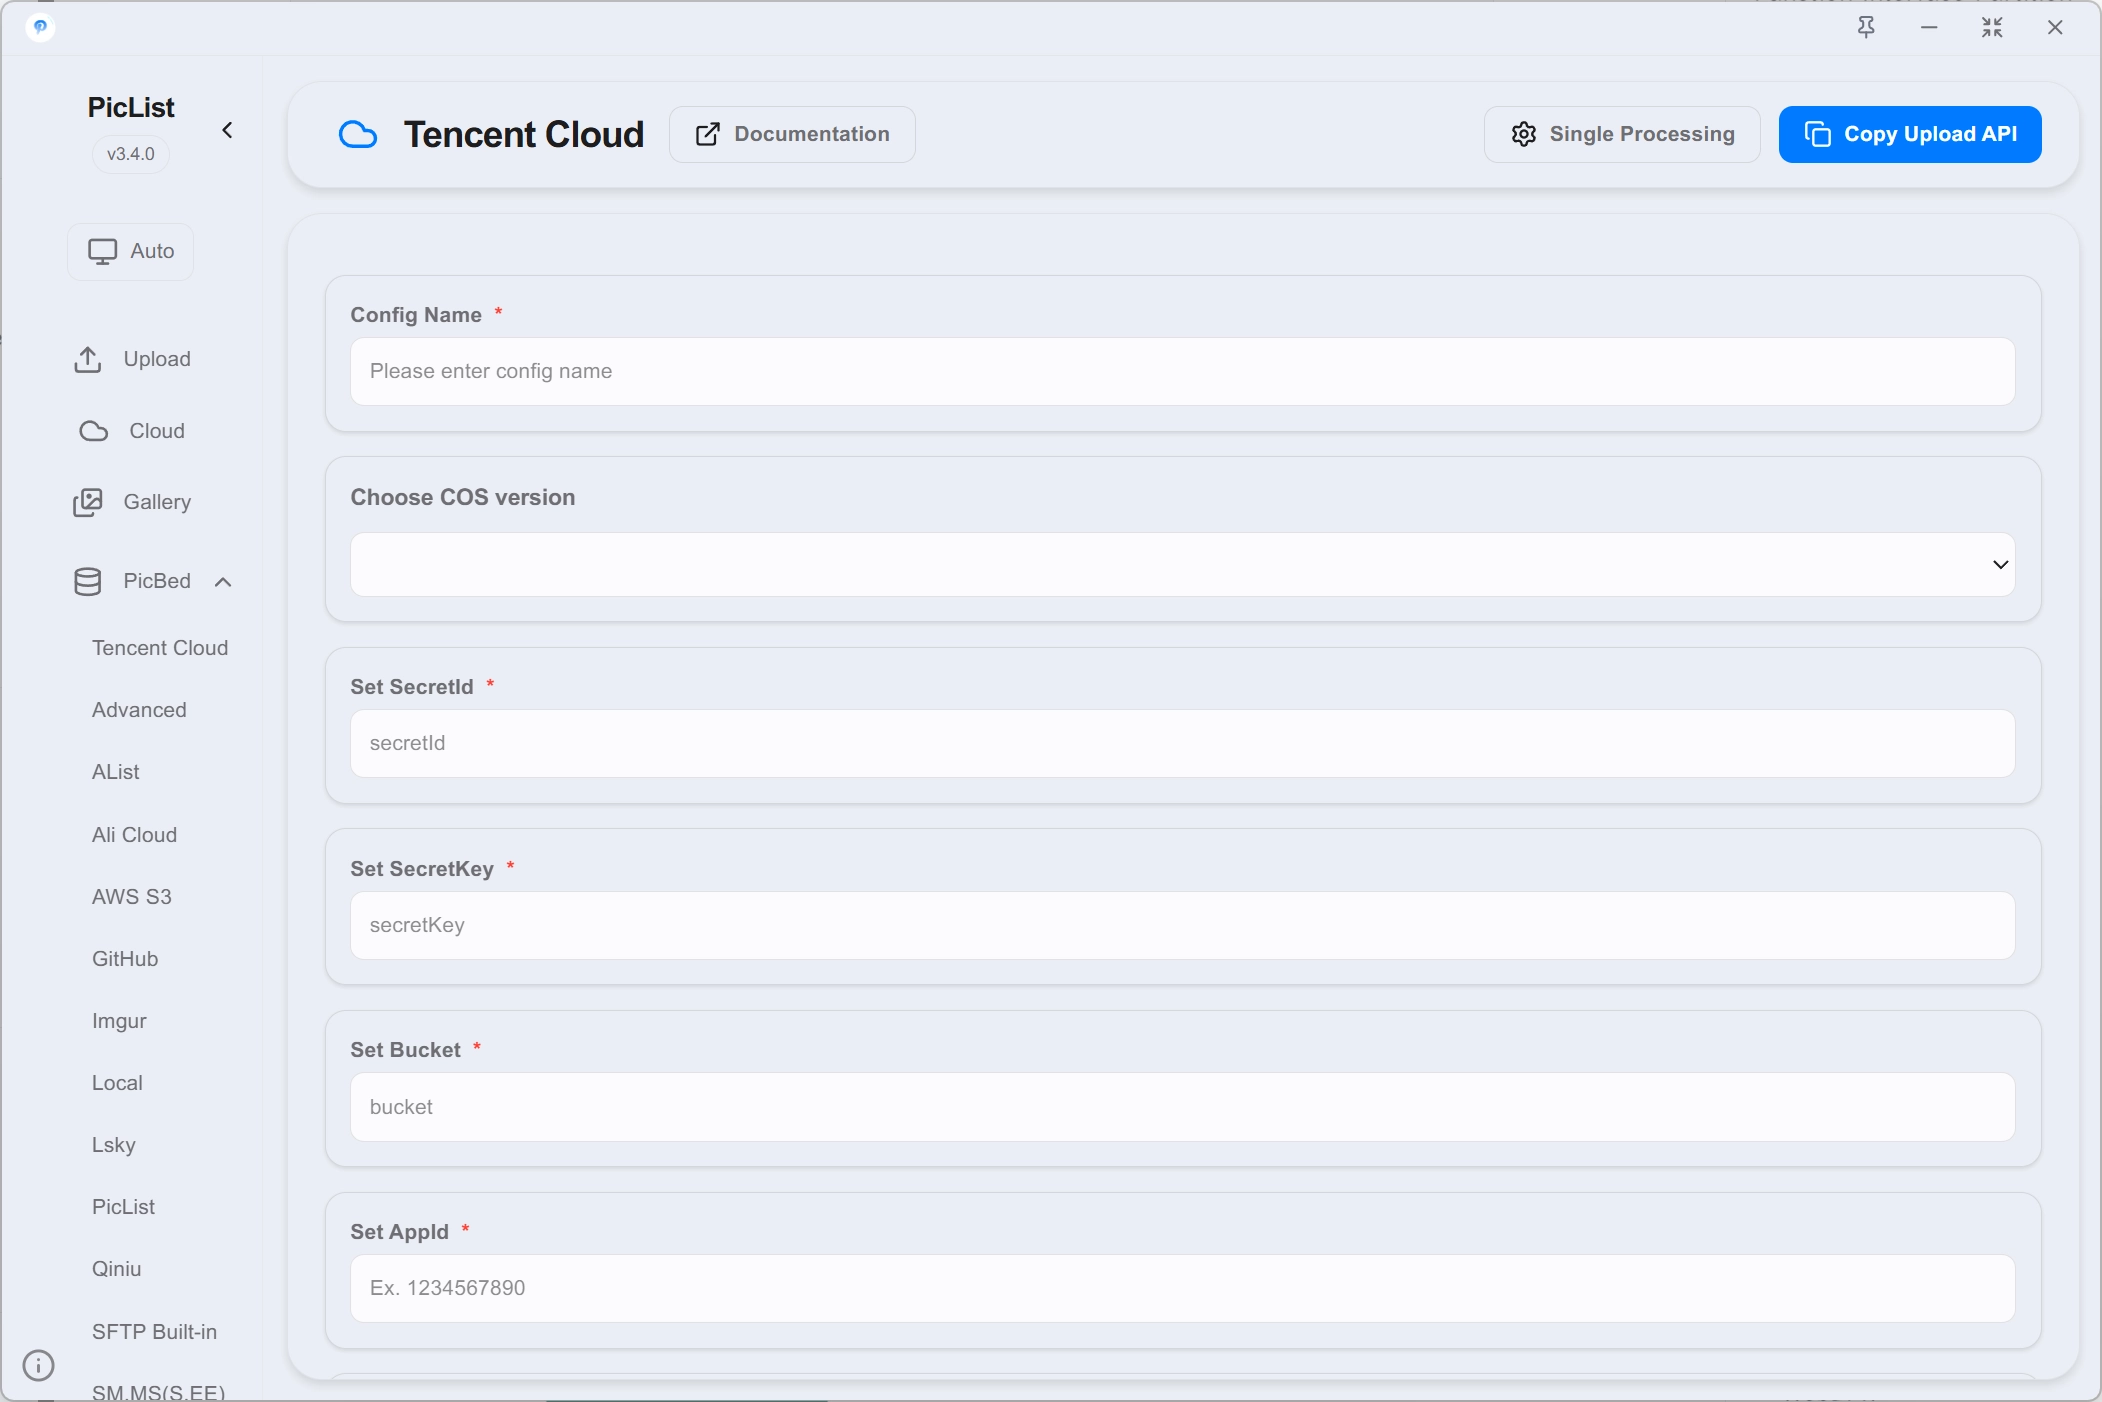
Tencent Cloud COS
Official website: https://www.tencentcloud.com/products/cos
Official documentation: https://www.tencentcloud.com/document/product/436
Configuration
{
  "_configName": "", // Image hosting configuration name
  "secretId": "",
  "secretKey": "",
  "bucket": "", // Storage bucket name, different for v4 and v5 versions
  "appId": "", // For example, 1250000000
  "area": "", // Storage area, such as ap-beijing-1
  "path": "", // Custom storage path, such as img/
  "customUrl": "", // Custom domain name, be sure to include http:// or https://
  "version": "v5" | "v4", // COS version, v4 or v5
  "options": "", // Website suffix, such as ?imageMogr2/thumbnail/500x500
  "slim": boolean // Whether to enable image compression
}
V4 Version Instructions
Please refer to the PicGo official manual.
As the V4 version is already quite old, PicList will no longer actively update V4-related features and will not consider removing support in the future.
V5 Version Instructions
secretId & secretKey & appId
You need to create or view your secretId, secretKey, and appId in the Tencent Cloud API Key Management page.
bucket & area
Create a bucket and view your bucket list and corresponding storage areas.
The format of the bucket is bucketname-appId, where appId corresponds to the above appId.
Please set the storage bucket permissions to public read, otherwise uploaded images will not be displayed in the album.
Note
The storage area filled in the APP is the area code, not the actual Chinese name.
Please visit the Tencent Cloud Official Document - Regions and Access Endpoints or refer to the table below to query the code.
| Storage Area | Region Abbreviation |
|---|---|
| Beijing Zone 1 | ap-beijing-1 |
| Beijing | ap-beijing |
| Nanjing | ap-nanjing |
| Shanghai | ap-shanghai |
| Guangzhou | ap-guangzhou |
| Chengdu | ap-chengdu |
| Chongqing | ap-chongqing |
| Shenzhen Finance | ap-shenzhen-fsi |
| Shanghai Finance | ap-shanghai-fsi |
| Beijing Finance | ap-beijing-fsi |
| Hong Kong (China) | ap-hongkong |
| Singapore | ap-singapore |
| Jakarta | ap-jakarta |
| Seoul | ap-seoul |
| Bangkok | ap-bangkok |
| Tokyo | ap-tokyo |
| Riyadh | me-saudi-arabia |
| Silicon Valley (US West) | na-siliconvalley |
| Virginia (US East) | na-ashburn |
| São Paulo | sa-saopaulo |
| Frankfurt | eu-frankfurt |
path/storage path
The storage path is an optional item. If not filled in, it will be stored in the root directory of the bucket by default.
For example, if you fill in images/test/, the file will be stored in the corresponding test directory.
customUrl/Custom Domain
Warning
Make sure to include http:// or https:// in the URL.
Custom domain is an optional feature. If not specified, Tencent Cloud's default public domain will be used for actions such as copying links or previewing images.
For example, if the file test.jpg is stored in the directory images/test/, the bucket name is test-1250000000, and the storage region is ap-beijing, then the default public domain will be test-1250000000.cos.ap-beijing.myqcloud.com, and the file access URL will be https://test-1250000000.cos.ap-beijing.myqcloud.com/images/test/test.jpg.
However, if a custom domain is specified, the public access URL for the file will be http://custom-domain/images/test/test.jpg.
options/Website Suffix
Tencent Cloud provides image processing capabilities, generally used for operations such as image cropping, scaling, rotating, and watermarking.
Usage: add the website suffix after the public access URL of the file, such as https://test-1250000000.cos.ap-beijing.myqcloud.com/images/test/test.jpg?imageMogr2/thumbnail/500x500.
For detailed website suffix usage, please refer to the Image Processing Guide.
If the usage of this feature exceeds the free quota, additional processing fees will be charged. For specific fees, please refer to the Image Processing Fees.
The website suffix is optional. If not specified, the original address will be copied.
slim/Compression
Refer to the Tencent Cloud Official Document - Image Compression for detailed usage.
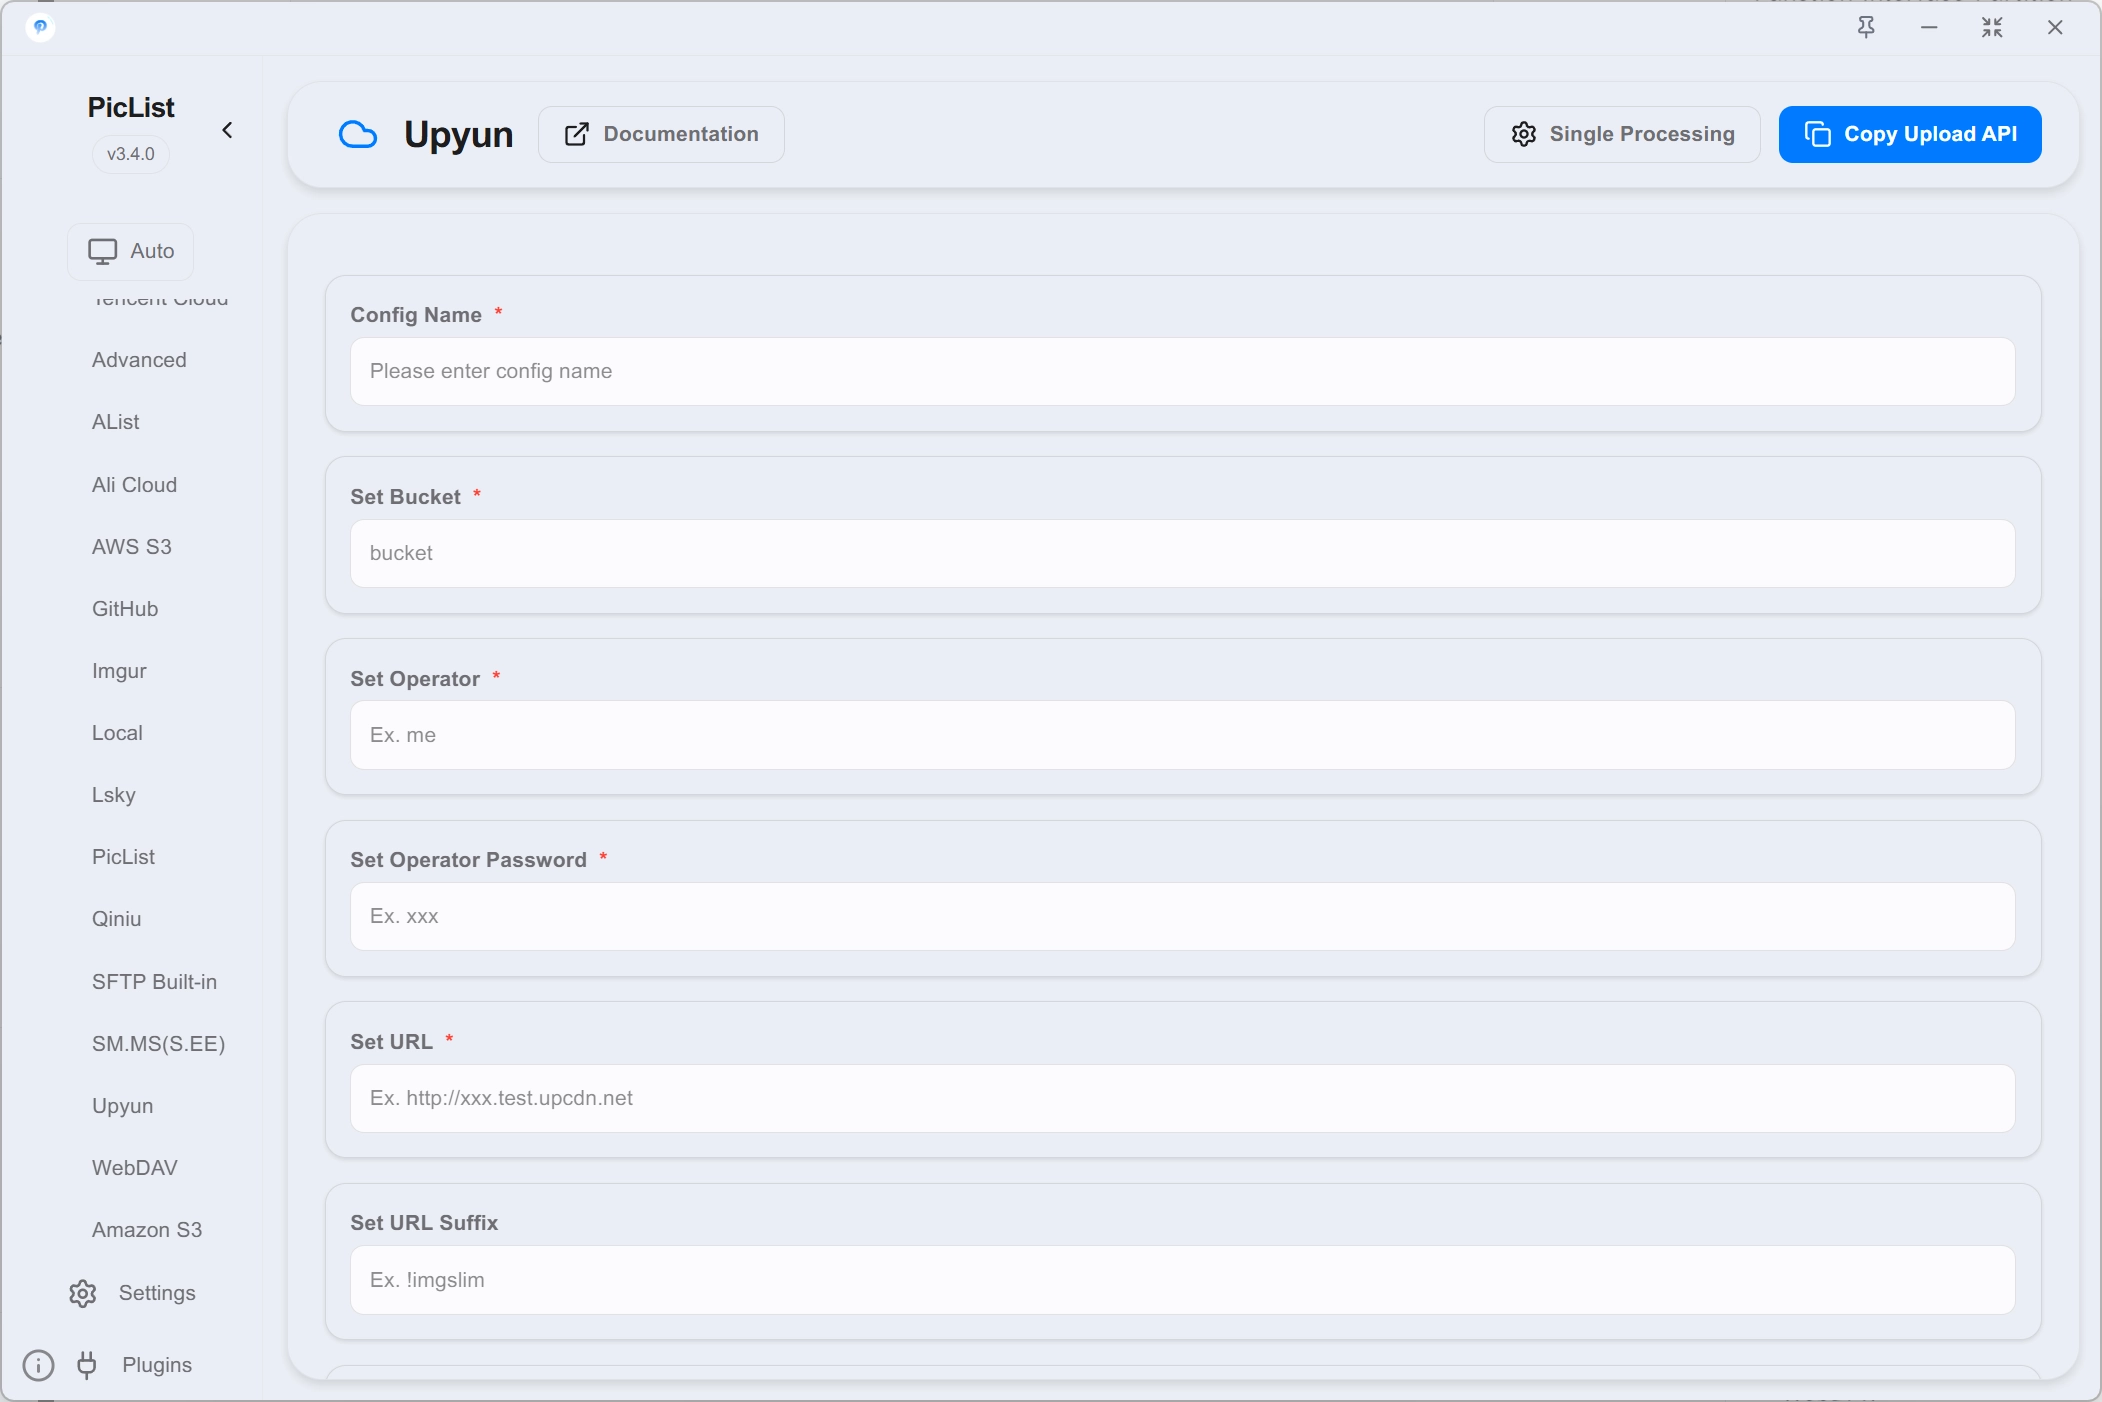
Upyun
Official Website: https://www.upyun.com/
Official Documentation: https://docs.upyun.com/api/
Configuration
{
  "_configName": "", // Configuration name for the image hosting service
  "bucket": "", // Storage space name, which is your service name
  "operator": "", // Operator name
  "password": "", // Password for the operator
  "options": "", // Some suffix processing parameters for images
  "path": "", // Custom storage path, such as img/
  "url": "", // Accelerated domain name, be sure to include http:// or https://
  "antiLeechToken": "", // Anti-leech token
  "expireTime": "", // Anti-leech expiration time
  "endpoint": "" // API endpoint, optional
}
Description
bucket
You can create a service (corresponding to a bucket) and view the service list by visiting https://console.upyun.com/services/file/.
operator & password
After entering the service, click on Storage Management, and you can view and modify the operator at the bottom. The password is the corresponding password of the operator.
It is recommended to grant the operator read, write, and delete permissions.
url/Accelerated Domain Name
The accelerated domain name is a test domain name assigned by Upyun or a domain name bound by yourself. If you have not bound a domain name, you can learn how to bind it in Upyun Official Documentation-How to create a CDN service for self-hosted sources?.
The bound domain name must be a pre-registered domain name, otherwise it cannot be accessed normally.
Be sure to include http:// or https://.
path/Storage Path
The storage path is an optional item. If not filled in, it will be stored in the root directory of the bucket by default.
For example, if you fill in images/test/, the file will be stored in the corresponding test directory.
options/Website Suffix
Upyun provides a free image processing function, which is generally used for operations such as cropping, scaling, rotating, and watermarking.
Parameter format:
Image URL + delimiter + parameters or thumbnail versionFor detailed suffix usage, please refer to Image Processing.
The website suffix is an optional item. If not filled in, the original address will be copied.
antiLeechToken & expireTime
If you want to use the anti-leech function, you need to fill in the anti-leech token and expiration time.
endpoint
Optional parameter, default is https://v0.api.upyun.com.
Refer to the official documentation and fill in your service node.
Optional nodes include:
https://v0.api.upyun.com:Automatic node selectionhttps://v1.api.upyun.com:China Telecomhttps://v2.api.upyun.com:China Unicomhttps://v3.api.upyun.com:China Mobile
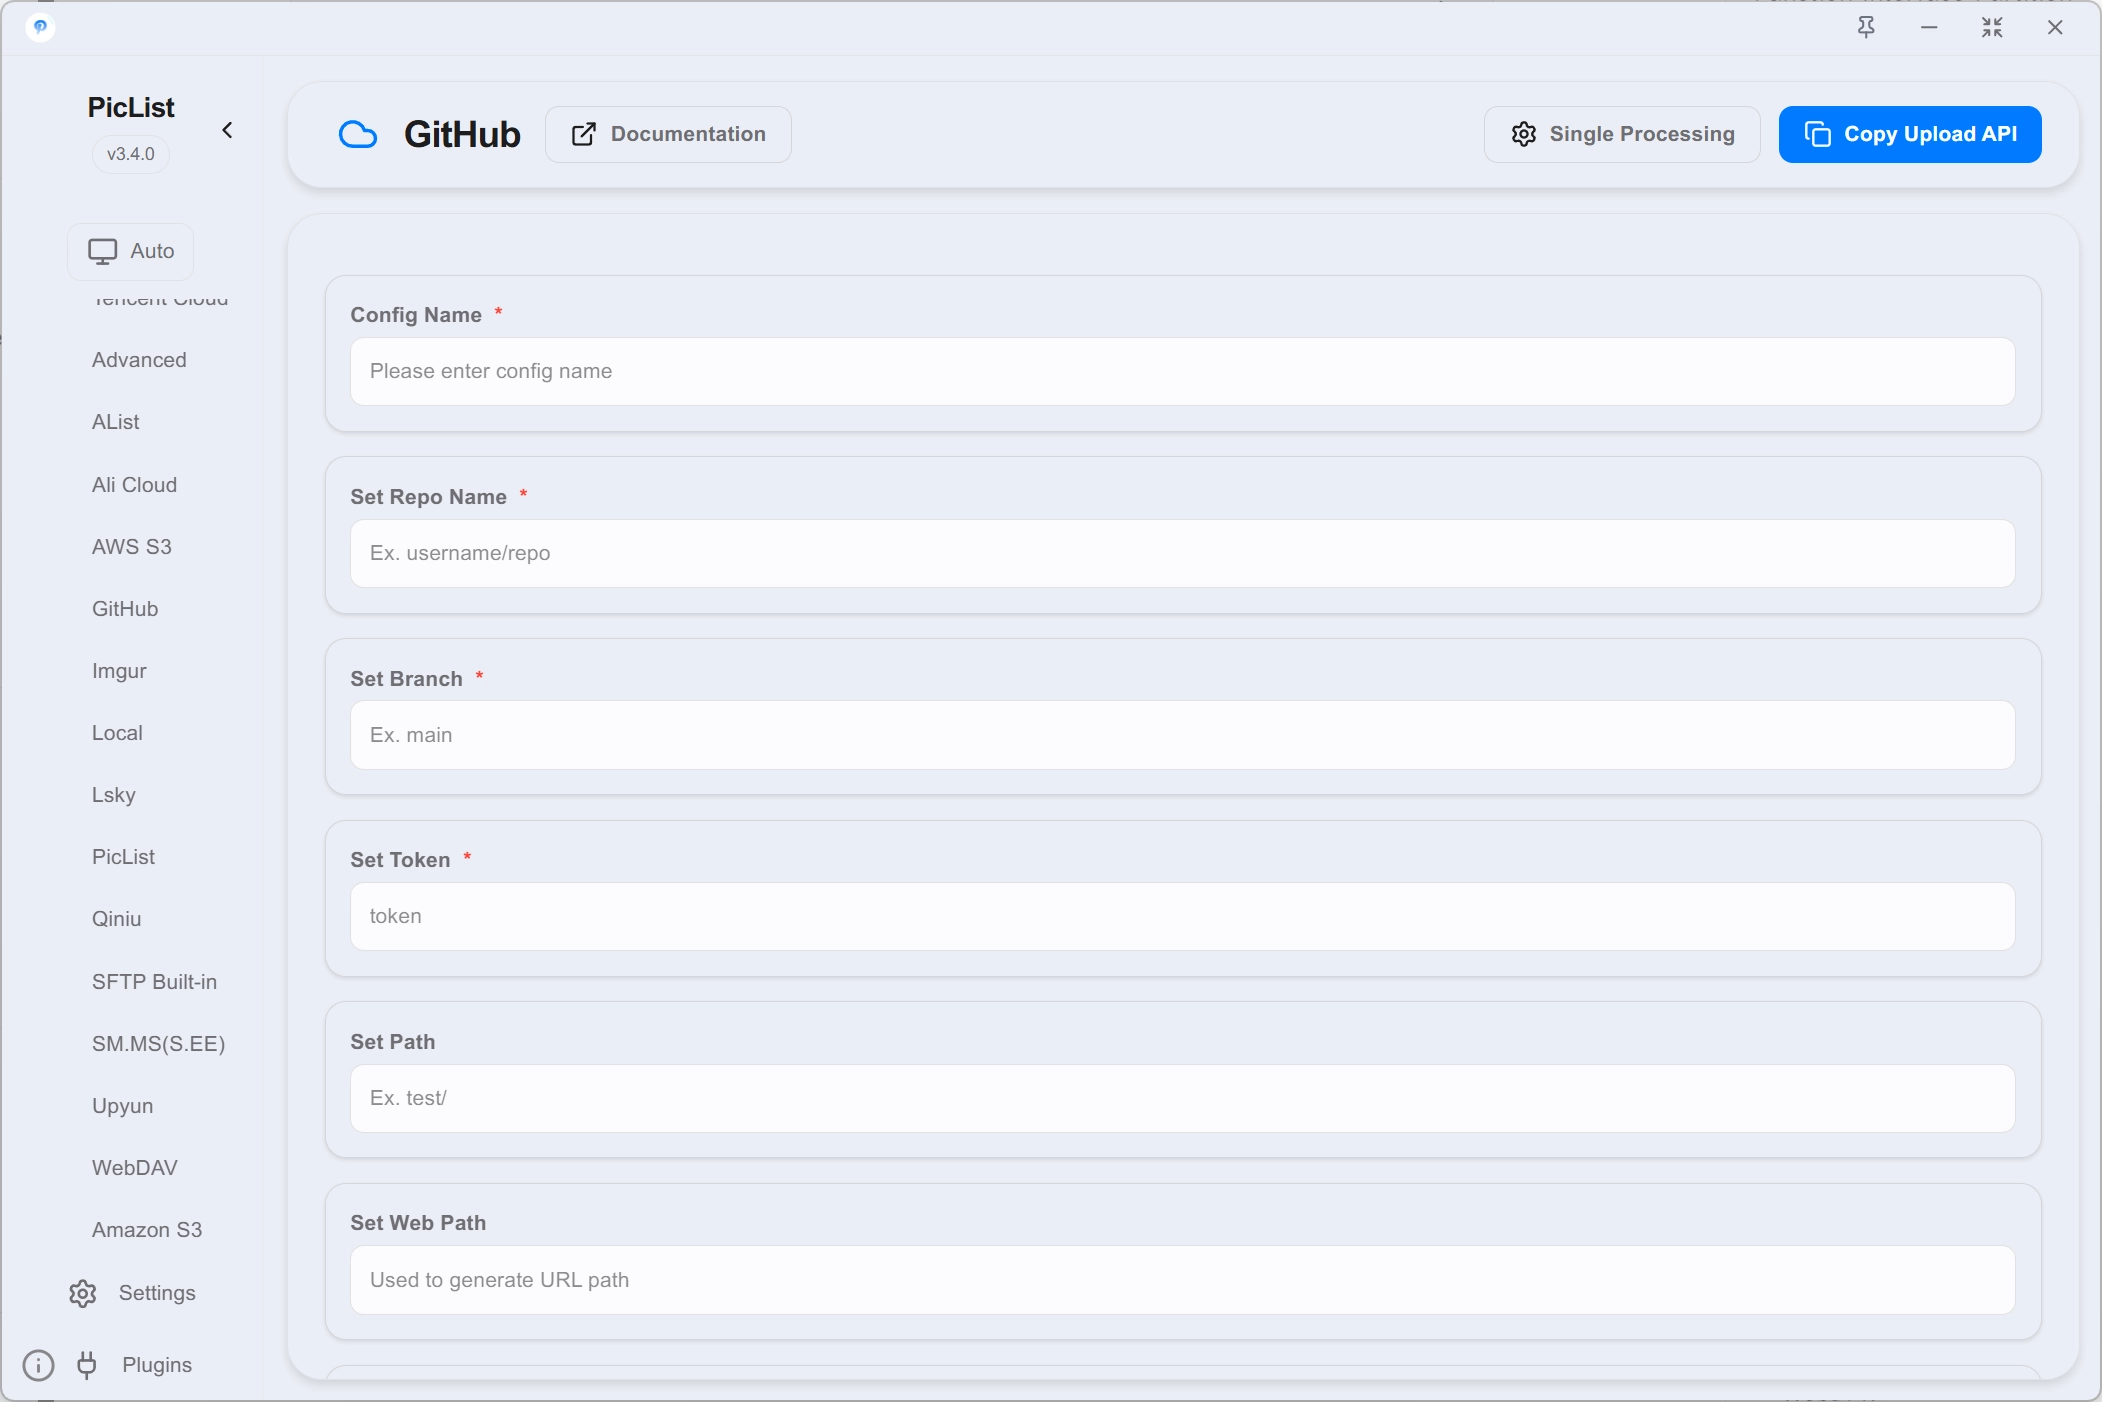
GitHub
Official Website: https://www.github.com
Official Documentation: https://docs.github.com/en/rest
Configuration
{
  "_configName": "", // Image hosting configuration name
  "repo": "", // Repository name in the format of username/reponame
  "token": "", // Github token
  "path": "", // Custom storage path, e.g. img/
  "webPath": "", // Custom web path, e.g. img/
  "customUrl": "", // Custom domain name, be sure to add http:// or https://
  "branch": "" // Branch name, default is main
}
Description
repo/Repository Name
Register an account on https://github.com and get your username after successful registration.
Create a new repository, and if it is used as an image hosting, remember to create a public repository.
Then fill in the username/reponame format according to your own repository.
token
Access: https://github.com/settings/tokens, and then click Generate new token(Classic).
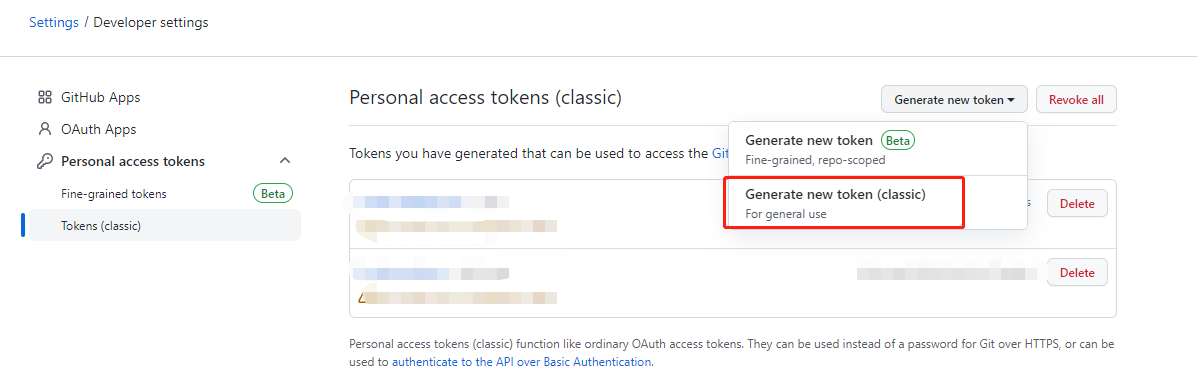
Check the repo box and set the expiration time according to your needs. Then scroll down to the bottom of the page and click the green Generate token button to generate the token.
Warning
The token will only be displayed once, please copy the token and store it in a secure place.
path/Storage path
Optional parameter used to specify the image storage path. If not filled in, it will be stored in the root directory of the repository by default.
webPath/Web path
Optional parameter used to specify the web access path of the image. If not filled in, it will default to the same as the storage path.
branch
Optional parameter used to specify the image storage branch. If not filled in, it will be stored in the default branch by default.
customUrl/Custom domain name
Optional parameter used to specify the custom domain name of the image, usually used for CDN acceleration.
For example, if jsDelivr acceleration is used, you can fill in https://cdn.jsdelivr.net/gh/{github username}/{reponame}@{branch}/, where {github username}, {reponame}, and {branch} correspond to the Github username, repository name, and branch name, respectively.
Alibaba Cloud
Official website: https://www.aliyun.com/product/oss
Official documentation: https://help.aliyun.com/product/31815.html
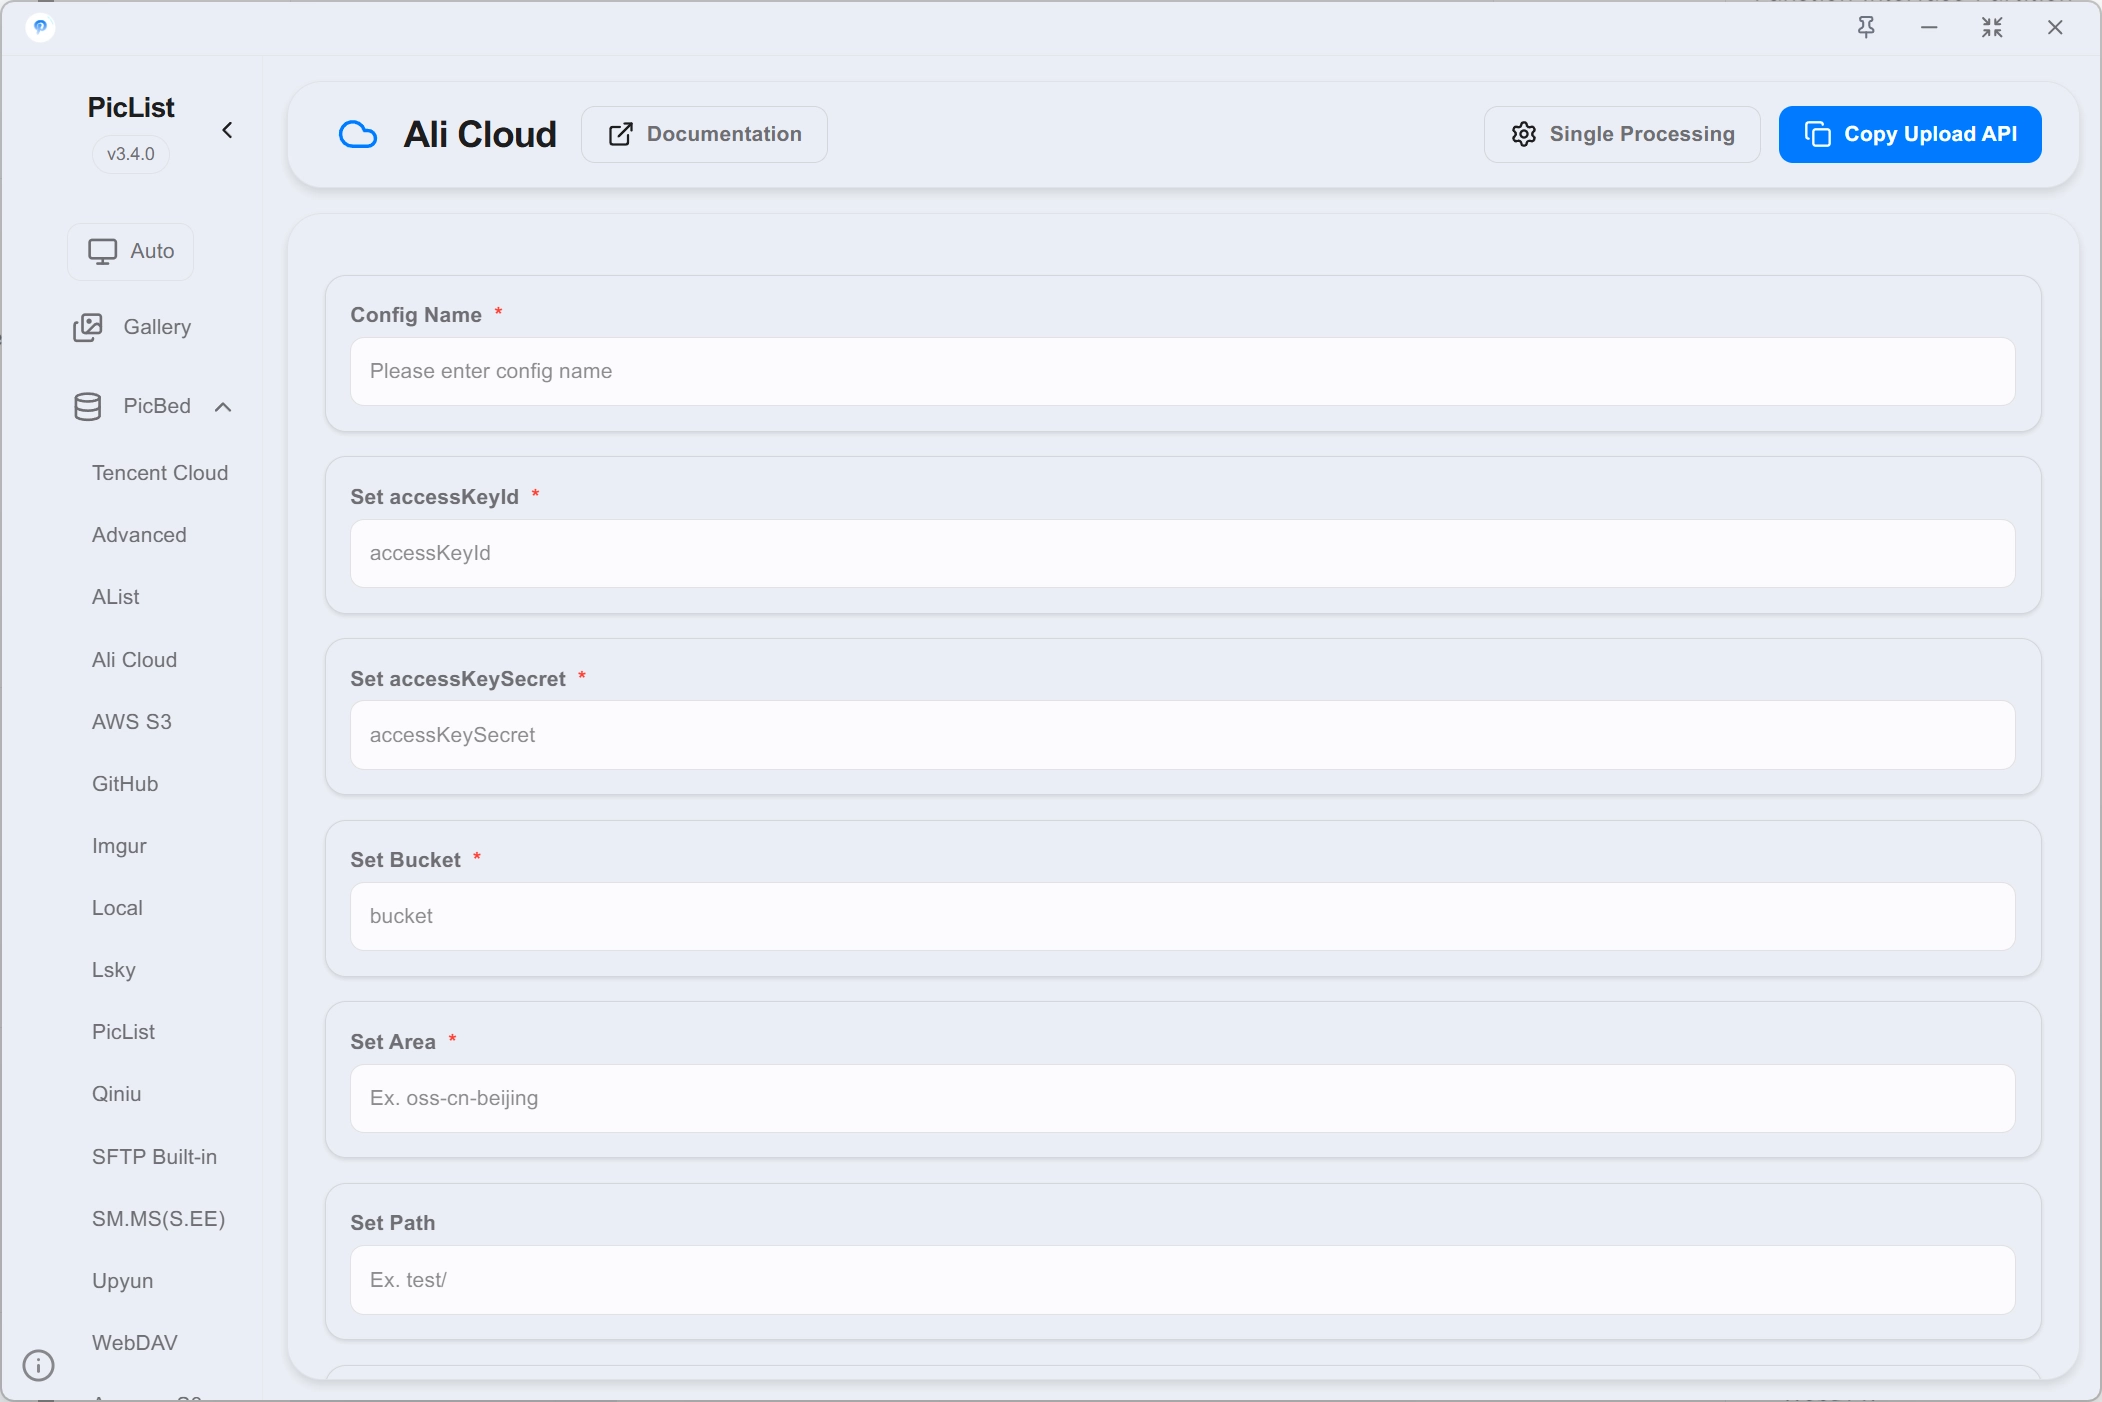
Configuration
{
  "_configName": "", // Image hosting configuration name
  "accessKeyId": "",
  "accessKeySecret": "",
  "bucket": "", // Bucket name
  "area": "", // Storage area code
  "path": "", // Custom storage path
  "webPath": "", // Custom web path
  "customUrl": "", // Custom domain name, be sure to add http:// or https://
  "options": "" // Website suffix, for example ?x-oss-process=image/resize,w_500
}
Description
accessKeyId & accessKeySecret
You need to create or view your accessKeyId and accessKeySecret in the Alibaba Cloud AccessKey management page, which can be accessed in two ways:
- Access management page URL directly
- After logging in to Alibaba Cloud, click the avatar in the upper right corner, and select
AccessKey management.
bucket & area
Please set the storage bucket permission to public read in Aliyun Console > Object Storage Service (OSS) > Bucket List, or directly visit https://oss.console.aliyun.com/bucket to view your bucket list and corresponding storage regions.
If the storage bucket permission is not set to public read, the uploaded images will not be displayed in the album.
TIP
The storage region entered in the app is the region code, not the actual Chinese name.
Please refer to the following table to find the corresponding code or visit the official Aliyun documentation.
| Region | Region Code |
|---|---|
| China (Hangzhou) | oss-cn-hangzhou |
| China (Shanghai) | oss-cn-shanghai |
| China (Nanjing - Local Region) | oss-cn-nanjing |
| China (Fuzhou - Local Region) | oss-cn-fuzhou |
| China (Wuhan - Local Region) | oss-cn-wuhan-lr |
| China (Qingdao) | oss-cn-qingdao |
| China (Beijing) | oss-cn-beijing |
| China (Zhangjiakou) | oss-cn-zhangjiakou |
| China (Hohhot) | oss-cn-huhehaote |
| China (Ulanqab) | oss-cn-wulanchabu |
| China (Shenzhen) | oss-cn-shenzhen |
| China (Heyuan) | oss-cn-heyuan |
| China (Guangzhou) | oss-cn-guangzhou |
| China (Chengdu) | oss-cn-chengdu |
| China (Hong Kong) | oss-cn-hongkong |
| US (Silicon Valley) | oss-us-west-1 |
| US (Virginia) | oss-us-east-1 |
| Japan (Tokyo) | oss-ap-northeast-1 |
| South Korea (Seoul) | oss-ap-northeast-2 |
| Singapore | oss-ap-southeast-1 |
| Australia (Sydney) | oss-ap-southeast-2 |
| Malaysia (Kuala Lumpur) | oss-ap-southeast-3 |
| Indonesia (Jakarta) | oss-ap-southeast-5 |
| Philippines (Manila) | oss-ap-southeast-6 |
| Thailand (Bangkok) | oss-ap-southeast-7 |
| India (Mumbai) | oss-ap-south-1 |
| Germany (Frankfurt) | oss-eu-central-1 |
| UK (London) | oss-eu-west-1 |
| US (Silicon Valley) | oss-us-west-1 |
| US (Virginia) | oss-us-east-1 |
| Mexico (Mexico City) | na-south-1 |
| France (Paris) | oss-eu-west-2 |
| UAE (Dubai) | oss-me-east-1 |
| China Mainland | oss-rg-china-mainland |
path/Storage path
Path is an optional field. If not specified, the file will be stored in the root directory of the bucket.
For example, if you enter images/test/, the file will be stored in the corresponding test directory.
webPath
Web path is an optional field, used to concatenate the web path.
customUrl
Custom URL is an optional field. If not specified, the default external domain name of Aliyun will be used when copying links, previewing images, and other operations.
For example, if the file test.jpg is stored in the directory images/test/, the bucket name is test-bucket, and the storage region is Hangzhou 1, the external access address of the file is https://test-bucket.oss-cn-hangzhou.aliyuncs.com/images/test/test.jpg.
If you specify a custom domain name, the external access address of the file will be http://customdomain/images/test/test.jpg.
Please note to include http:// or https://.
options/Website suffix
Alibaba Cloud OSS provides image processing functions, which are commonly used for operations such as cropping, scaling, rotating, and watermarking of images.
To use this function, append the website suffix to the external network access address of the file, for example, https://test-bucket.oss-cn-hangzhou.aliyuncs.com/images/test/test.jpg?x-oss-process=image/resize,m_fill,h_100,w_100.
For detailed usage of website suffix, please refer to OSS New Image Processing Guide.
If the usage of this function exceeds the free quota, additional processing fees will be charged. For specific fees, please refer to OSS Image Processing Fees.
The website suffix is optional. If left blank, the original address will be copied.
Imgur
Tips
Access to Imgur in mainland China is restricted, and a proxy must be set up to upload images.
Official website: https://imgur.com/
Official documentation: https://apidocs.imgur.com/
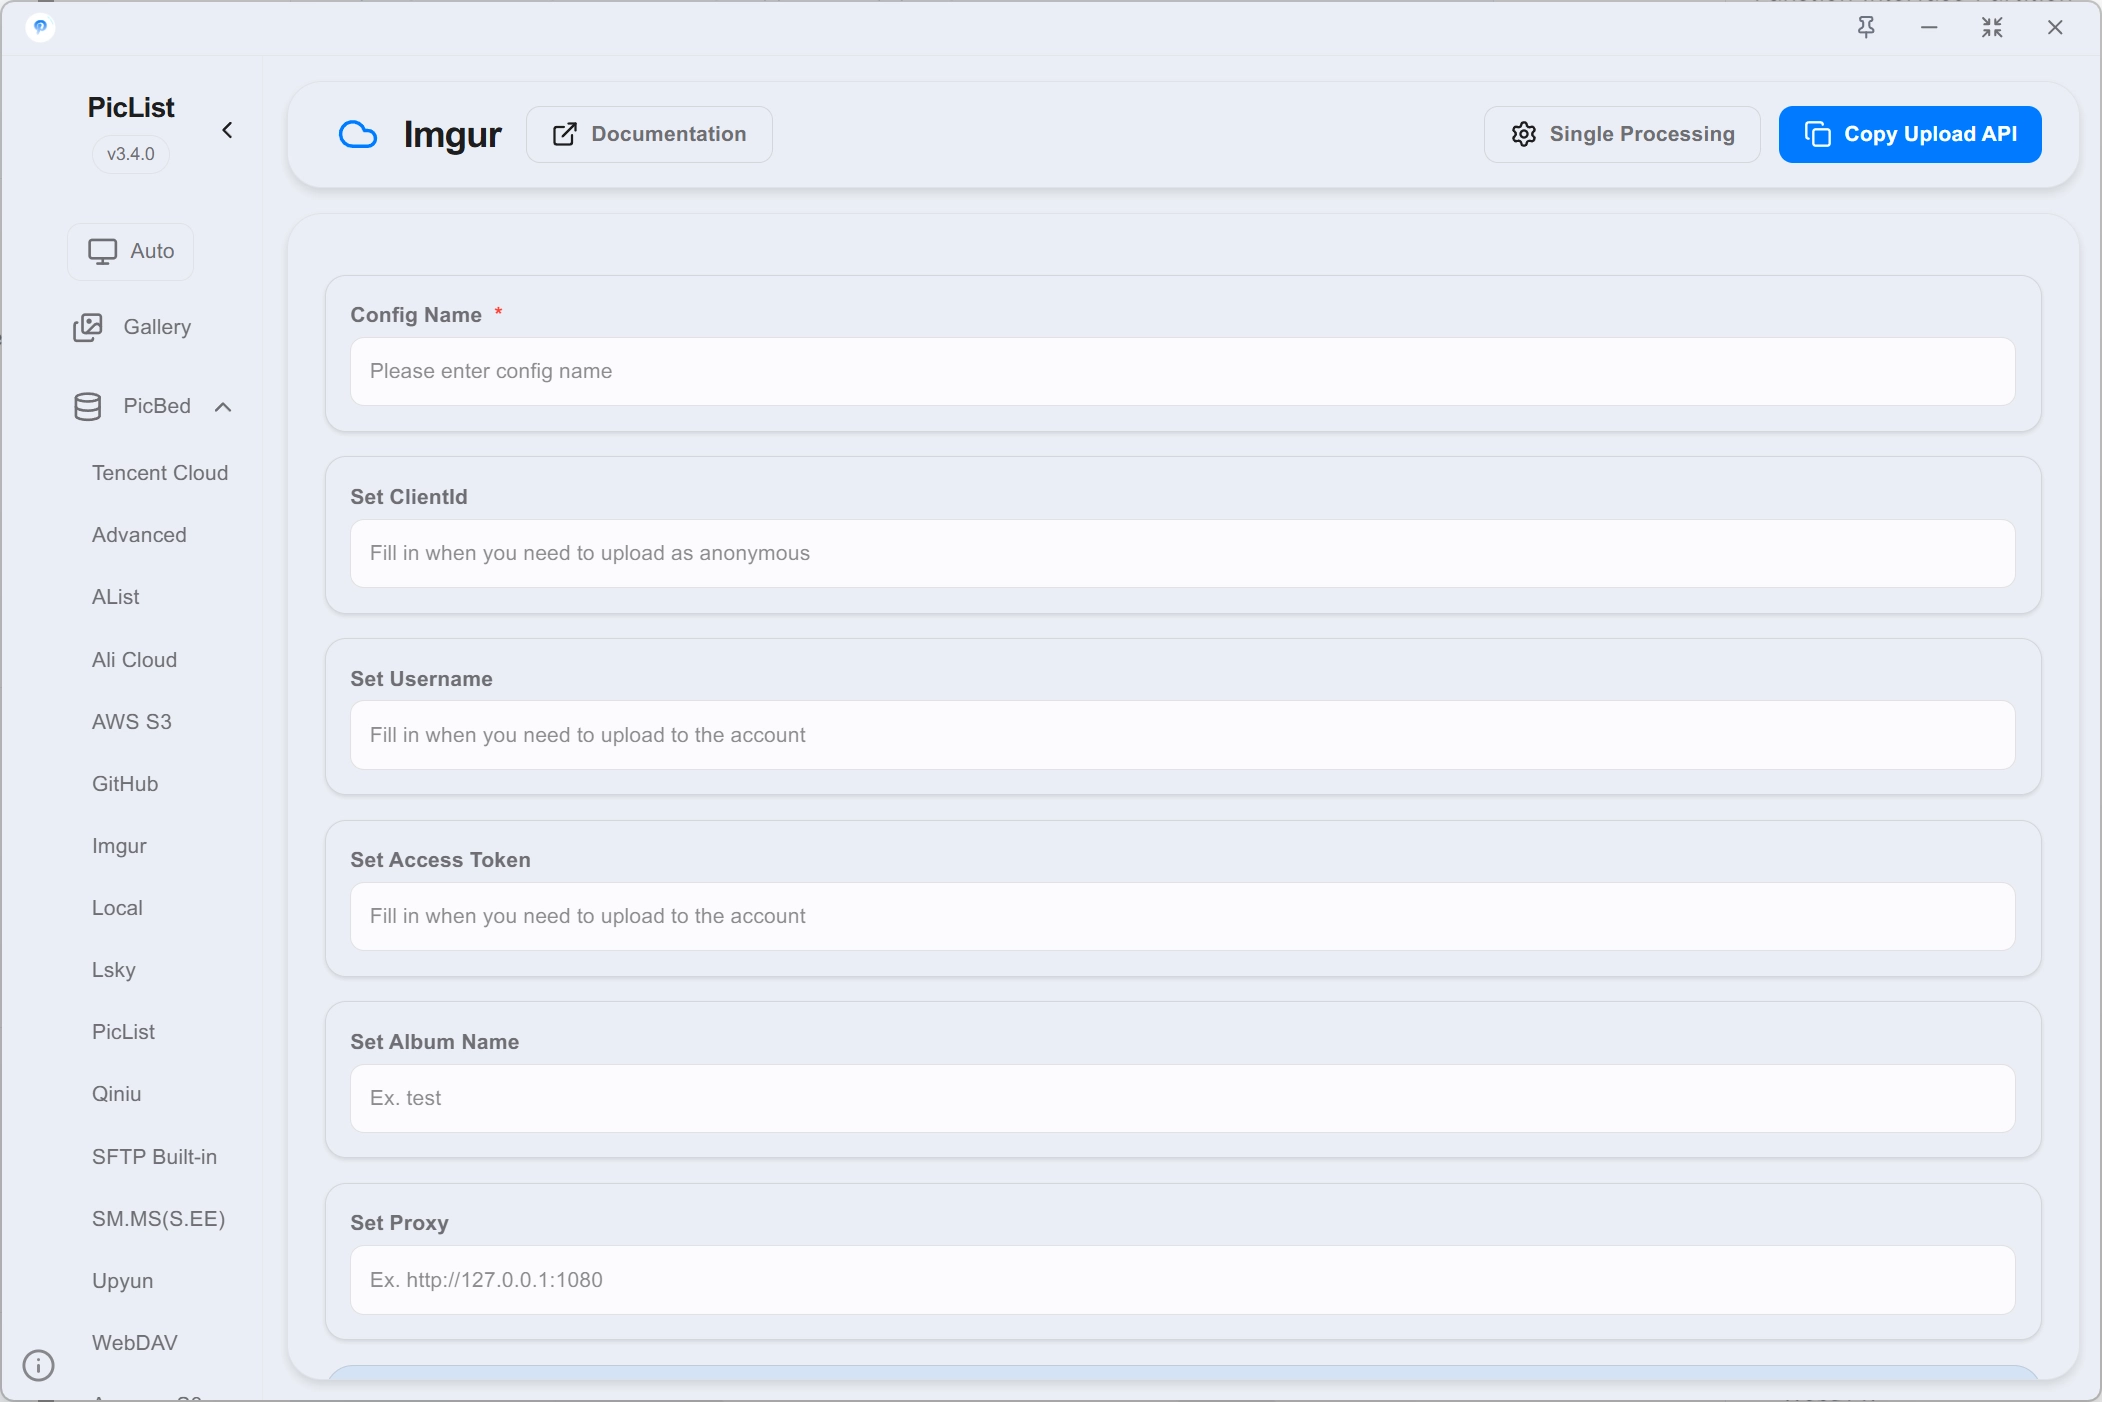
Configuration
{
  "_configName": "", // Configuration name
  "clientId": "", // Imgur clientId
  "username": "", // imgur username
  "accessToken": "", // imgur accessToken
  "album": "", // imgur album name
  "proxy": "" // Proxy address, only supports http proxy
}
Description
clientId
Tips
clientId is used for anonymous access to the Imgur API. If you want to upload images to your own account, you need to fill in the username and accessToken fields.
If you haven't generated a clientId yet, please log in to Imgur first, then go to https://api.imgur.com/oauth2/addclient, fill in the Application name, chooseOAuth 2 authorization without a callback URL for Authorization Type, and click Submit to generate a clientId.
If you have already generated a clientId, log in to the Imgur website, click on the profile picture in the upper right corner, choose Settings, and you can find it on the Applications page.
Or visit https://imgur.com/account/settings/apps to view it directly.
username/accessToken
If you want to upload images to your own account, you need to fill in the username and accessToken fields.
If you have not generated an accessToken, please log in to Imgur first, then visit https://api.imgur.com/oauth2/authorize?client_id={clientId}&response_type=token, where {clientId} is your clientId, click Allow, at this time the browser address bar will jump to https://imgur.com/#access_token={accessToken}&expires_in=315360000&token_type=bearer&refresh_token={refreshToken}&account_username={username}&account_id={accountId}, where {accessToken} is your accessToken.
album/Album name
Album name is an optional field. If not filled in, the uploaded image will not be added to the album.
proxy/http proxy
Due to well-known reasons, Imgur cannot be accessed in mainland China under normal circumstances, so please configure the proxy yourself.
The format of the proxy is http(s)://127.0.0.1:{port}, where {port} is the proxy port number.
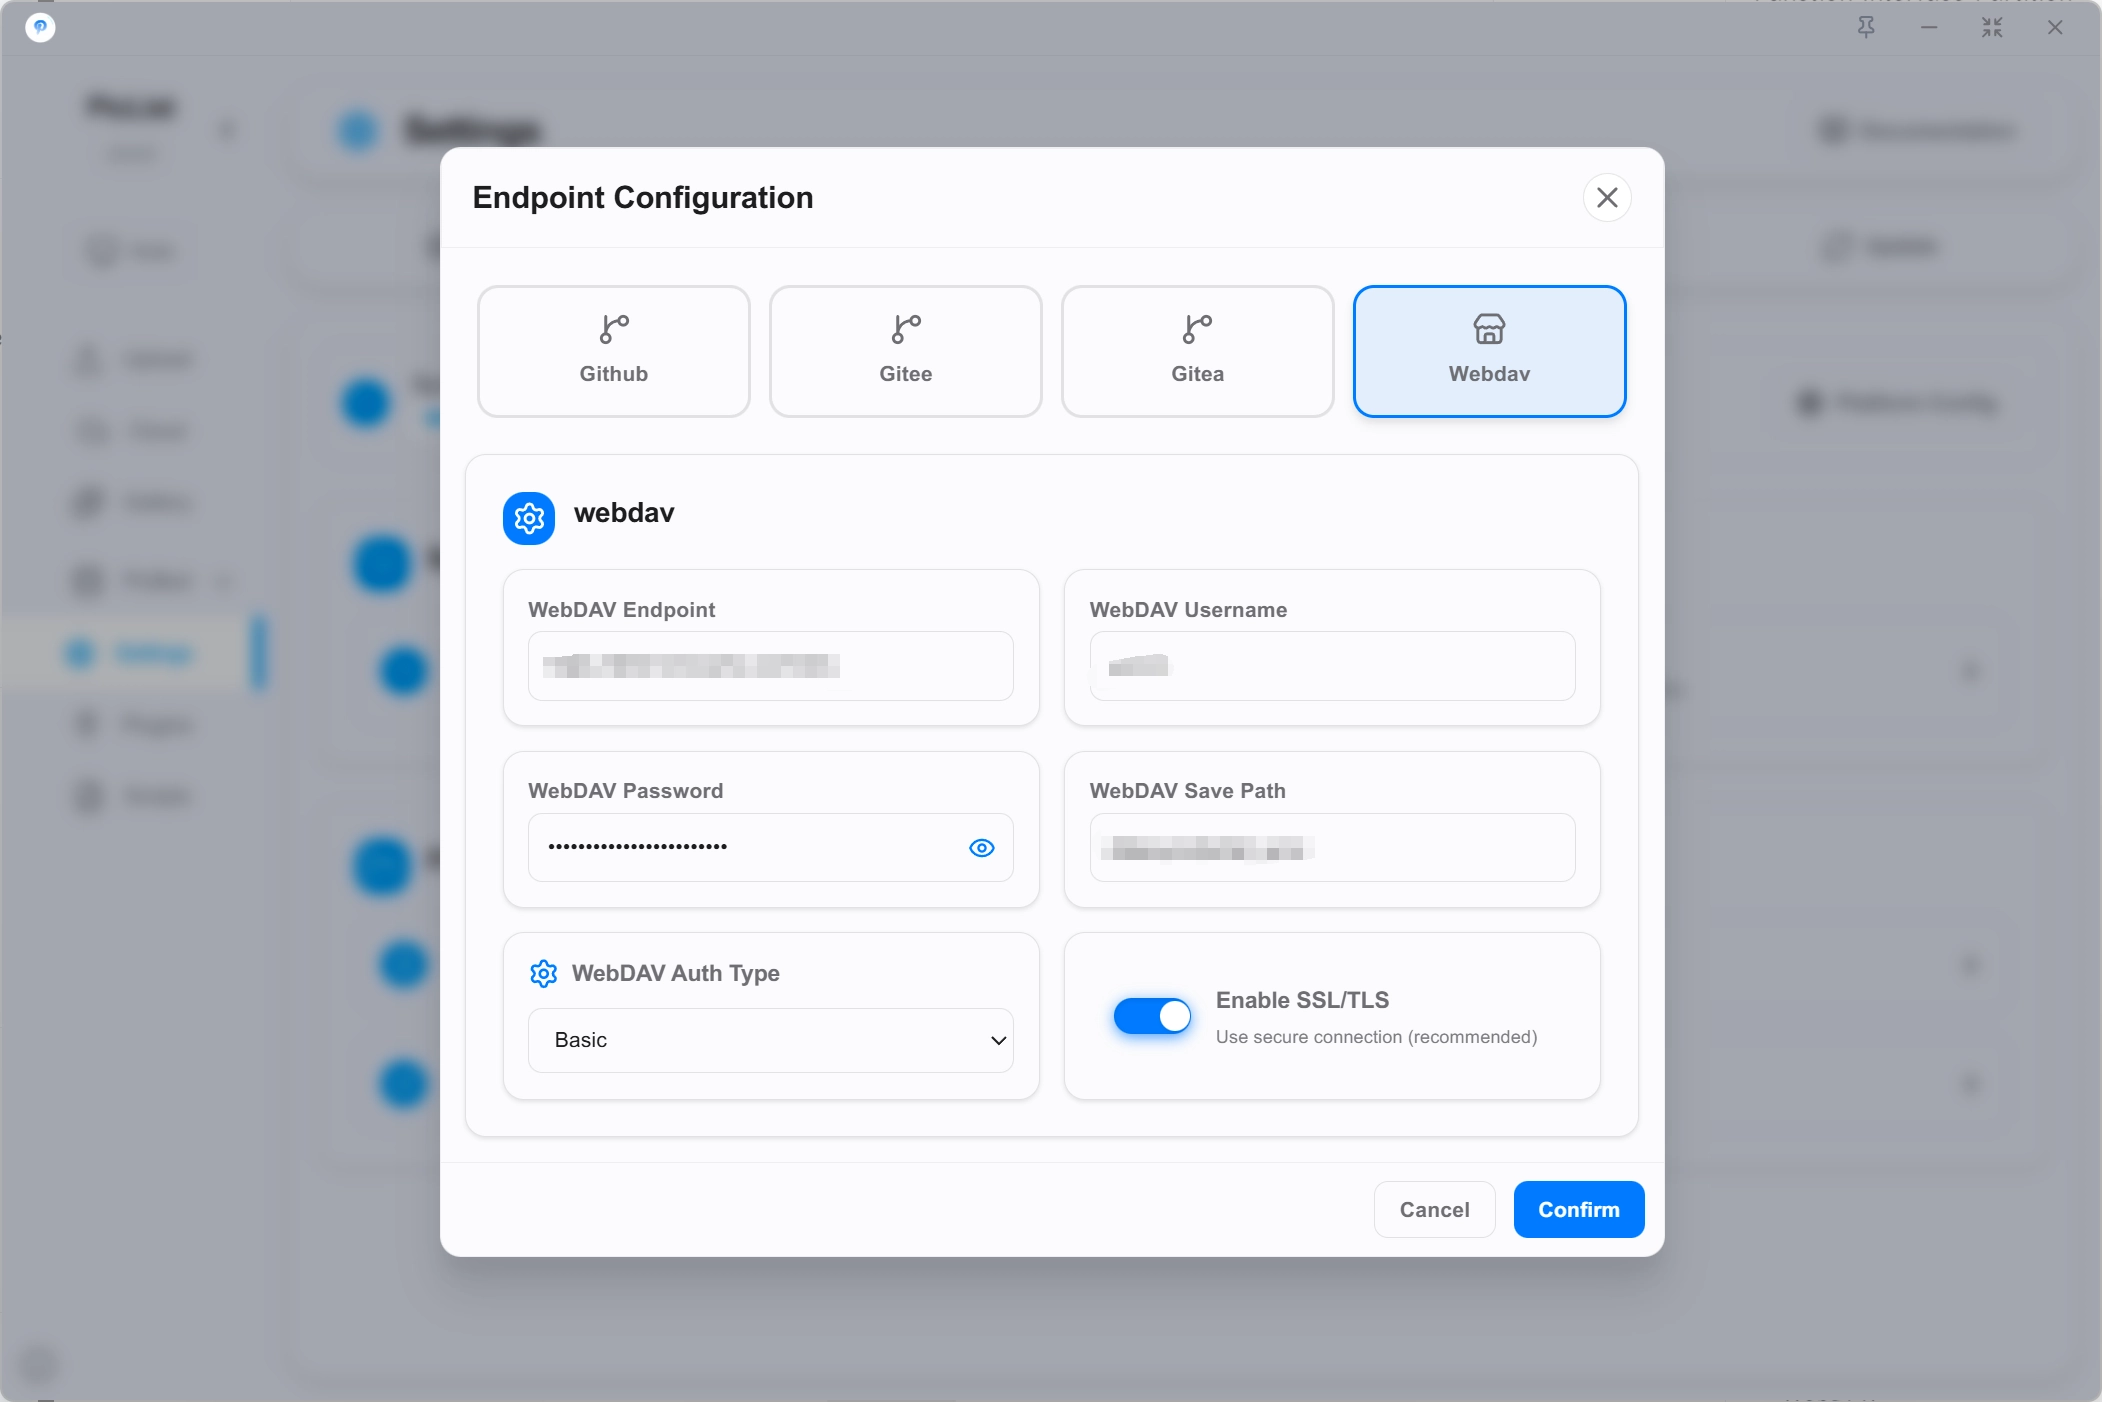
WebDAV
Configuration
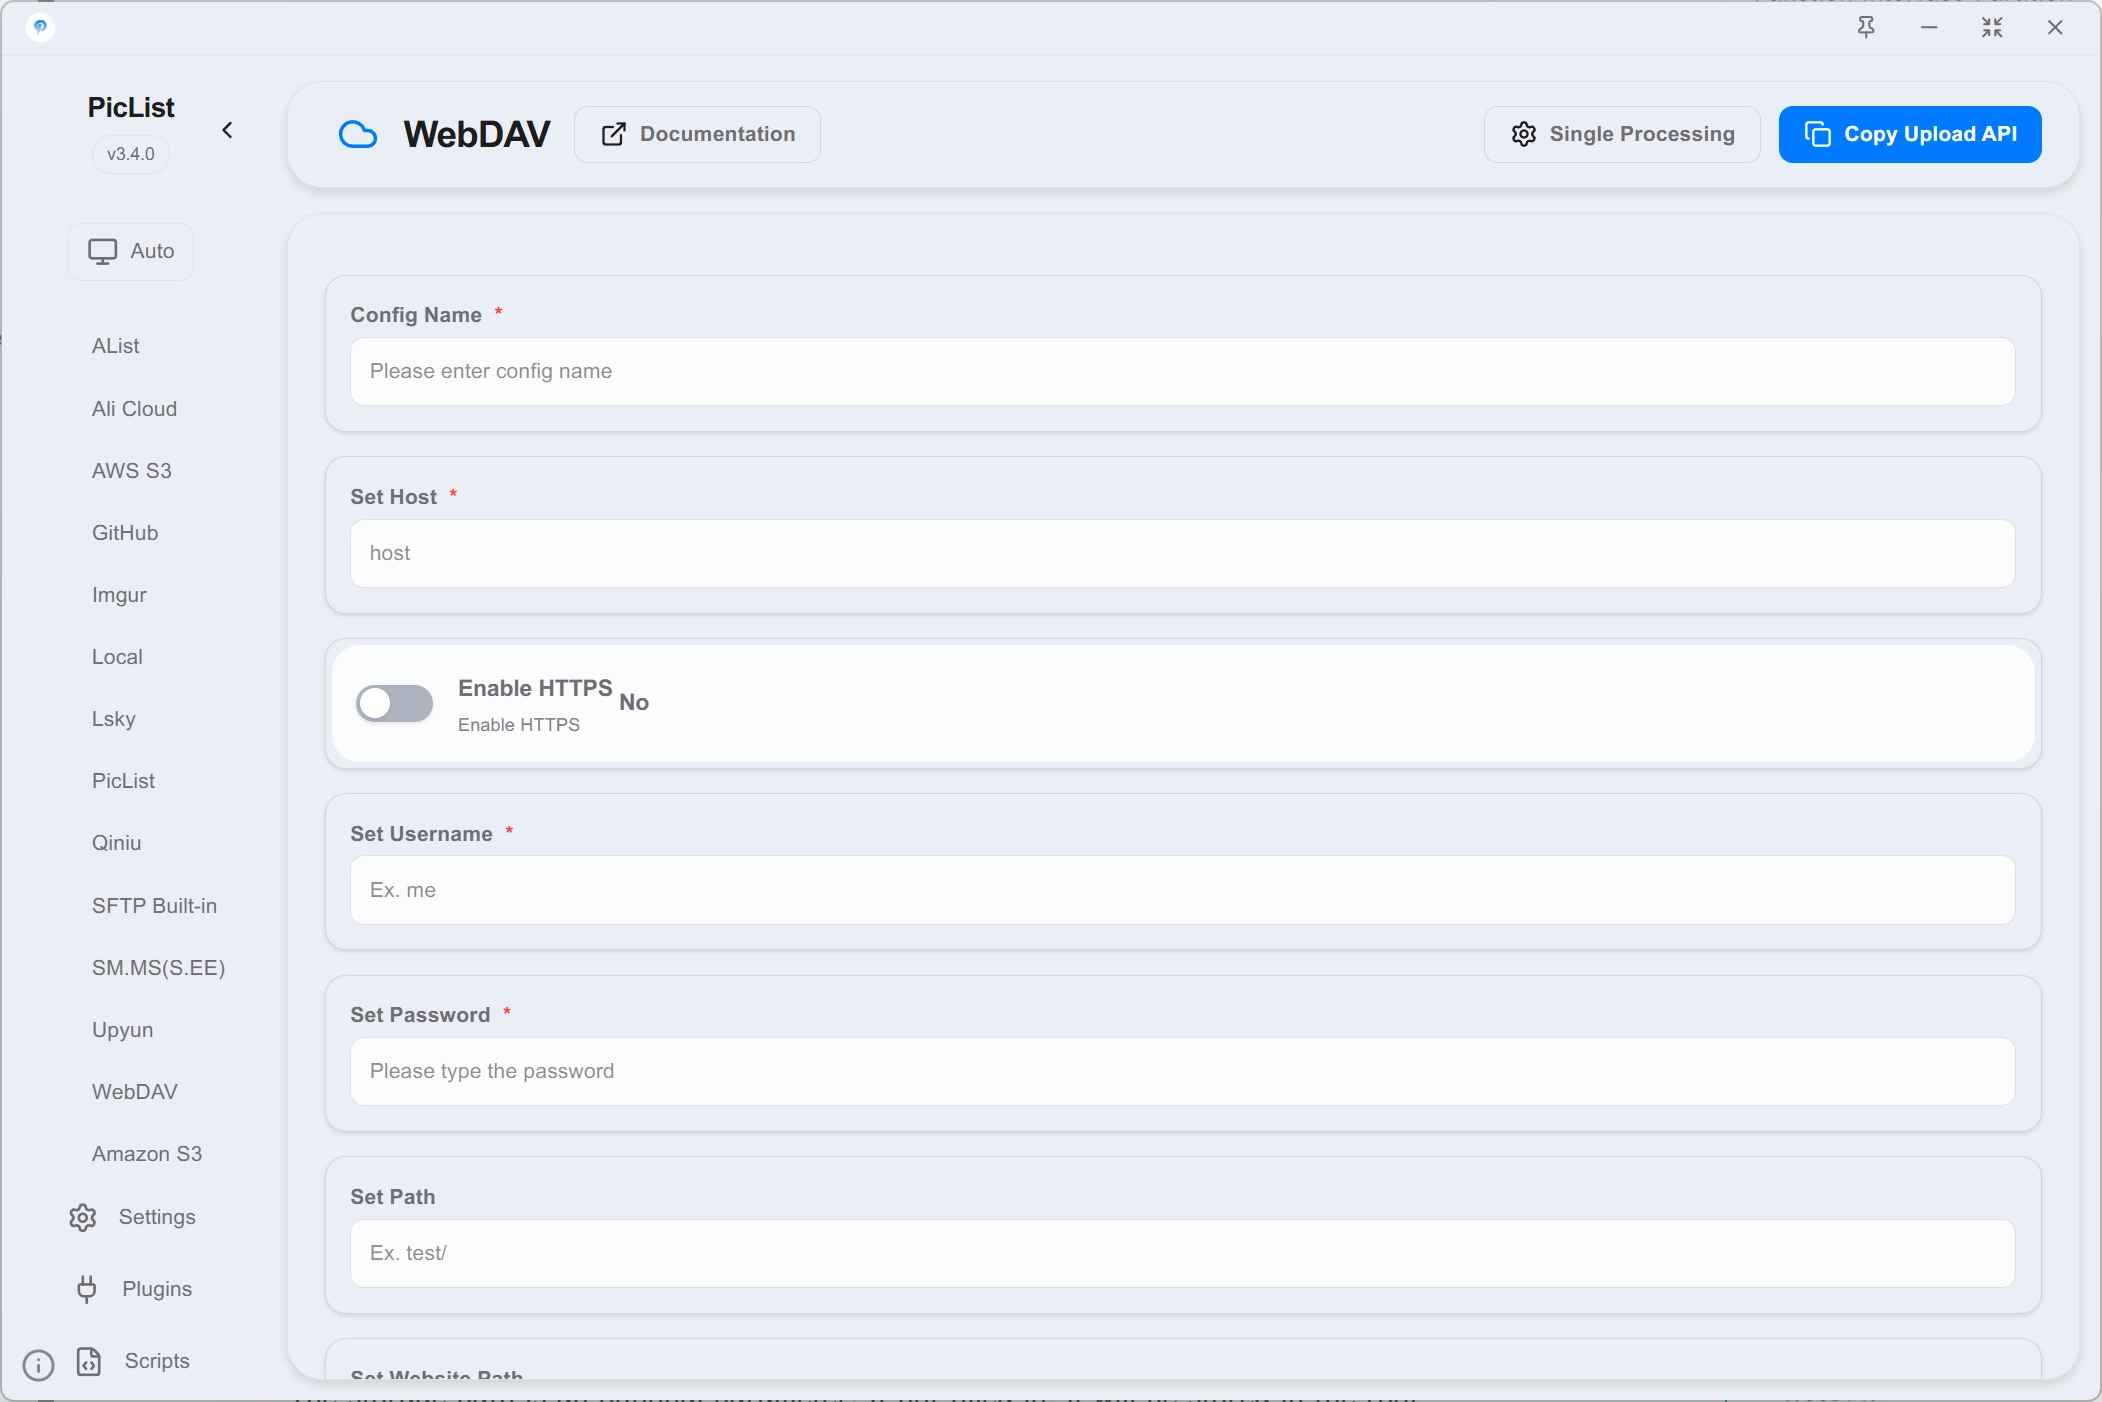
{
  "_configName": "", // Configuration name
  "host": "", // WebDAV address
  "username": "", // Username
  "password": "", // Password
  "path": "", // Storage path
  "webpath": "", // Web path
  "customUrl": "", // Custom domain
  "sslEnabled": boolean, // Whether to enable SSL
  "authType": "basic" | "digest", // Authentication type
  "options": "" // Website suffix
}
Description
host
Required parameter used to specify the domain name of WebDAV, which can be an IP address or a domain name. If an IP address is used, please specify the port number.
username & password
Required parameters used to specify the username and password for WebDAV.
path/Storage path
The storage path is an optional parameter. If not filled in, it will be stored in the root directory of WebDAV by default.
For example, if you fill in images/test/, the file will be stored in the corresponding test directory.
webpath/Web path
Web path is an optional parameter. If not filled in, it will be the same as the storage path by default.
This path is used to splice the image access address. For example, if you fill in images/test/, the image access address will be https://host/images/test/.
customUrl
The custom domain is an optional parameter. If not filled in, the host domain name will be used for copying links, previewing images, and other operations.
sslEnabled
Please choose whether to enable SSL based on whether your WebDAV is accessed via HTTPS.
authType
Default is basic, you can choose digest if you need.
options/Website suffix
Customize the URL suffix for special operations.
Local image hosting
Local image hosting refers to using a local folder as an image hosting service. The uploaded images will be stored in the folder. For example, you can use Rclone to mount cloud storage to a local path, and then use the path as a local image hosting service.
Configuration
{
  "_configName": "", // Image hosting configuration name
  "path": "", // Storage path
  "customUrl": "", // Custom domain name, be sure to add http:// or https://
  "webPath": "" // Web path
}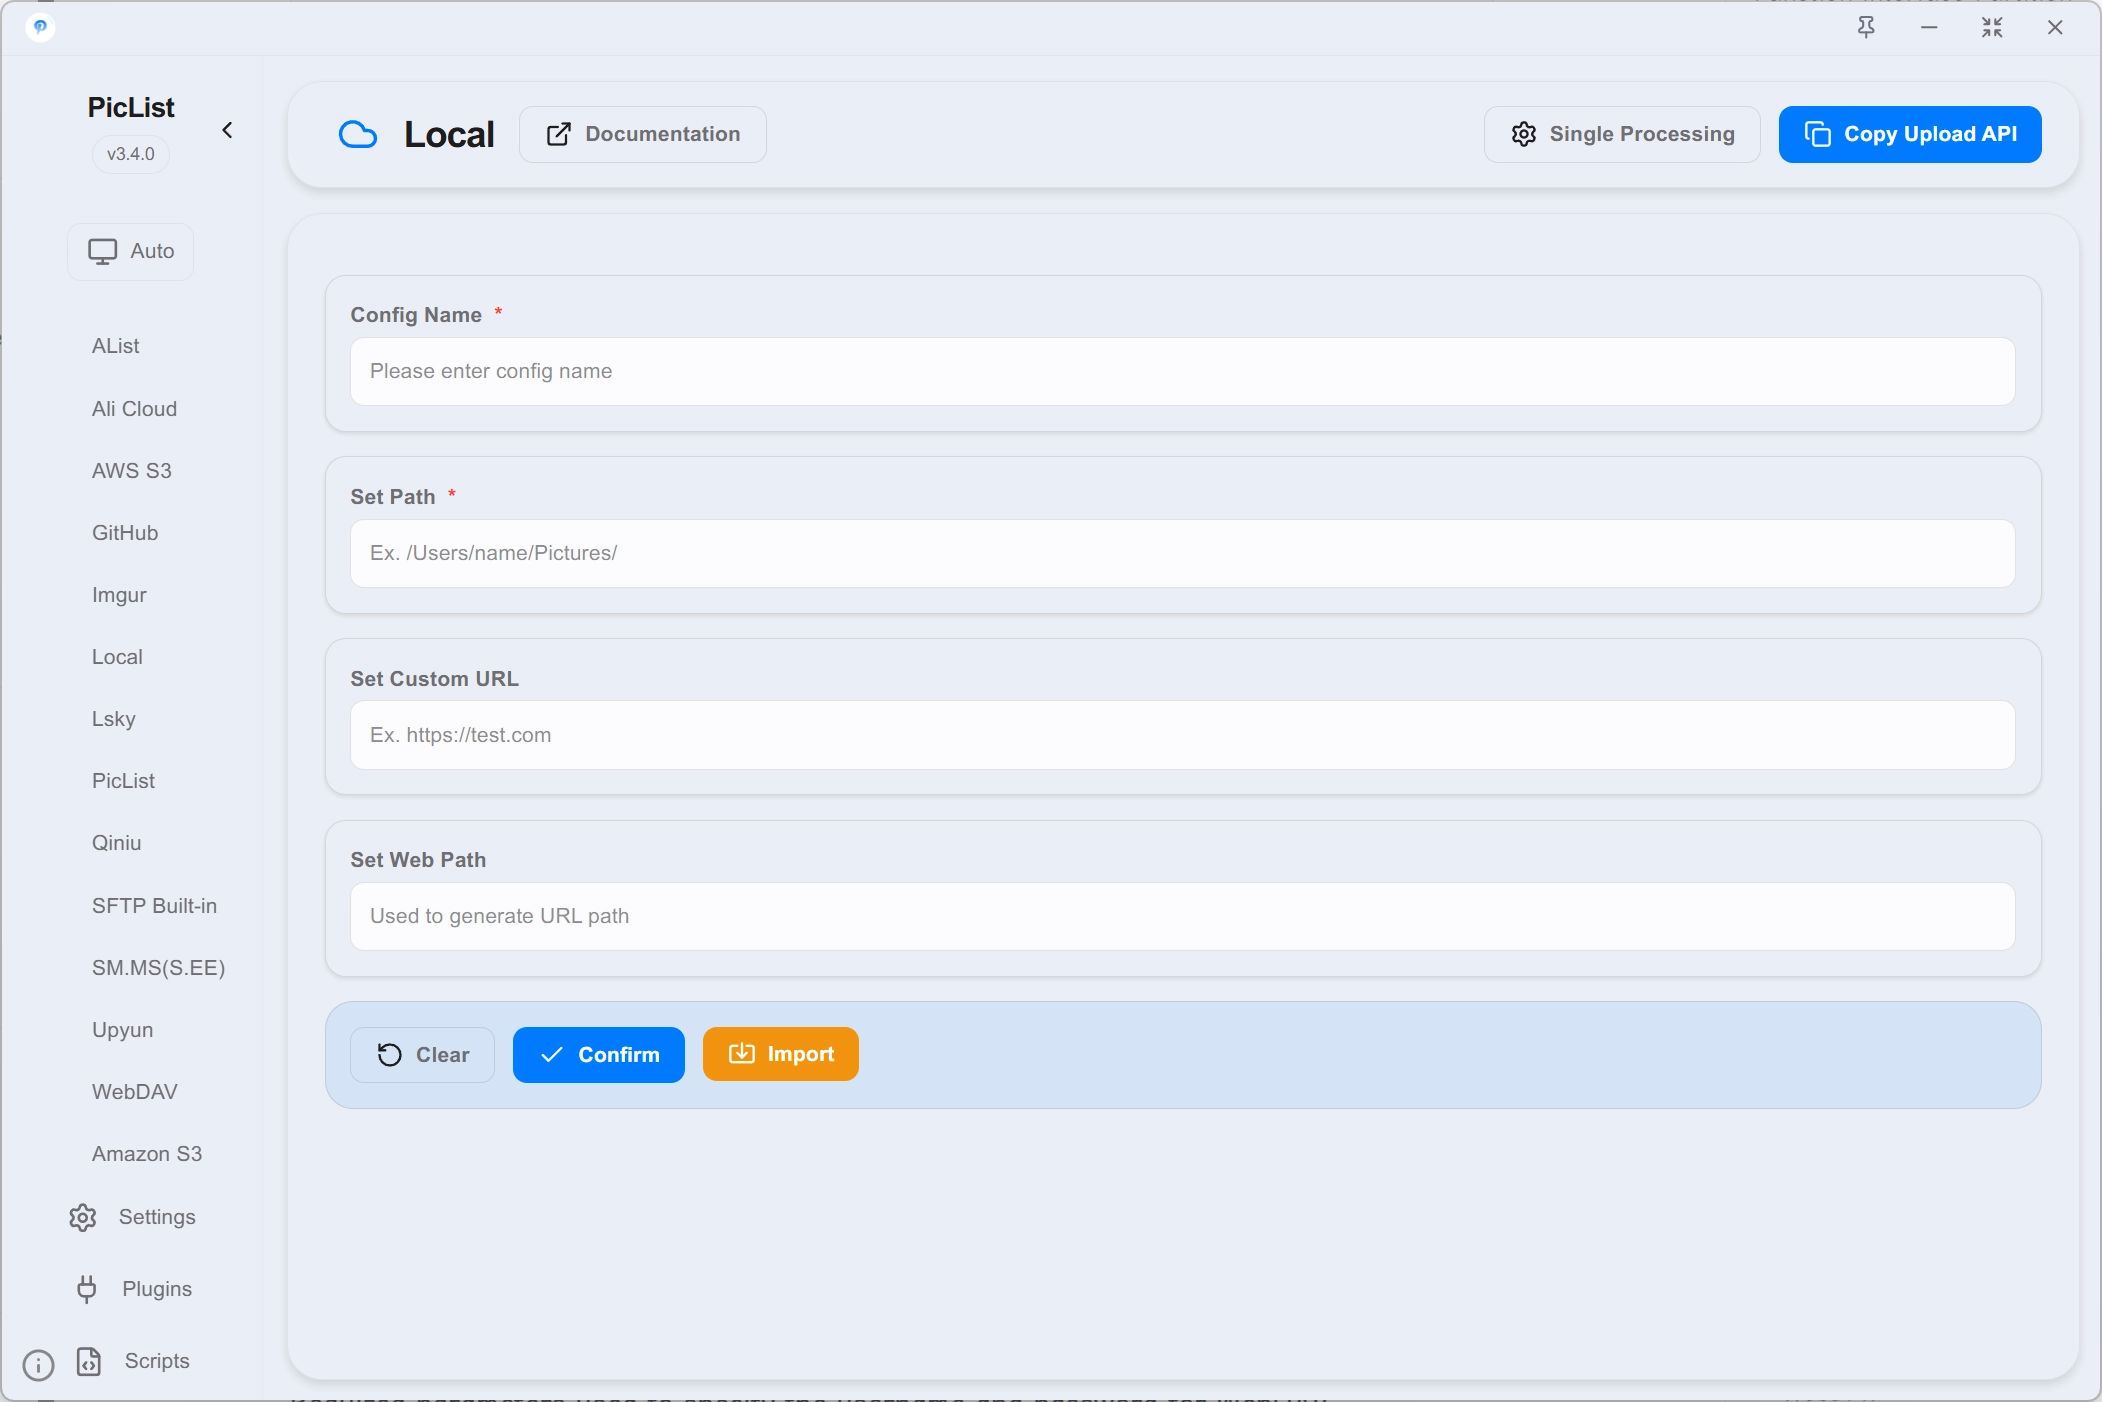
Description
path
Required parameter used to specify the storage path of the local image hosting service.
customUrl
Custom domain name is an optional parameter. If not filled in, the local path above will be used when copying links, previewing images, and other operations.
webpath
Web path is an optional parameter. If not filled in, it will be the same as the storage path by default.
This path is used to splice the image access address. For example, if you fill in images/test/, the image access address will be https://host/images/test/.
Built-in SFTP
Used to upload files to remote servers via SFTP.
Configuration
{
  "_configName": "", // Image hosting configuration name
  "host": "", // host
  "port": number, // port, default is 22
  "username": "", // username
  "password": "", // password
  "privateKey": "", // private key path
  "passphrase": "", // private key password
  "uploadPath": "", // upload path
  "customUrl": "", // custom domain
  "webPath": "", // web path
  "fileUser": "", // user and group of file
  "fileMode": "", // file permission
  "dirMode": "", // directory permission
}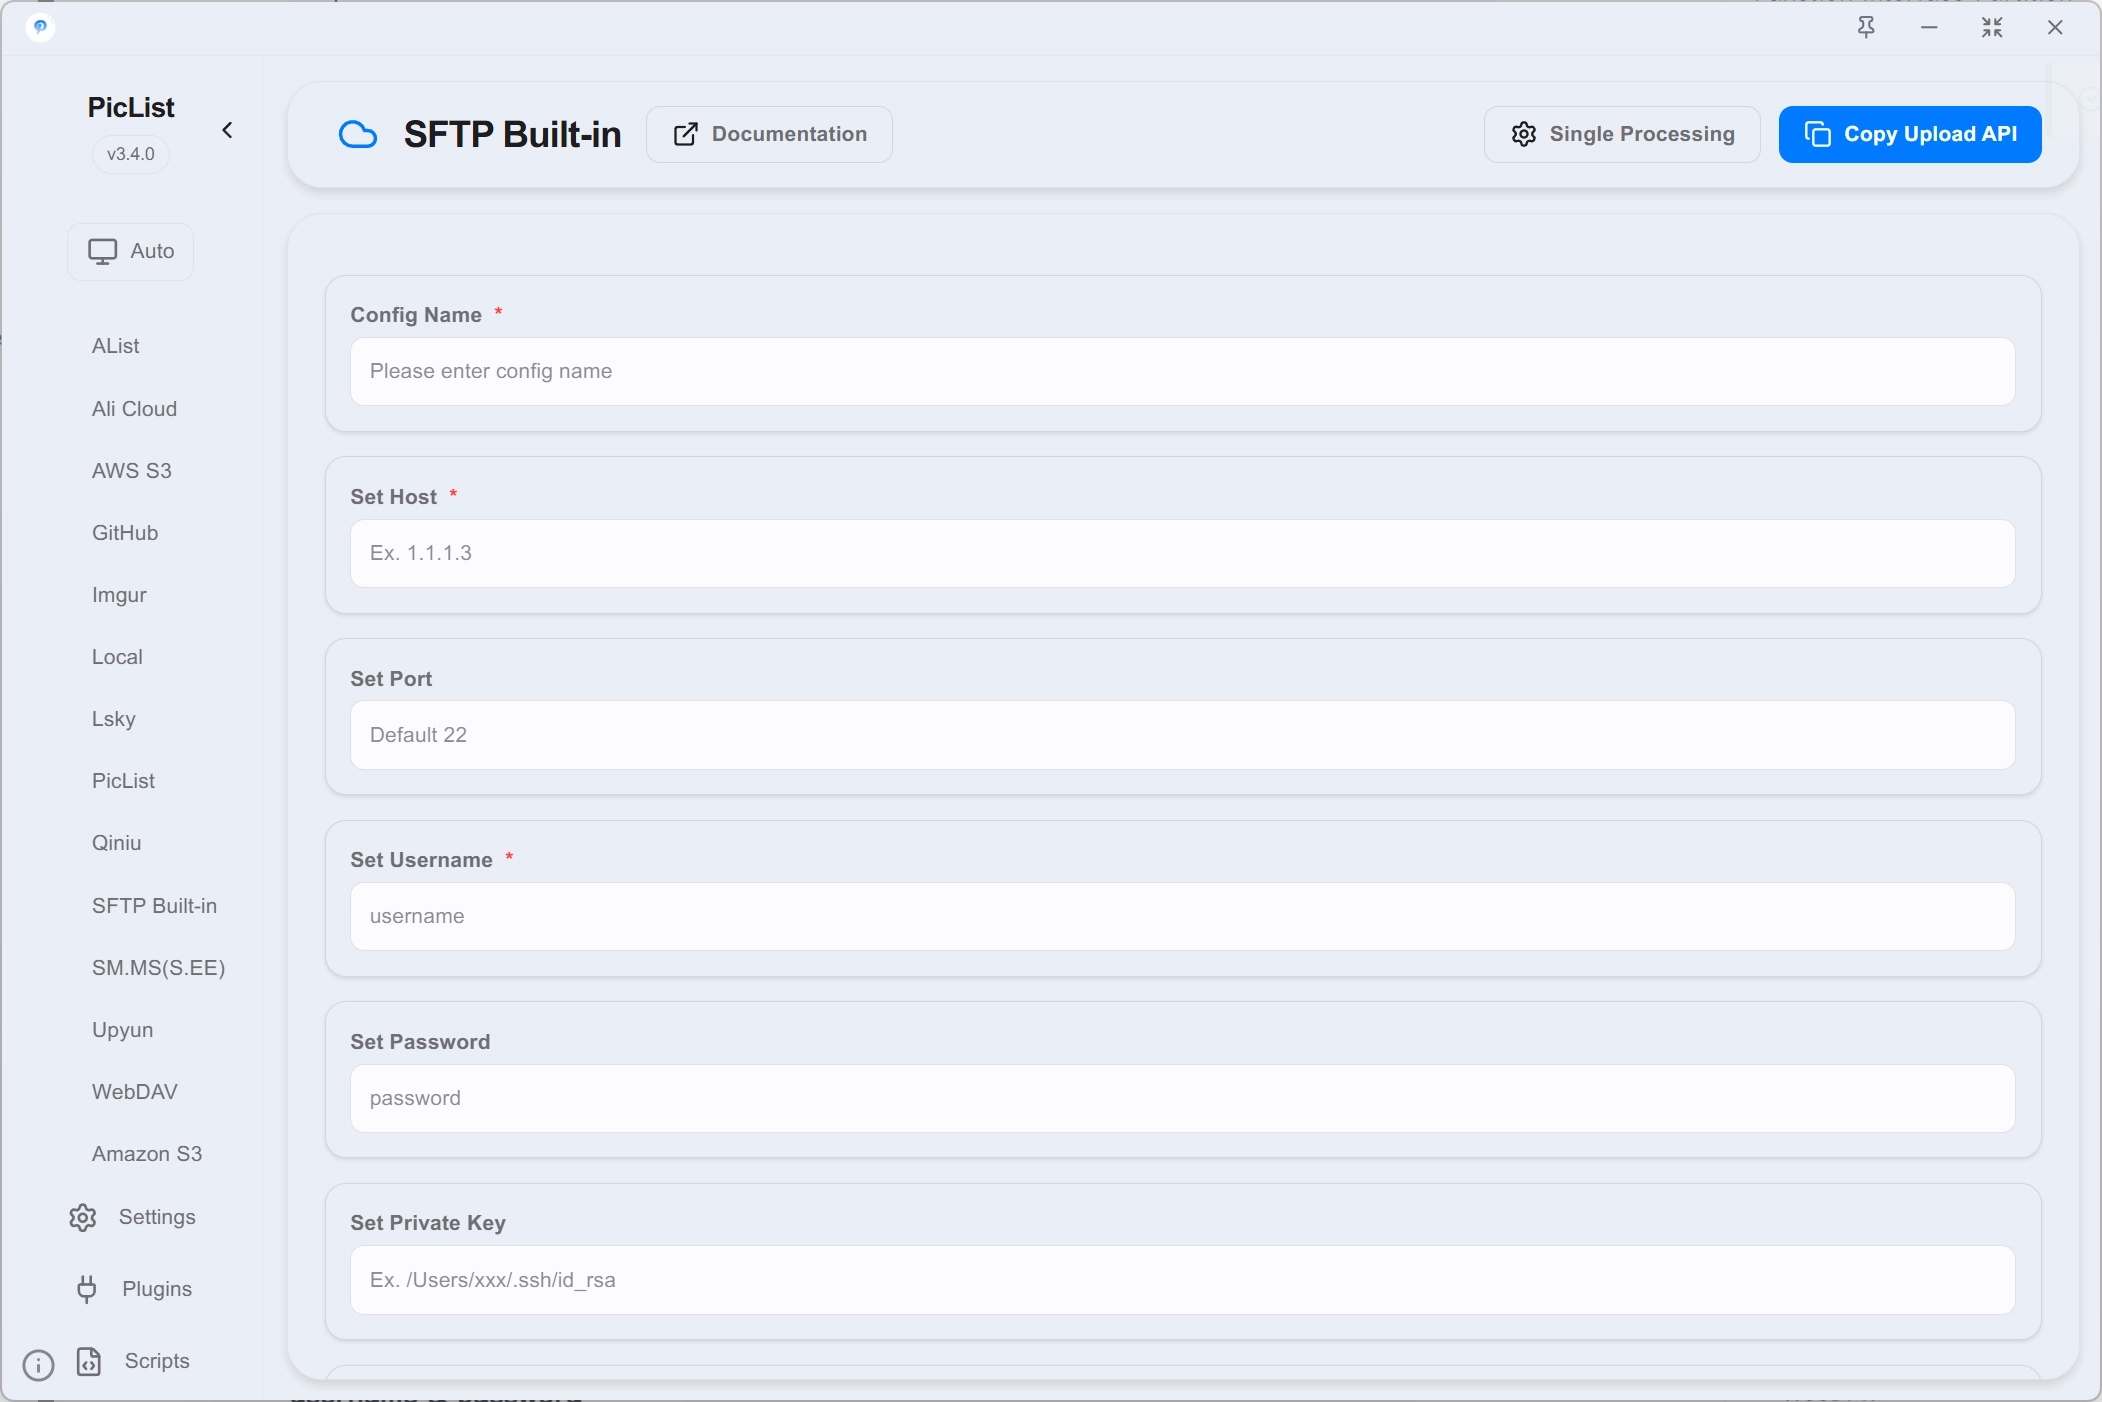
Description
host
Required parameter used to specify the host name of SFTP, which is generally the IP address of the server.
port
Optional parameter, default is 22. If you have modified the port number for SSH login, please modify it accordingly.
username & password
username is a required parameter used to specify the username of SFTP.
password is an optional parameter. If you use password login, please fill in the password. But it is generally not recommended to use password login, but to use private key login.
privateKey & passphrase
privateKey is an optional parameter. If you use private key login, please fill in the private key path.
passphrase is an optional parameter. If your private key has a password, please fill in the private key password.
uploadPath
Required parameter used to specify the upload path of SFTP, which is the real storage path of the file on the server.
customUrl
Optional parameter, if not filled in, the host name above will be used when copying links, previewing images, and other operations.
webpath
Optional parameter, if not filled in, it will be the same as the upload path by default. This path is used to splice the image access address. For example, if you fill in images/test/, the image access address will be https://host/images/test/.
fileUser
Optional parameter, used to specify the user group and user settings of the file, the format is user:group, for example www-data:www-data. If there is only a user name, for example www-data, the default user group is www-data.
fileMode
Optional parameter, used to specify the permission of the file, the default is 0644.
dirMode
Optional parameter, used to specify the permission of the directory, the default is 0755.
Lsky Pro
You need to build the server yourself for Lsky Pro, please refer to Lsky Pro.
Configuration
{
  "_configName": "", // Image hosting configuration name
  "host": "", // host
  "version": "V1" | "V2", // version
  "token": "", // token
  "strategyId": "", // strategyId
  "albumId": "", // albumId
  "permission": "public" | "private", // permission
}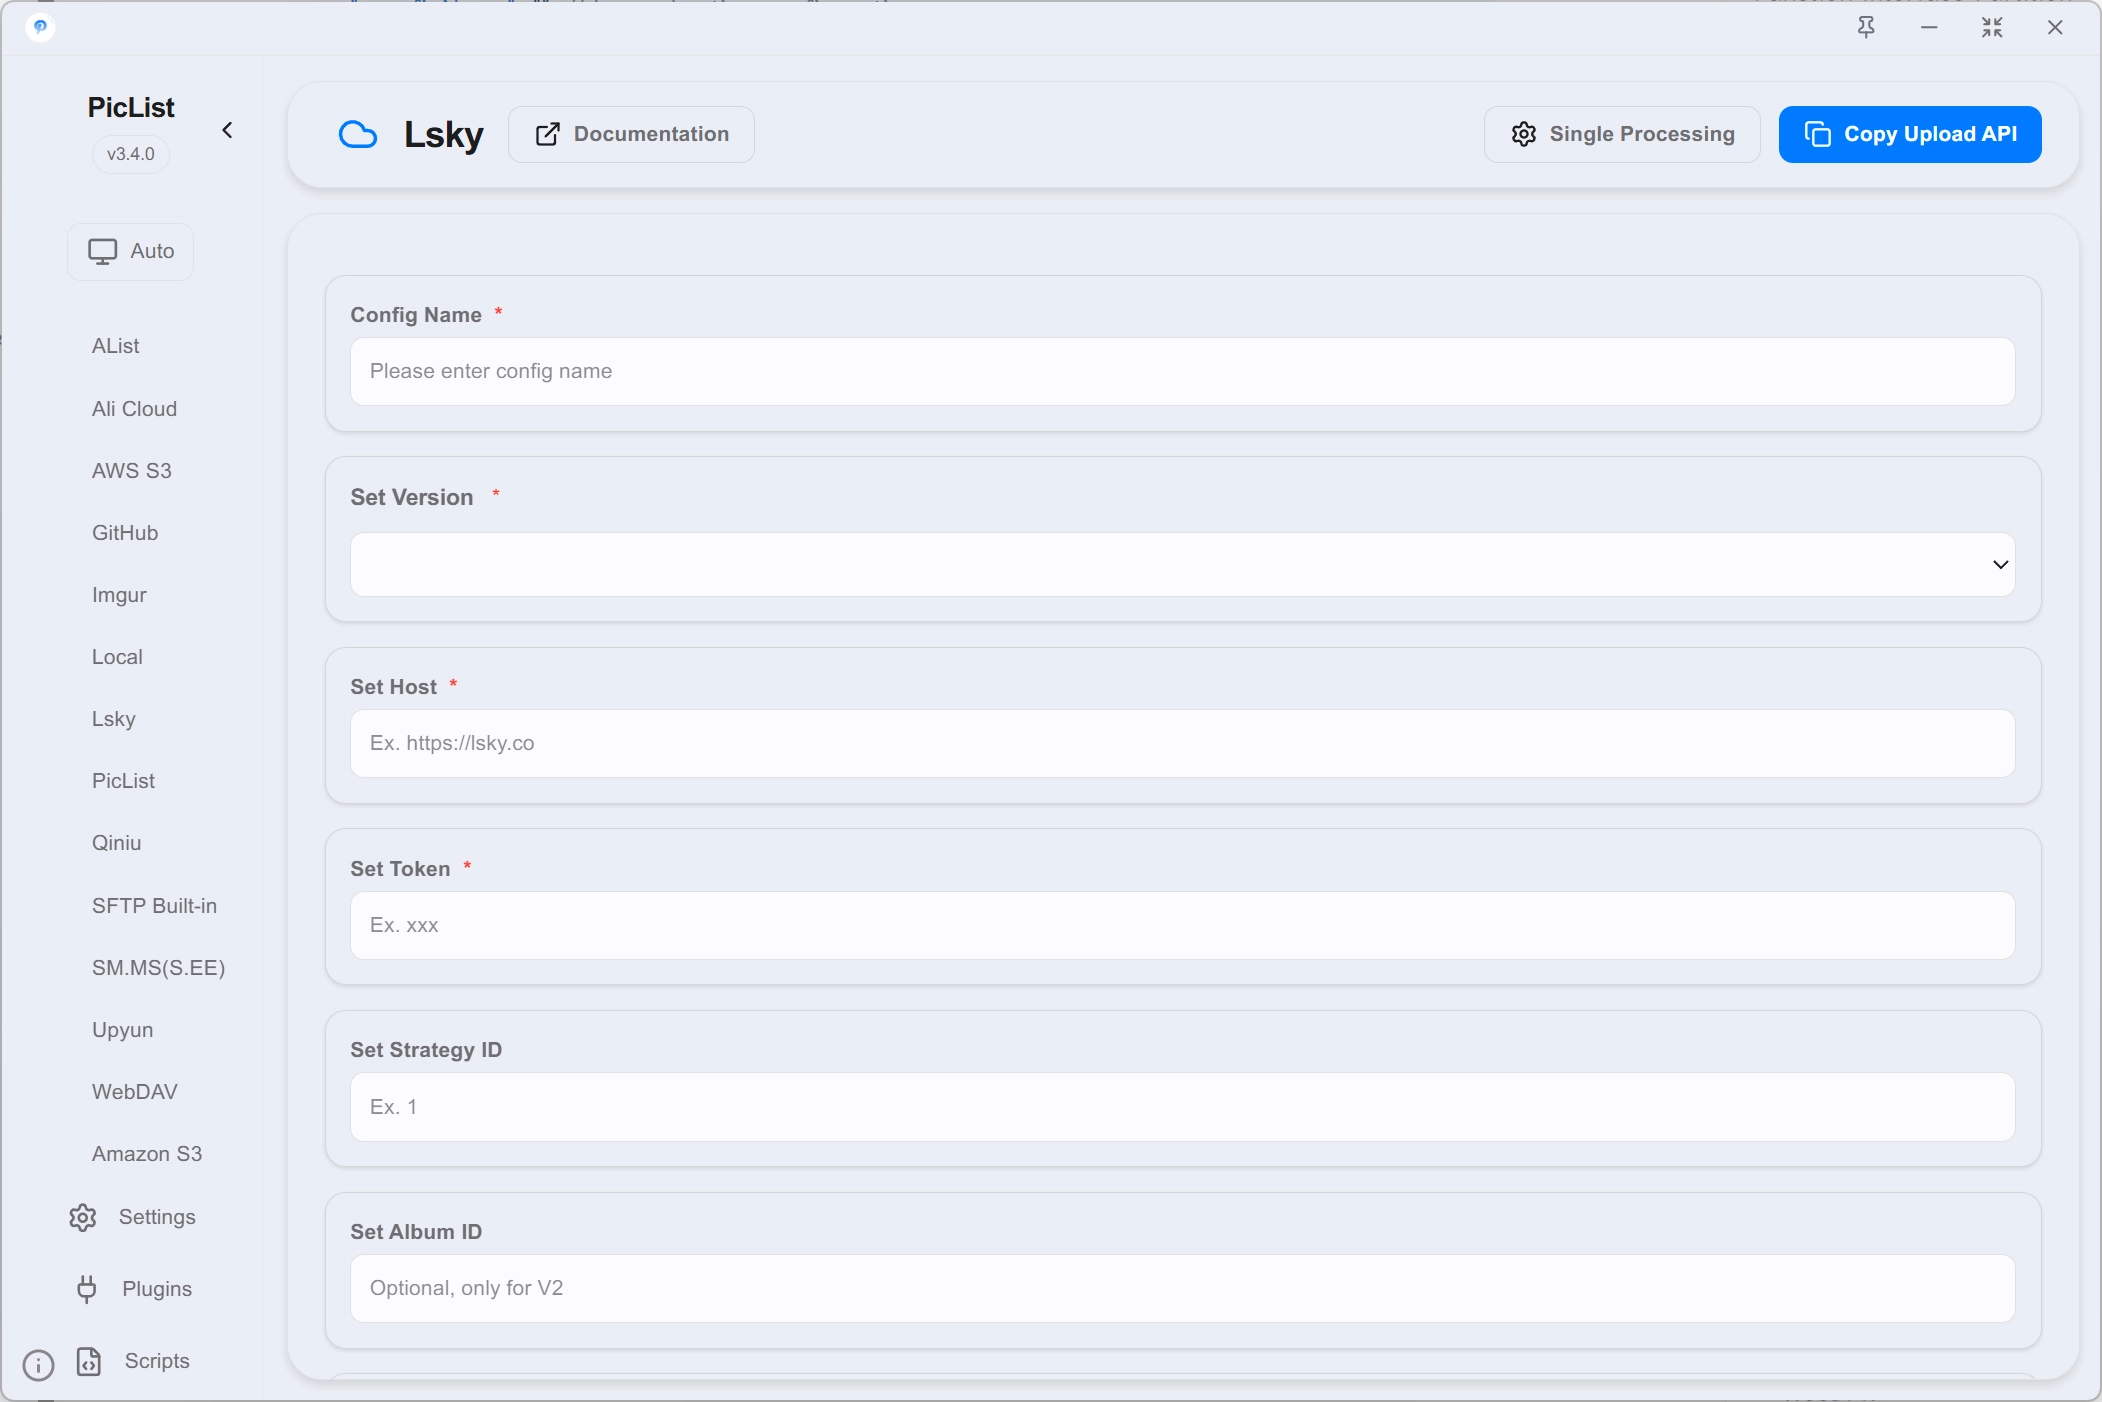
Description
host
The address of the server, for example https://www.lsky.pro.
version
Server version, currently supports V1 and V2. Note that only V2 version supports cloud deletion.
token
When filling in the token, please note that it needs to start with Bearer, for example Bearer 123456789.
To view the token of V1 version, please visit the personal settings page.
Using the cURL command to get the V2 version token:
curl --location --request POST 'https://{host}/api/v1/tokens' \
--form 'email="{email}"' \
--form 'password="{password}"'
Replace {host}, {email}, and {password} with your own information, and then execute the command to get the token.
strategyId
If you are a user who uses the default storage strategy for V1 or V2, please leave it blank. V2 users can view it on the personal settings page.
albumId
Album ID is used to specify which album the picture is uploaded to. If not filled in, it will be uploaded to the default album.
Permission
Permission is used to set the permission of the picture, optional parameter, default is private.
Built-in AWS S3
Built-in AWS S3 image hosting service, which can support various object storage compatible with S3 protocol, such as amazon s3, cloudflare R2, backblaze B2, minio, etc.
The domestic cloud service providers also provide S3 compatible object storage, such as Alibaba Cloud's OSS, Tencent Cloud's COS, Huawei Cloud's OBS, etc.
Different S3 object storage may have different configuration items, please refer to the official documentation of each object storage.
Configuration
{
  "_configName": "", // configuration name
  "accessKeyID": "", // accessKeyID
  "secretAccessKey": "", // secretAccessKey
  "bucketName": "", // bucketName
  "uploadPath": "", // uploadPath
  "region": "", // region
  "endpoint": "", // endpoint
  "proxy": "", // http proxy
  "urlPrefix": "", // custom domain
  "pathStyleAccess": boolean, // whether to enable S3 Path Style
  "rejectUnauthorized": boolean, // whether to reject unauthorized SSL certificates
  "acl": "", // permission
  "disableBucketPrefixToURL": boolean, // whether to disable bucket prefix
}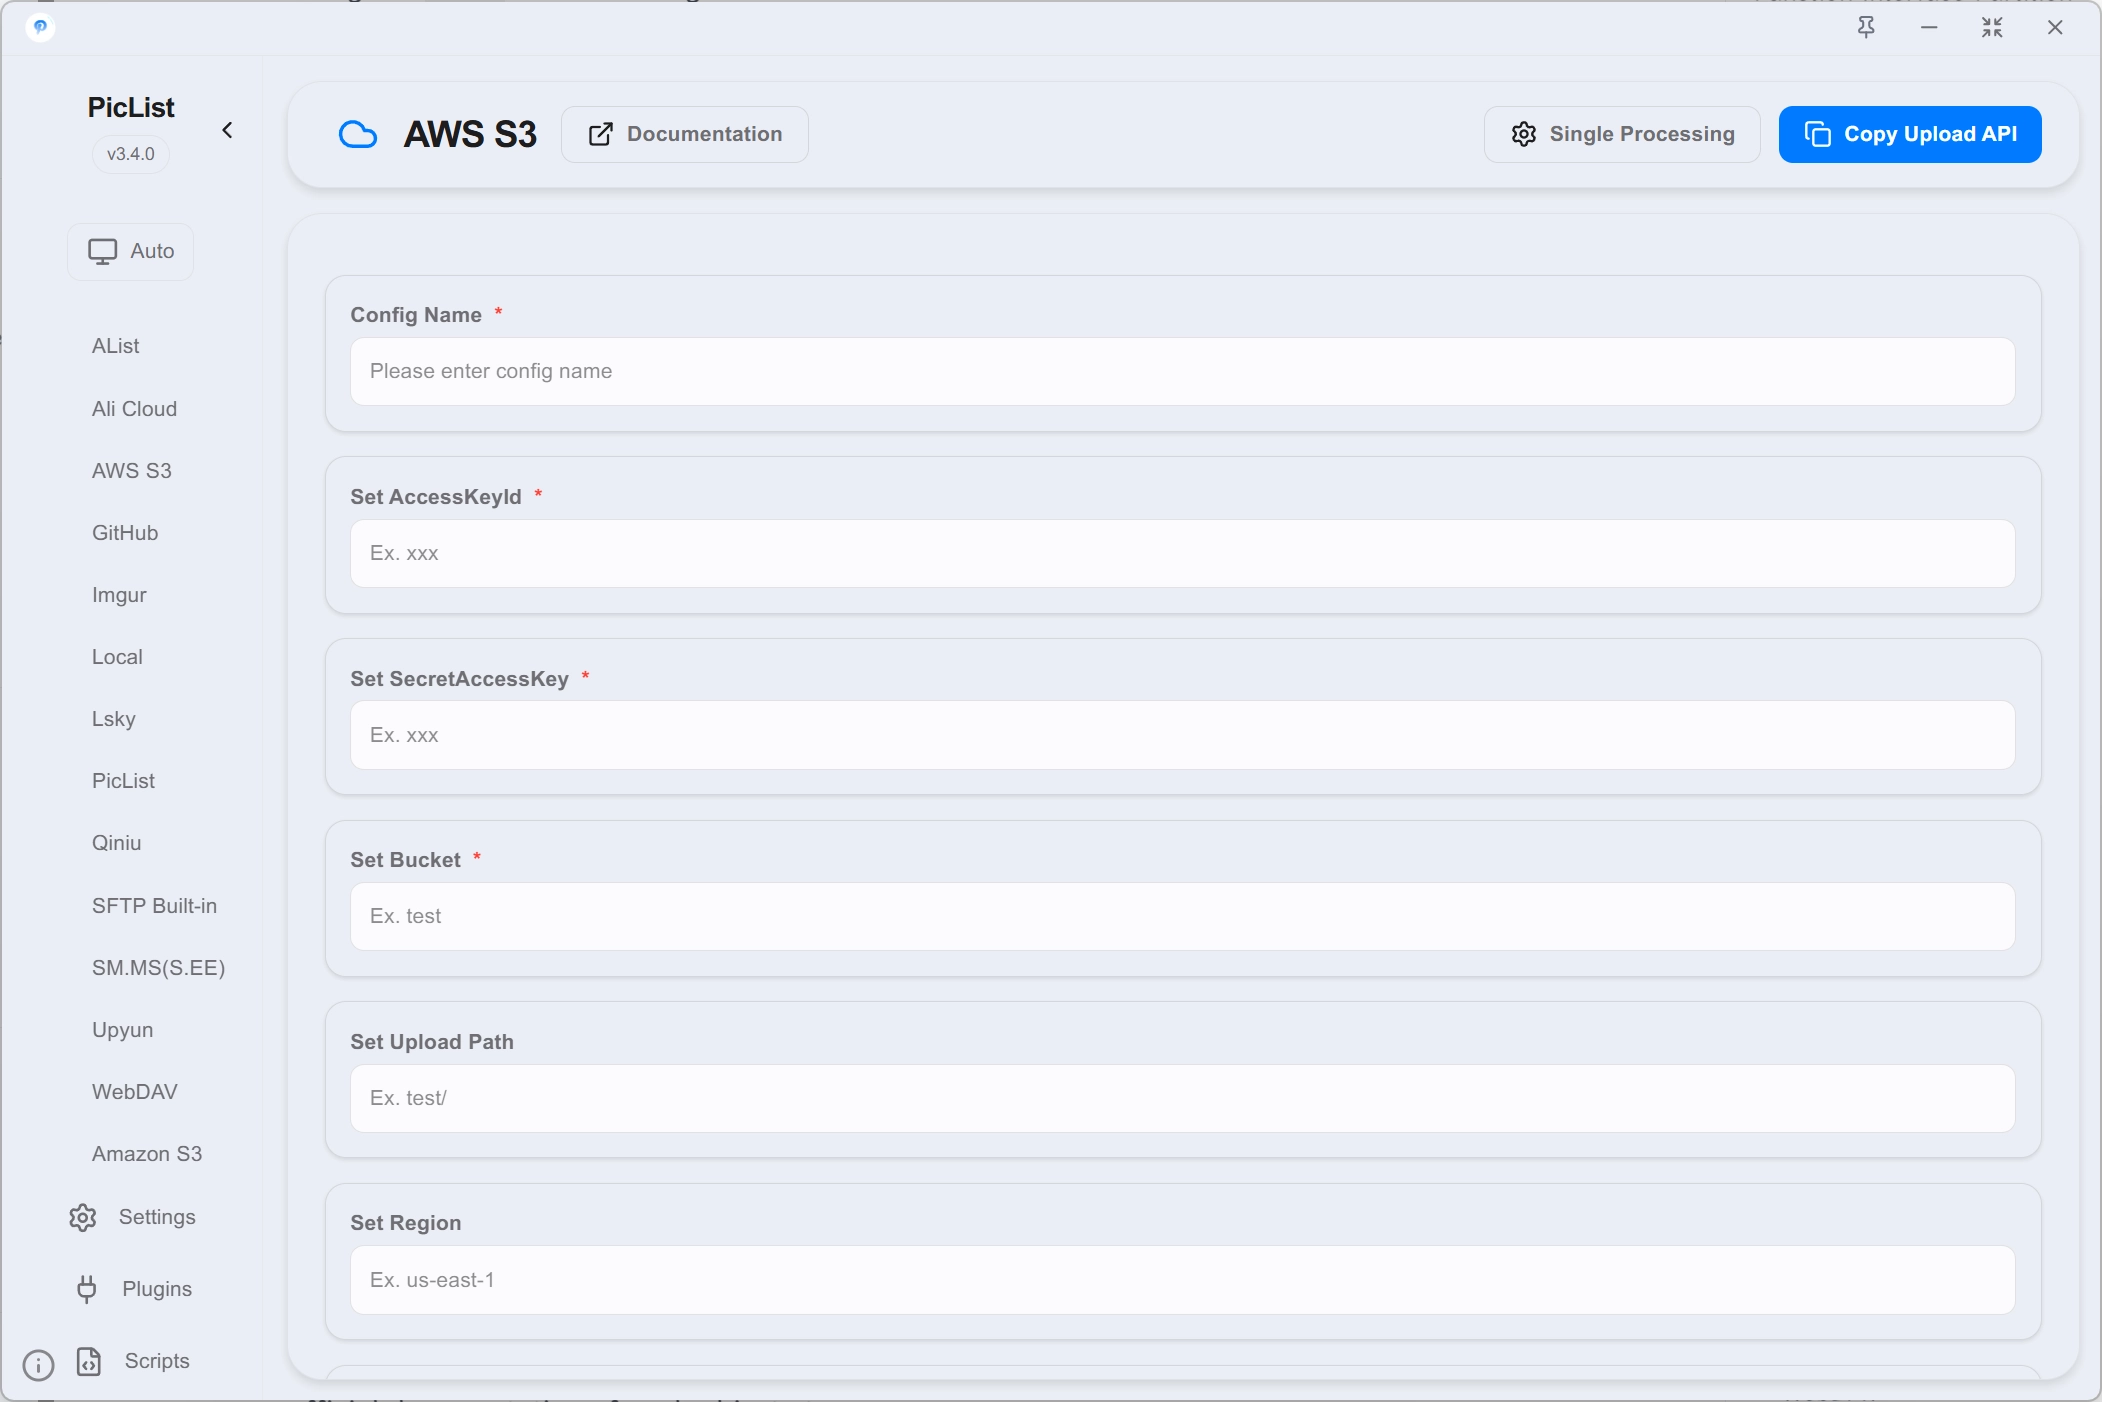
Description
accessKeyID & secretAccessKey
accessKeyID and secretAccessKey is the API access key used to access S3 object storage. Please refer to the official documentation of your object storage to obtain it.
bucketName
Bucket name is the name of the bucket you created in the object storage.
uploadPath
Upload path is an optional item. If not filled in, it will be stored in the root directory of the bucket by default.
region
Please fill in according to the actual situation, for example us-east-1, if it is cloudflare R2, please fill in auto.
endpoint
Please fill in according to the actual situation, for example https://s3.us-east-1.amazonaws.com.
proxy
If your object storage cannot be accessed directly, please configure the proxy yourself.
urlPrefix
urlPrefix is an optional item. If not filled in, the terminal node above will be used when copying links, previewing images, and other operations.
pathStyleAccess
Optional parameter, default is false. When using minio, this option needs to be enabled.
If not enabled, the URL format is https://{bucketName}.{endpoint}/{uploadPath}. If enabled, the URL format is https://{endpoint}/{bucketName}/{uploadPath}.
rejectUnauthorized
Optional parameter, default is false. If your object storage uses a self-signed certificate, you need to set it to false.
acl
Default is public-read, optional parameter.
disableBucketPrefixToURL
When pathStyleAccess is enabled, whether to disable adding the bucket prefix to the final generated URL.
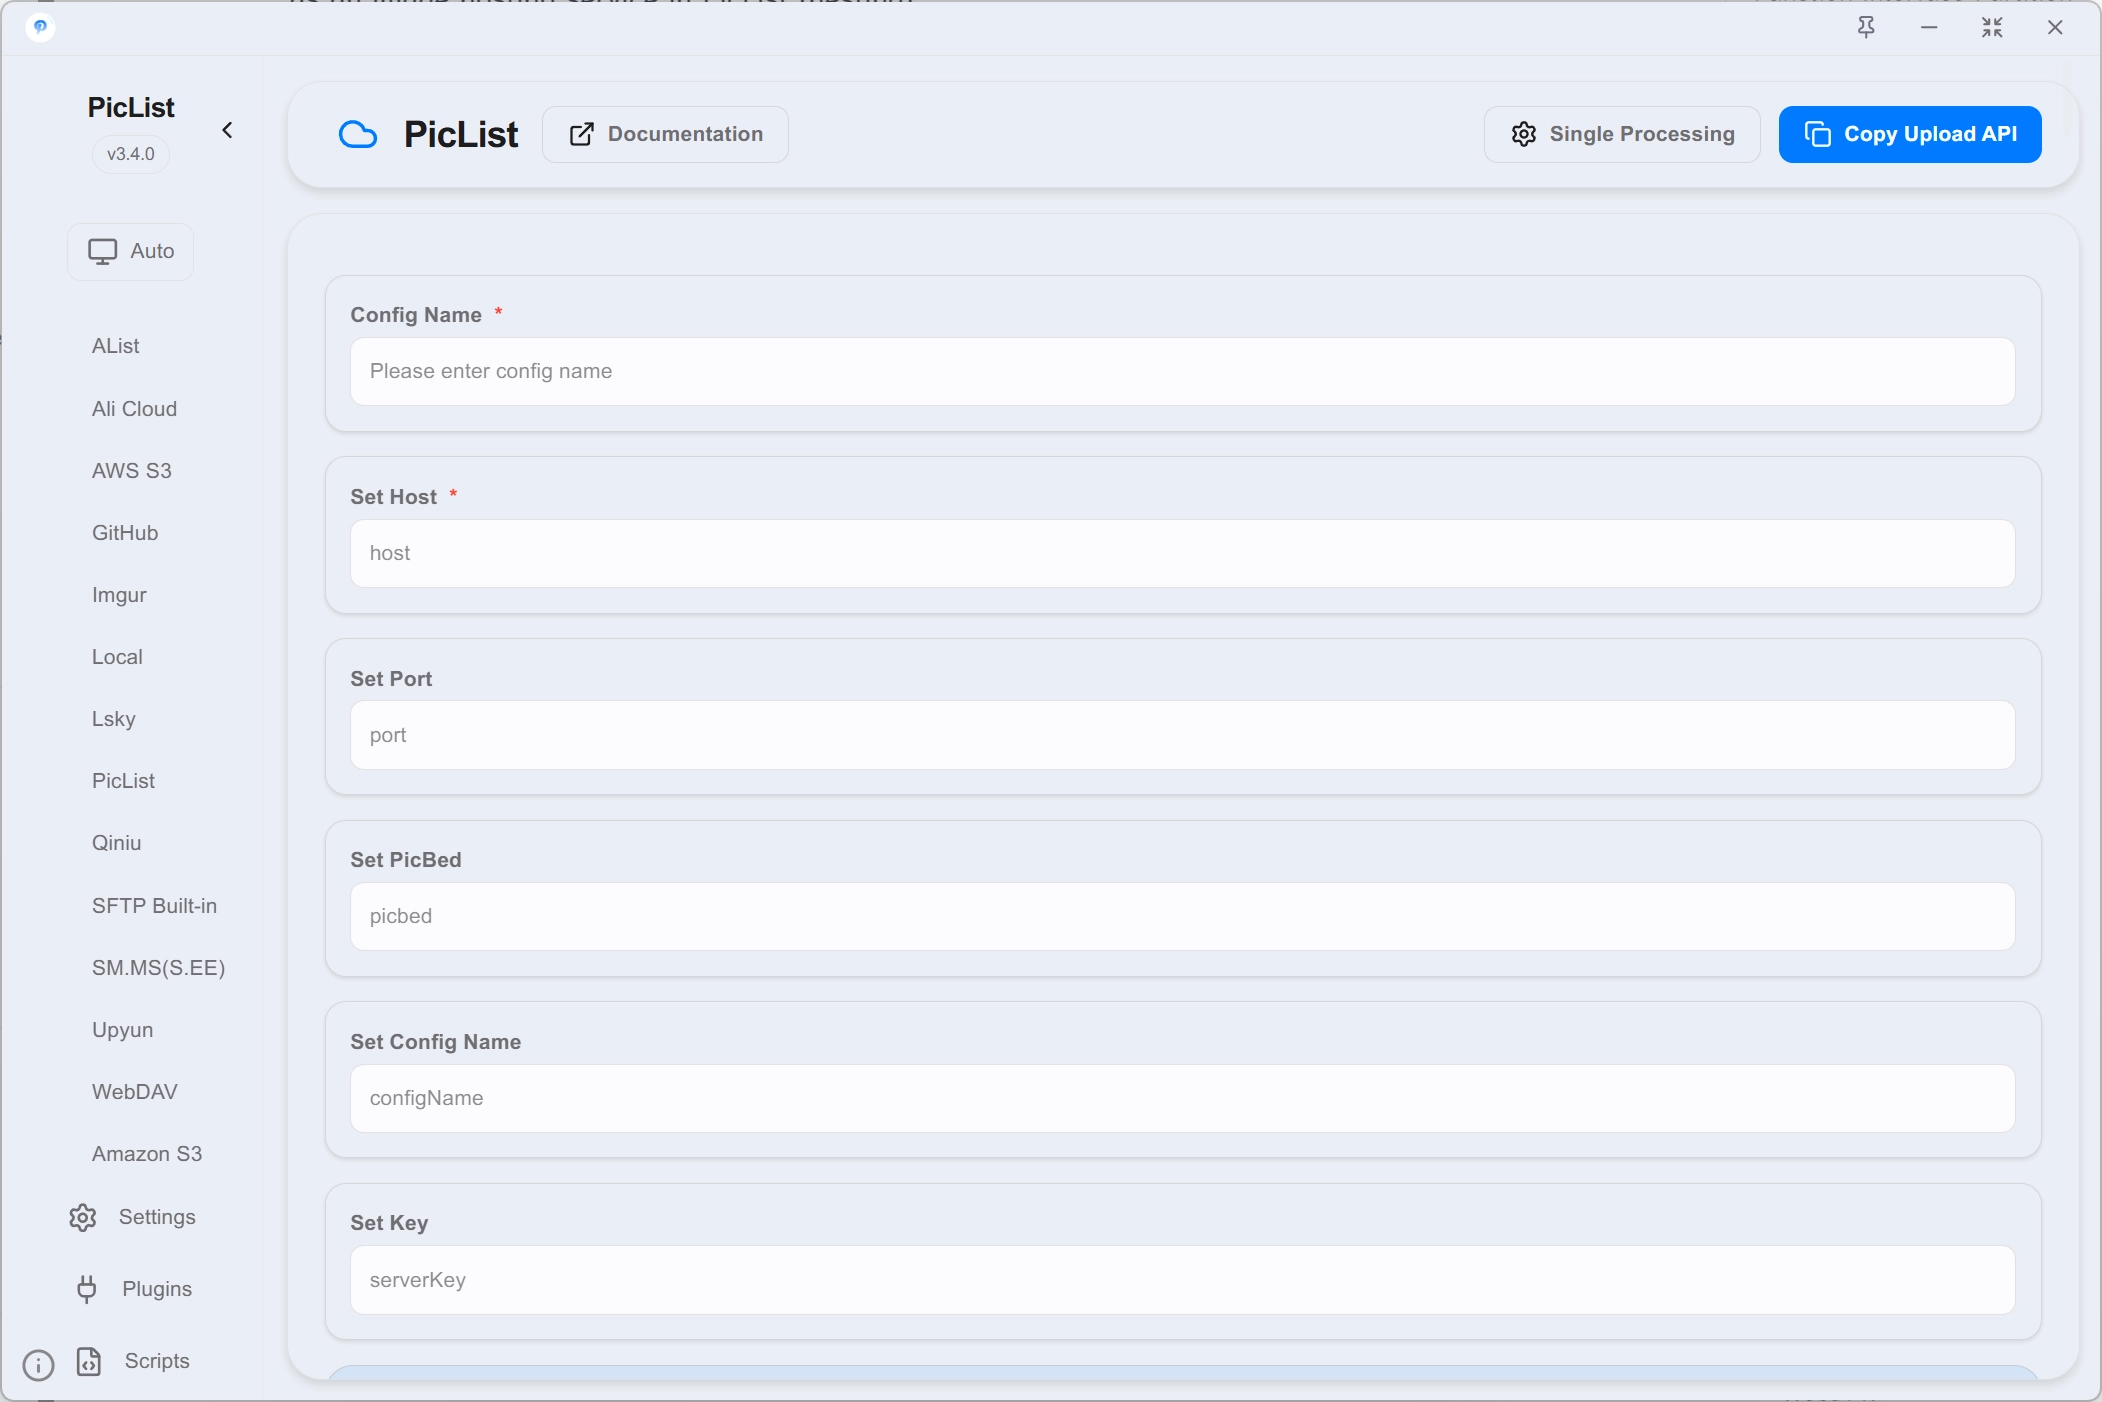
PicList
As PicList and PicList-core both support enabling the built-in server, PicList can be used as an image hosting service in PicList (nesting).
Configuration
{
  "_configName": "", // configuration name
  "host": "", // server address
  "port": number, // server port
  "picbed": "", // image hosting name
  "configName": "", // image hosting configuration name
  "serverKey": "", // server key
}
Description
host
The server address where PicList or PicList-core is running, which can be an IP address or a domain name.
port
The server port where PicList or PicList-core is running.
picbed
The name of the image hosting service to be uploaded to, for example github.
configName
Configuration name of the image hosting service to be uploaded to, for example github.
serverKey
Server key set to verify the request.
Other image hosting services
PicList is compatible with PicGo's plugin ecosystem. Please use plugins for other image hosting services.
PicList plans to integrate more image hosting services into the built-in functionality in the future, so stay tuned.
General Settings
System Settings
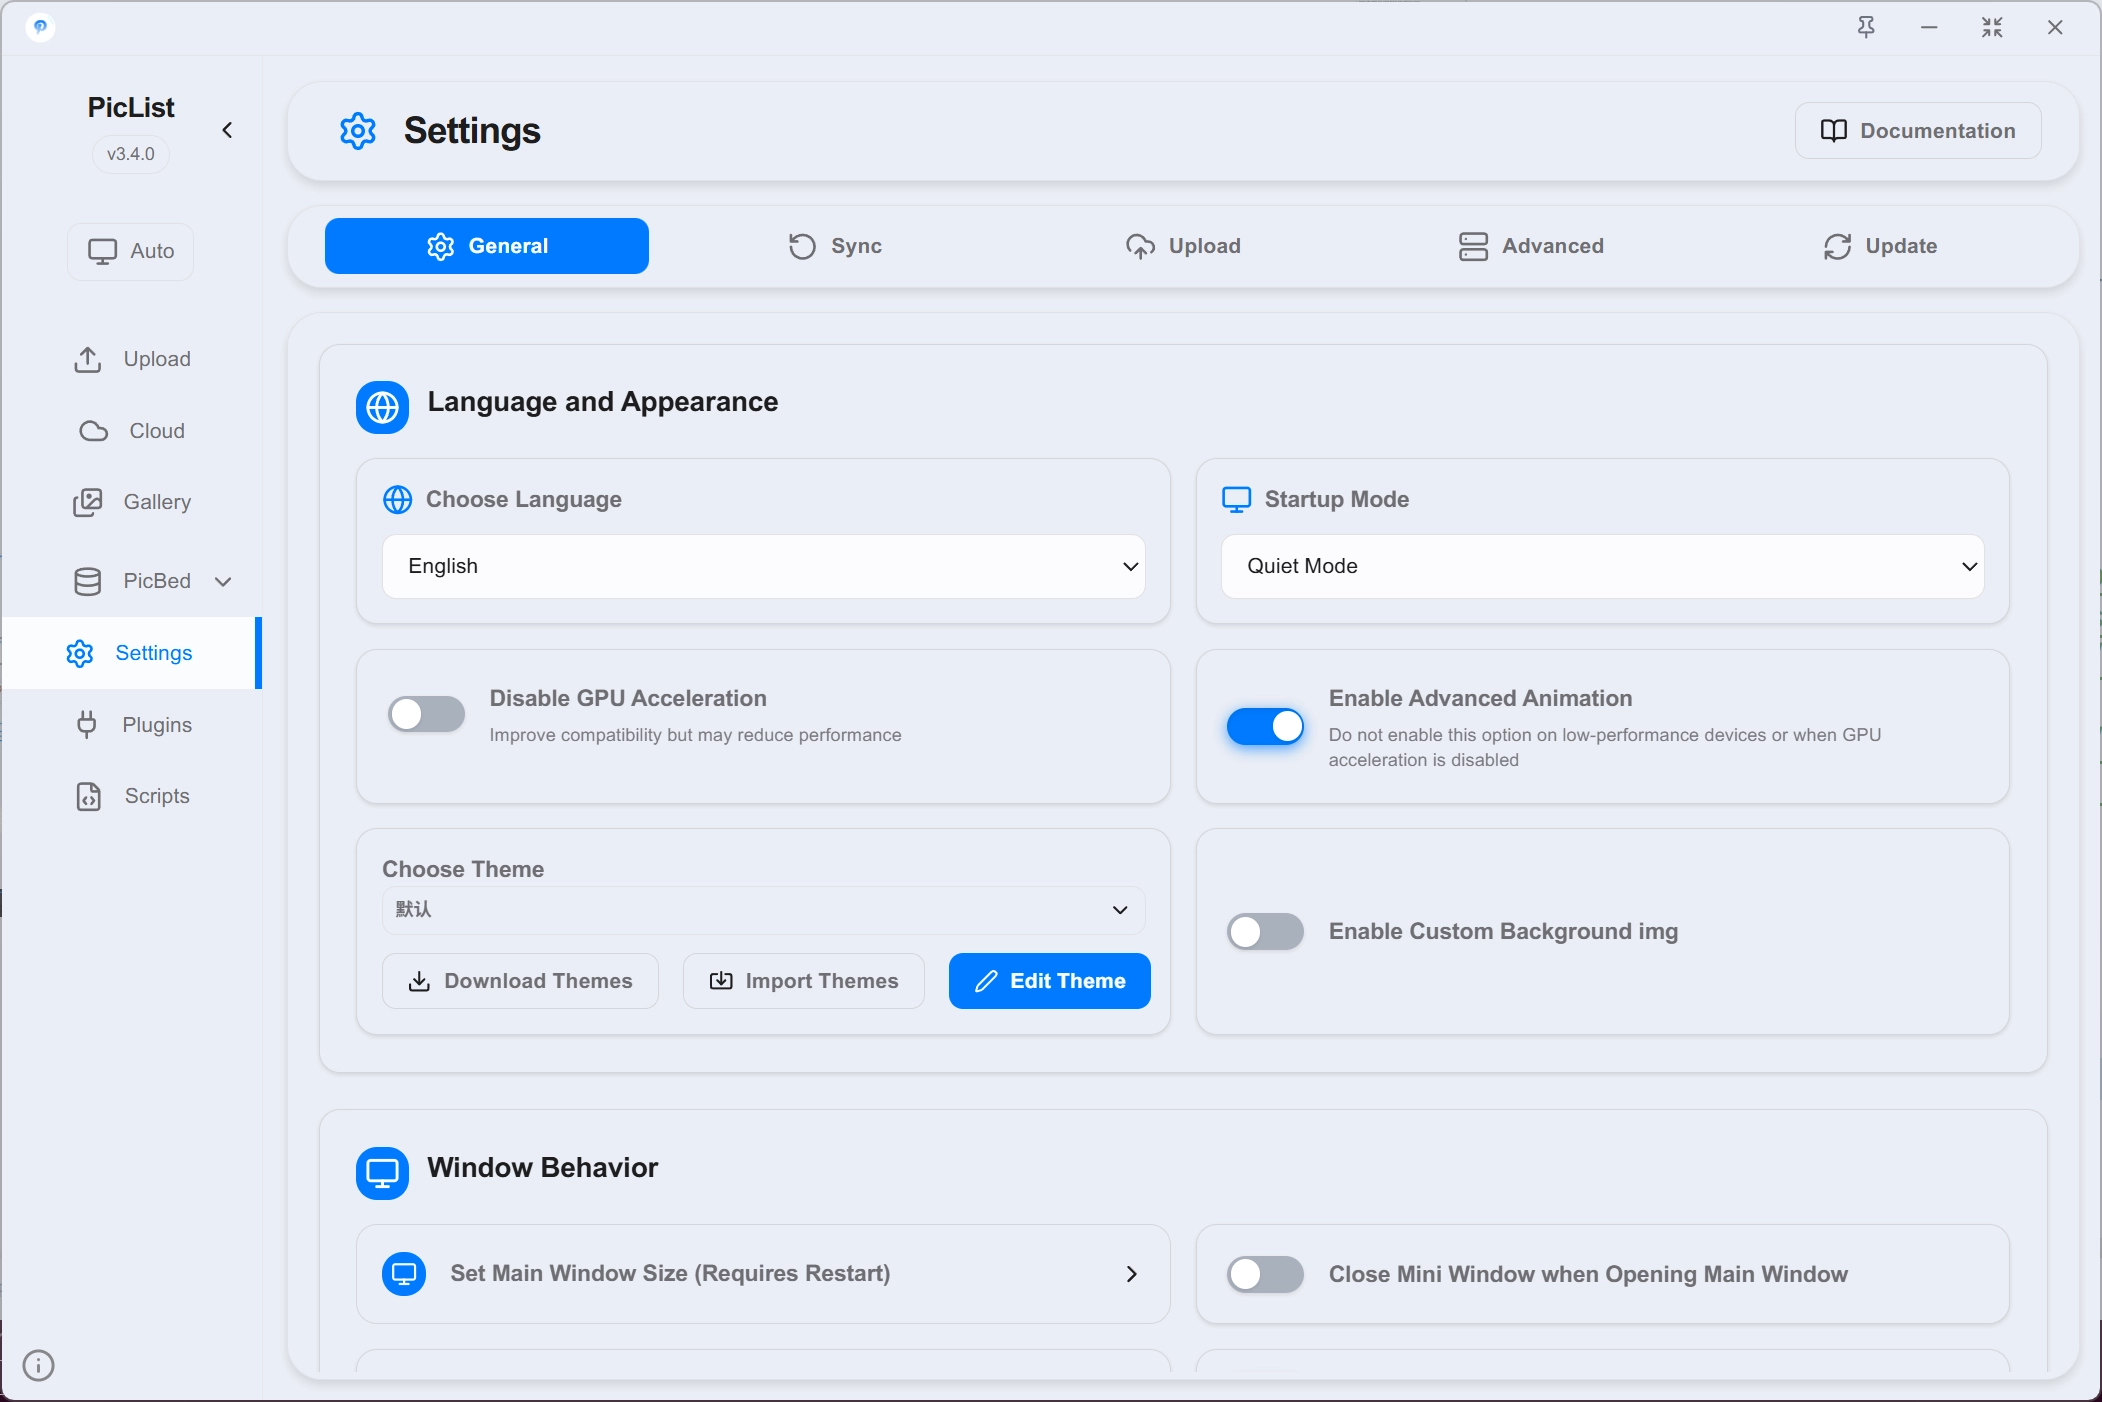
Language
PicList currently supports three languages: Simplified Chinese, Traditional Chinese, and English. You can choose your favorite language here.
Startup mode
PicList supports startup mode selection, of which Windows and Linux systems support the following startup modes:
- Silent startup: PicList will run in the background without displaying a window, but will display an icon in the system tray.
- Mini window: PicList will display an icon in the system tray and automatically display the mini window.
- Main window: PicList will display an icon in the system tray and automatically display the main window.
Mac systems support the following startup modes:
- Silent startup: PicList will run in the background without displaying a window, but will display an icon in the top bar.
- Hide top bar: PicList will not display an icon in the top bar, but will display an icon in the Dock bar.
- Main window: PicList will display an icon in the top bar and automatically display the main window.
Note that PicList also supports turning on or off the dock bar icon, but does not allow turning off both the top bar and dock bar icons at the same time.
Disable GPU Acceleration
You can disable GPU acceleration to avoid some graphics driver issues.
Enable Advanced Animation Effects
When enabled, PicList will use more advanced animation effects, making the interface smoother and more visually appealing. This feature cannot be enabled when GPU acceleration is disabled.
Custom Theme System 3.3.0+
From version v3.3.0, PicList supports custom theme system. You can fetch themes from the PicList ThemeHub repository.
The theme files are stored in the themes folder under the PicList configuration directory.
PicList comes with a variety of built-in themes, including:
- Default Theme
- Adwaita
- Bilibili
- Catppuccin
- CoolApk
- Cupertino
- GoldenSand
- Windows 11
- Anime
- purple
- Huorong
Default main window size
You can set the default size of the main window when it starts, the default value is 1200x800.
If you choose Original PicGo size, it will be the same as PicGo, and the size when it starts will be 800x450.
Mini Window Always on Top
If you choose to enable this option, the mini window will always be displayed on top of other windows.
Custom mini window icon
You can use your favorite icon to replace the icon of the mini window.
Startup on boot
Choose whether to start up on boot.
Customize shortcuts
The default upload shortcut is Cmd+Alt+U [Mac] or Ctrl+Alt+U [Windows].
Click on PicList settings in the sidebar to modify the shortcuts. This will open the shortcut panel, where you can choose to enable or disable shortcuts:
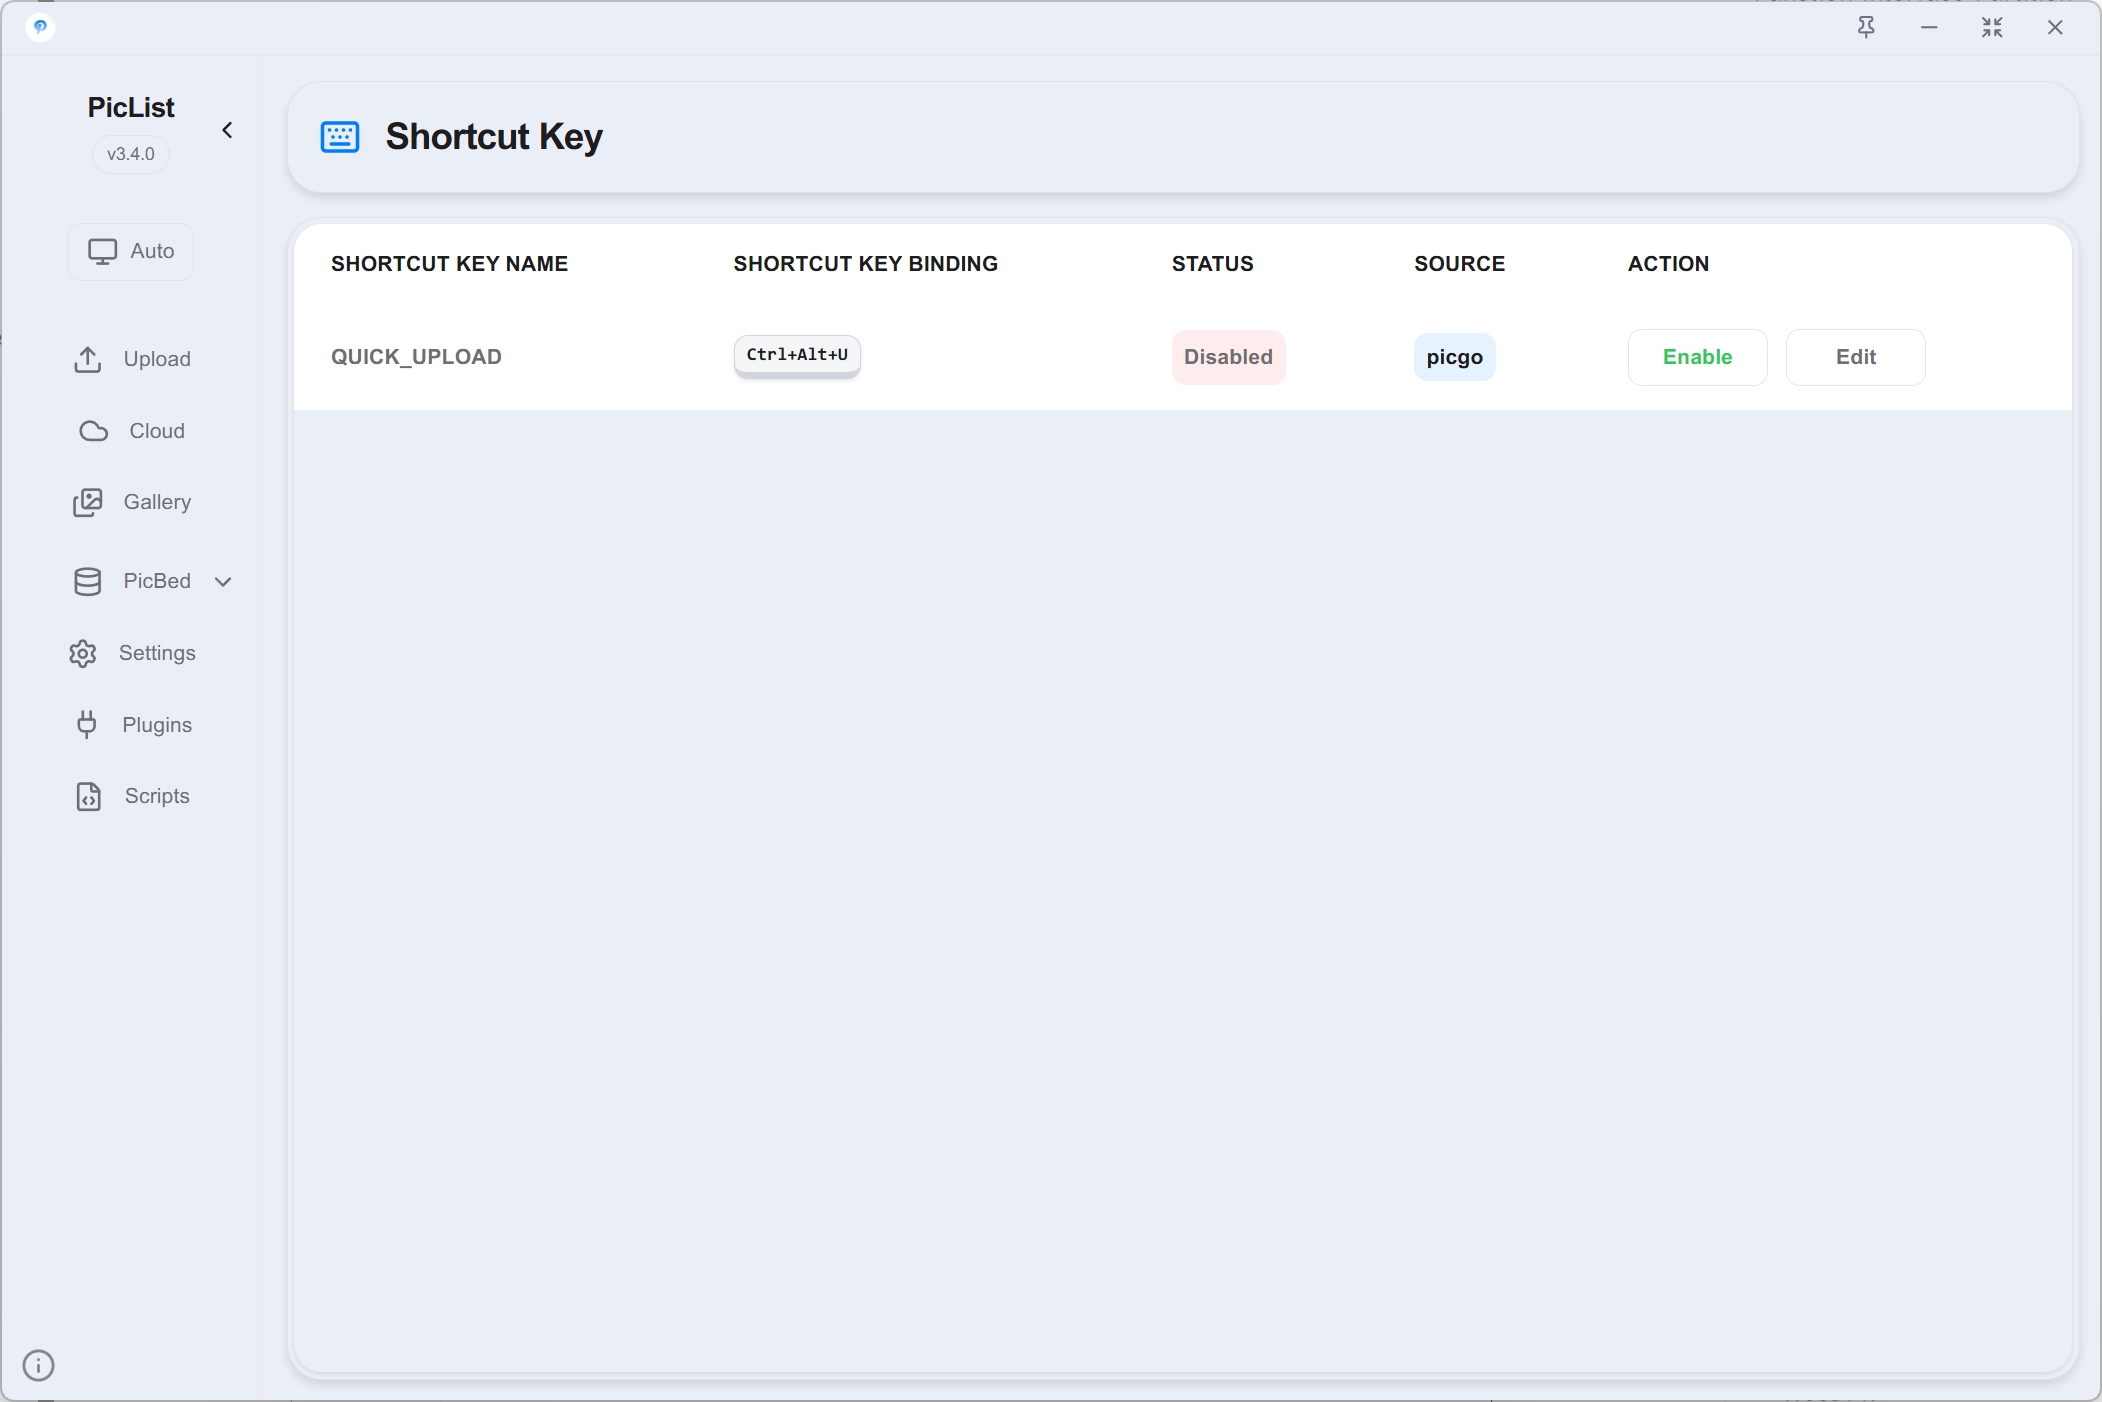
Click "Edit", then click the input box in the opened dialog, and press the shortcut keys you want (it can also be a combination of keys). Then click OK to save (otherwise it will not take effect!).
Plugins can also add their own shortcuts, and the added shortcuts will be displayed in the shortcut panel.
Sync and Configurations
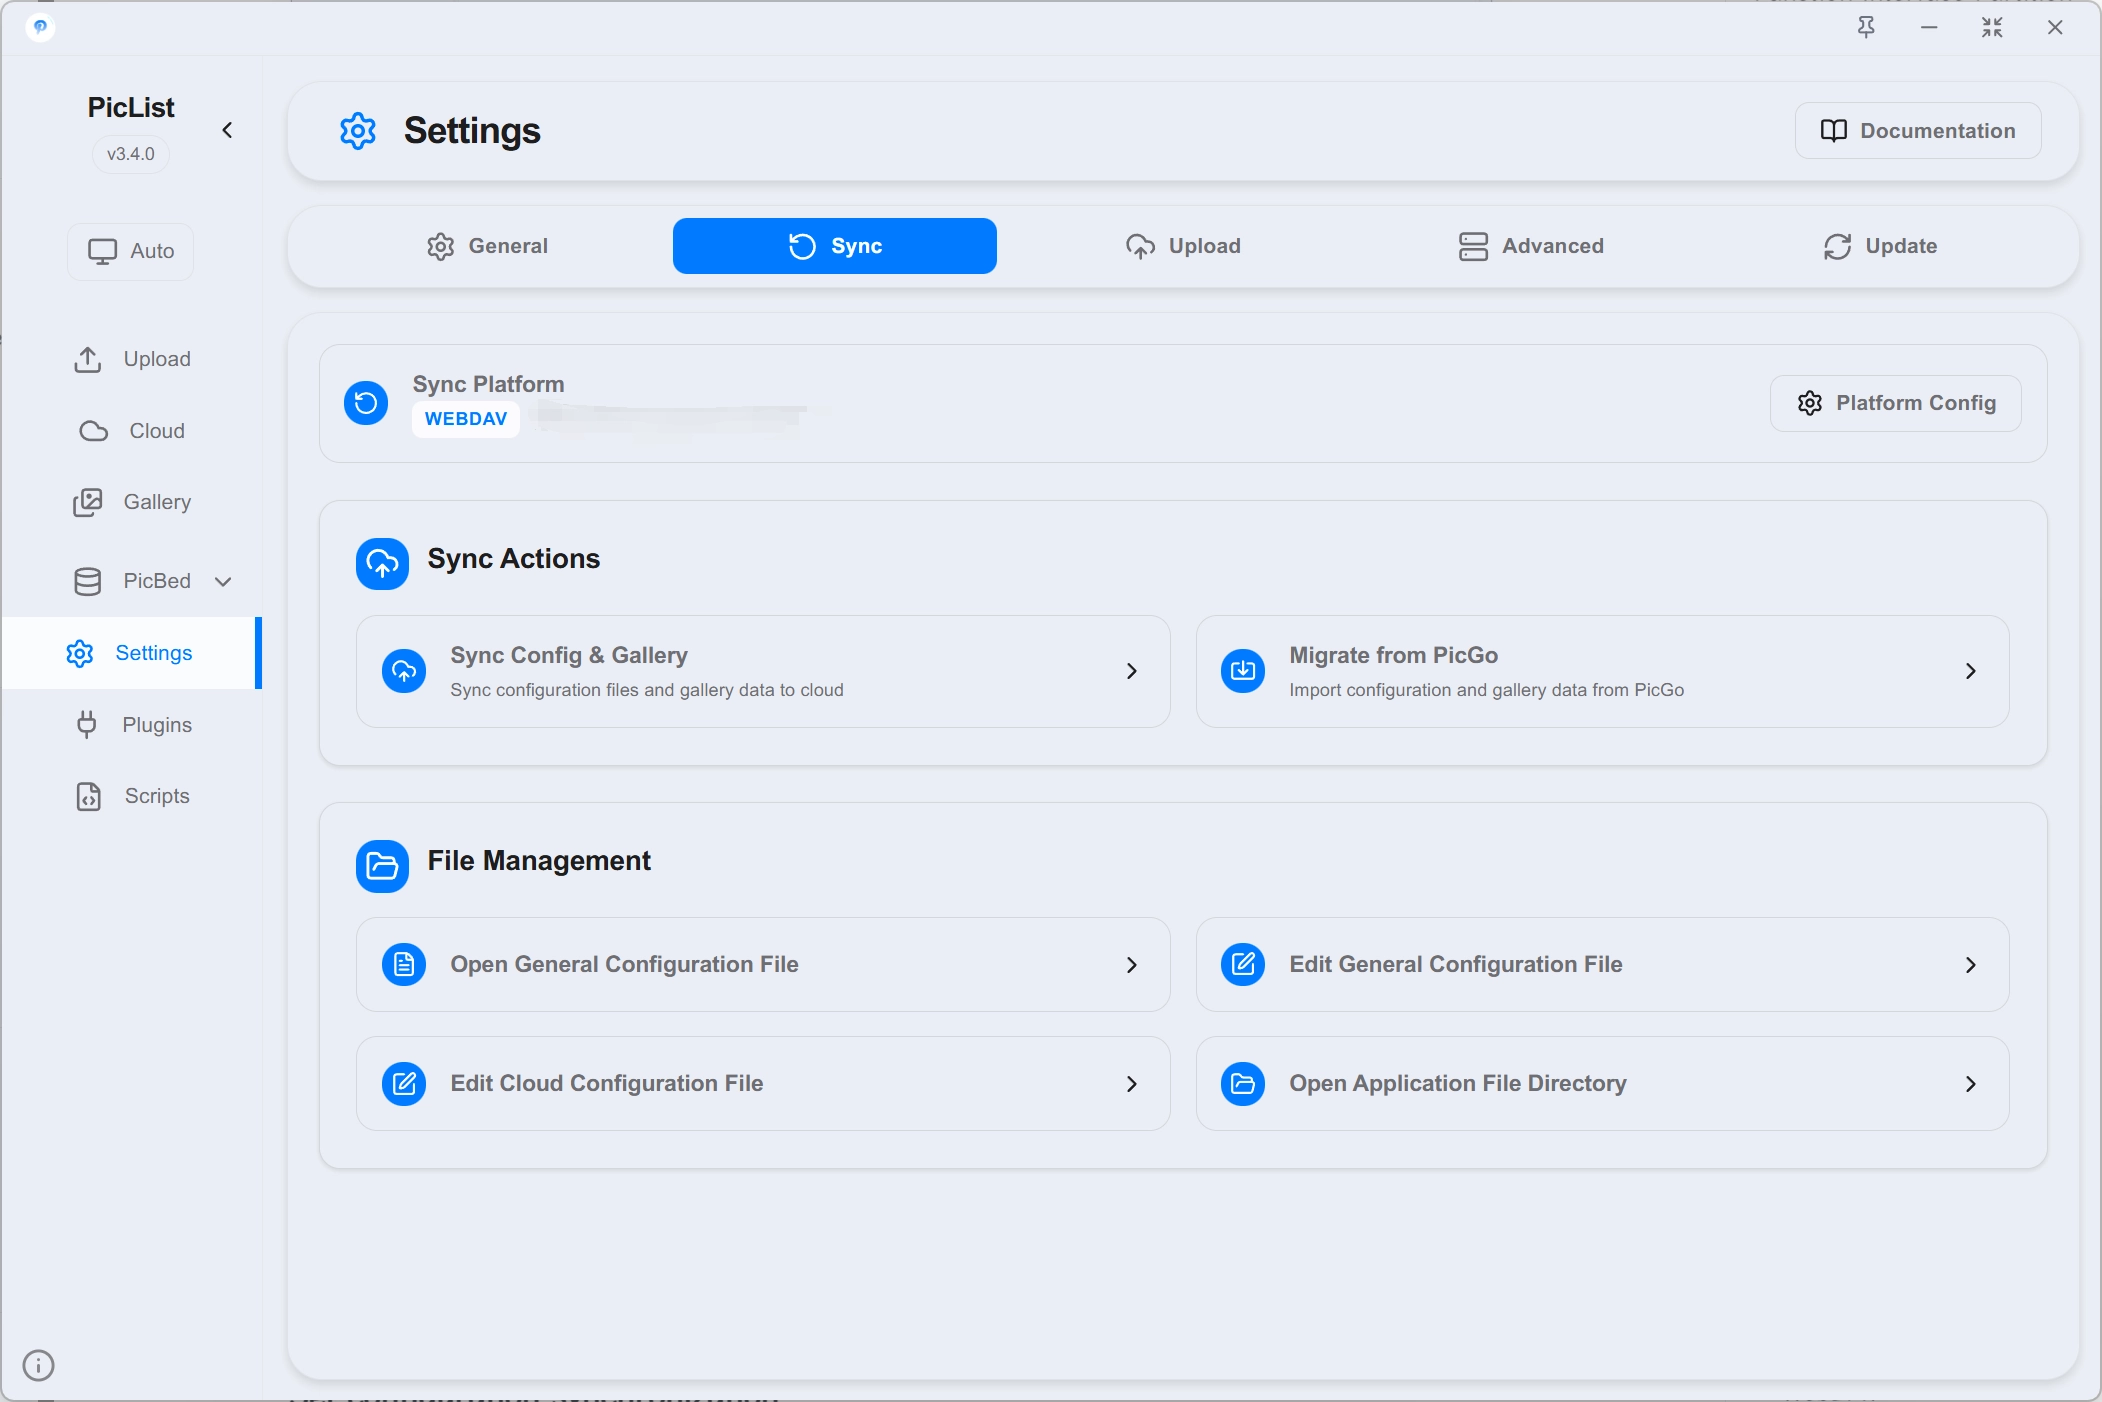
Set configuration synchronization
Warning
When using Gitee, be sure to open Allow repository files to be edited online in Repository page-Management-Function Settings, otherwise an error will be reported.
You can set the synchronization configuration here. Currently, PicList supports using Github, Gitea, Gitee or WebDaV for configuration synchronization.
Files that need to be synchronized include data.json, data.bak.json that save the general configuration, and manage.json, manage.bak.json that save the management interface configuration, also the gallery configuration file piclist.db and piclist.db.bak.
Parameters that need to be set include:
{
  "type": "github", // github/gitee/gitea
  "username": "", // username
  "repo": "", // repository name
  "branch": "", // branch name
  "token": "", // token
  "proxy": "", // proxy
  "webdavEndpoint": "", // WebDAV Endpoint
  "webdavUsername": "", // WebDAV Username
  "webdavPassword": "", // WebDAV Password
  "webdavAuthType": "", // WebDAV auth type
  "webdavSslEnabled": "", // WebDAV enable ssl
  "webdavSavePath": "" // WebDAV save path
}
Upload and download configuration files 1.8.4+
After setting the synchronization configuration, you can manually upload or download the configuration file here.
Currently, PicList does not support automatic synchronization.
Migration from PicGo 1.5.0+
If you have used PicGo before, you can migrate the PicGo configuration to PicList here. The imported configuration includes the data.json file and the album file.
Open configuration file
You can click to open the data.json file. Please do not modify this file at will, otherwise PicList may not work properly.
Upload Settings
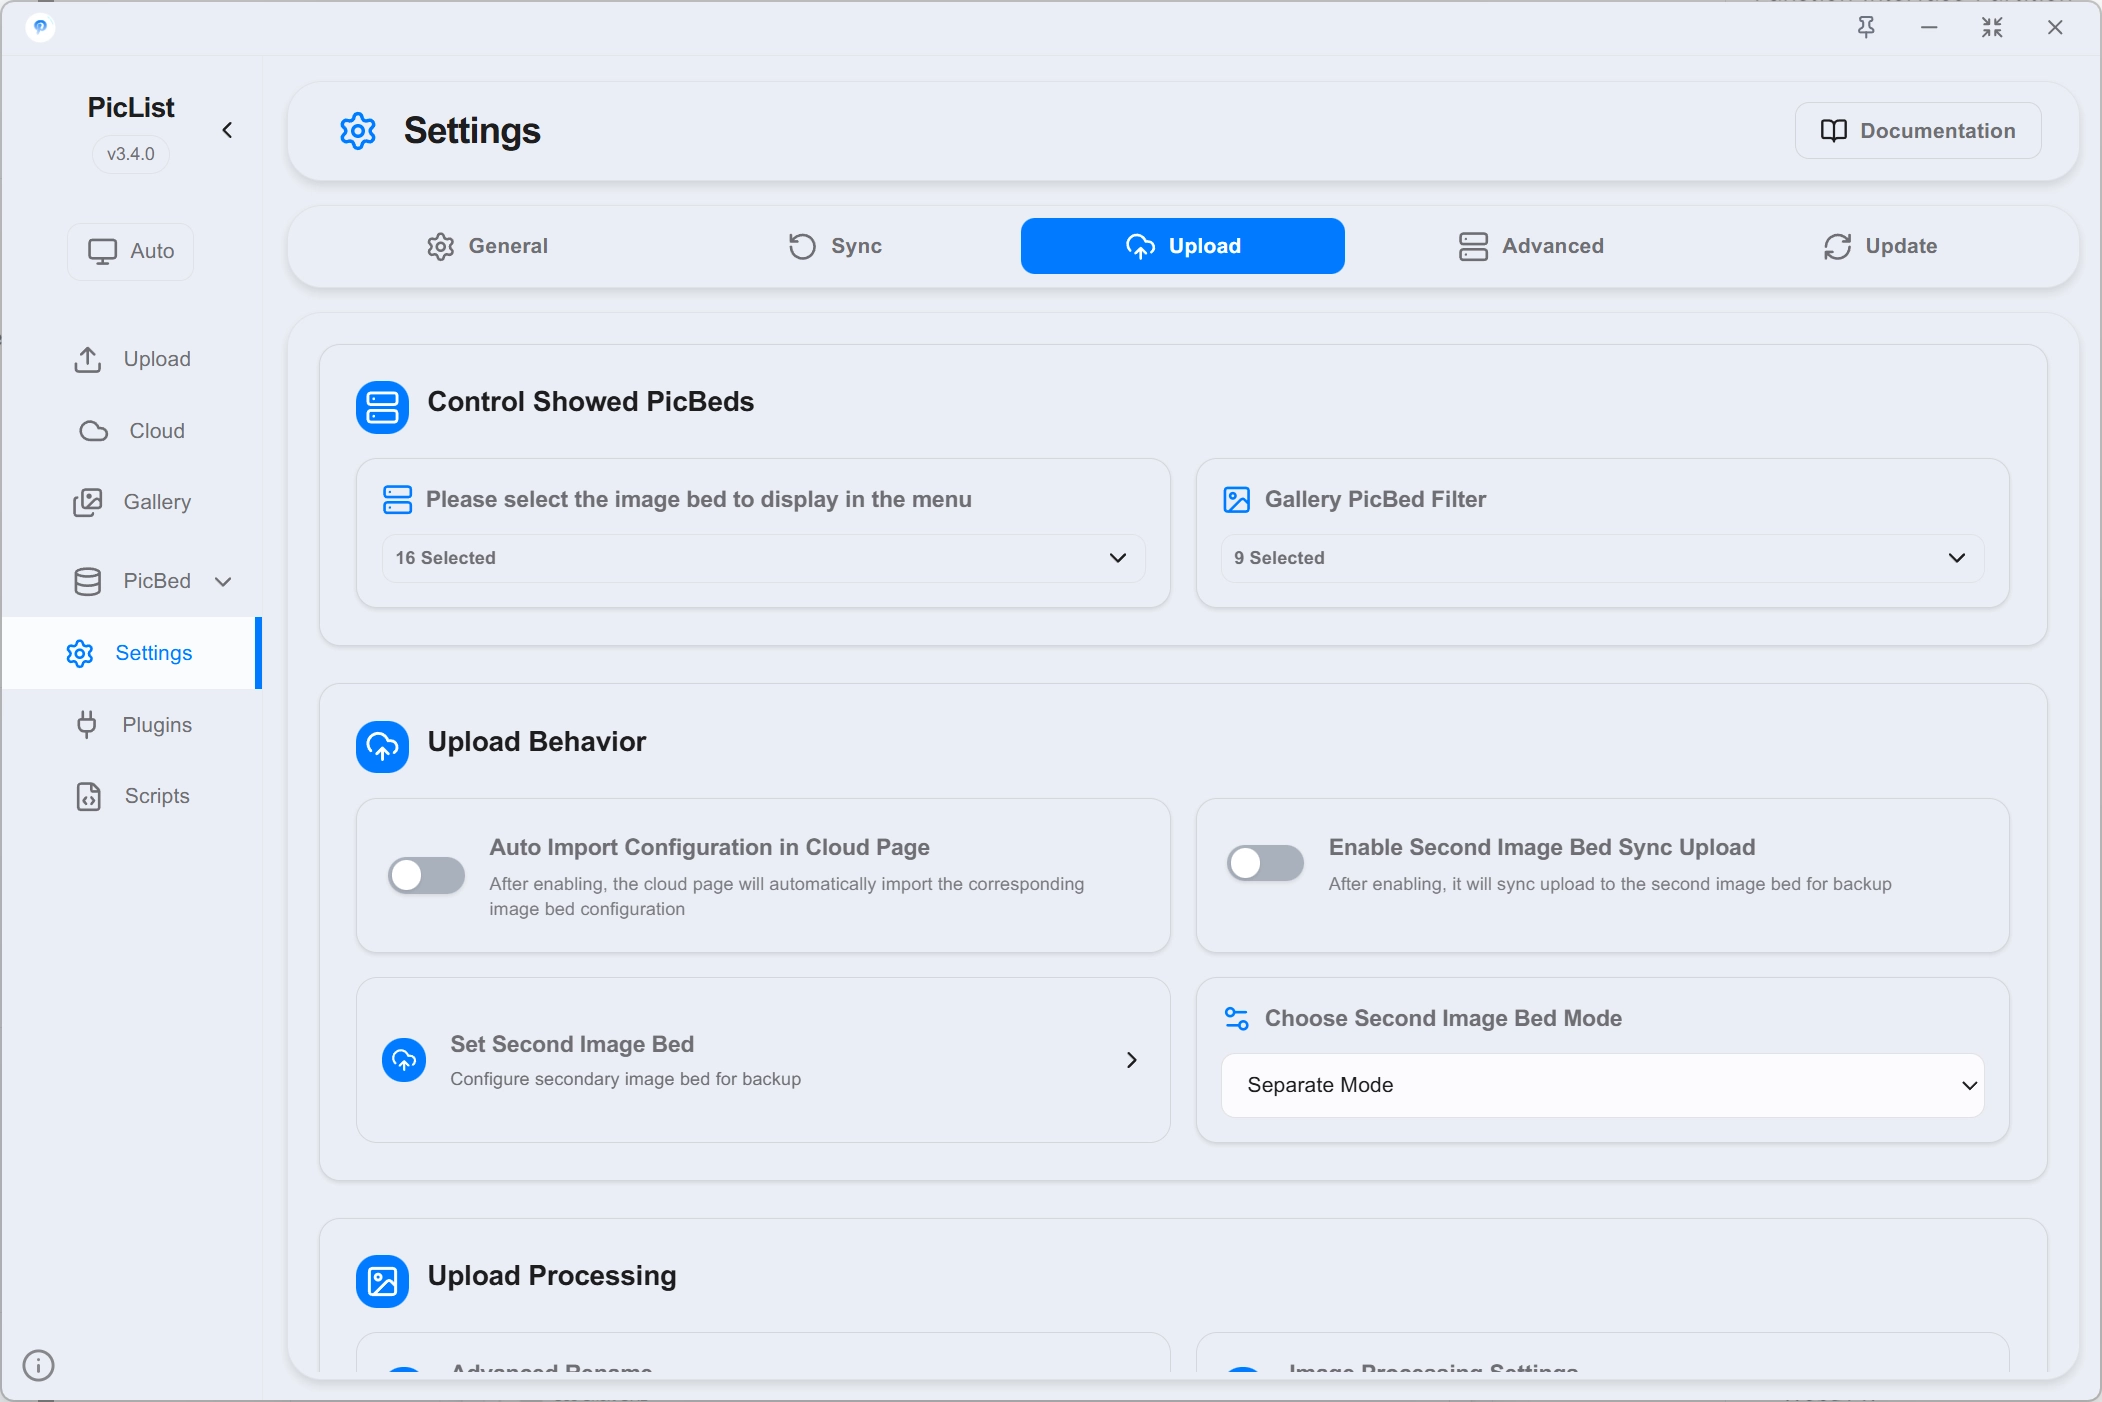
Auto import configuration on management page
After turning on, PicList will automatically import the image hosting information that has been configured in the image hosting every time you open the management page.
Second image hosting related settings
PicList supports configuring a second image hosting, which can be selected for uploading images. The working mode is divided into independent mode and backup mode. In independent mode, each image hosting will apply its own image processing rules and renaming rules. In backup mode, the first image hosting's rules will be used for processing.
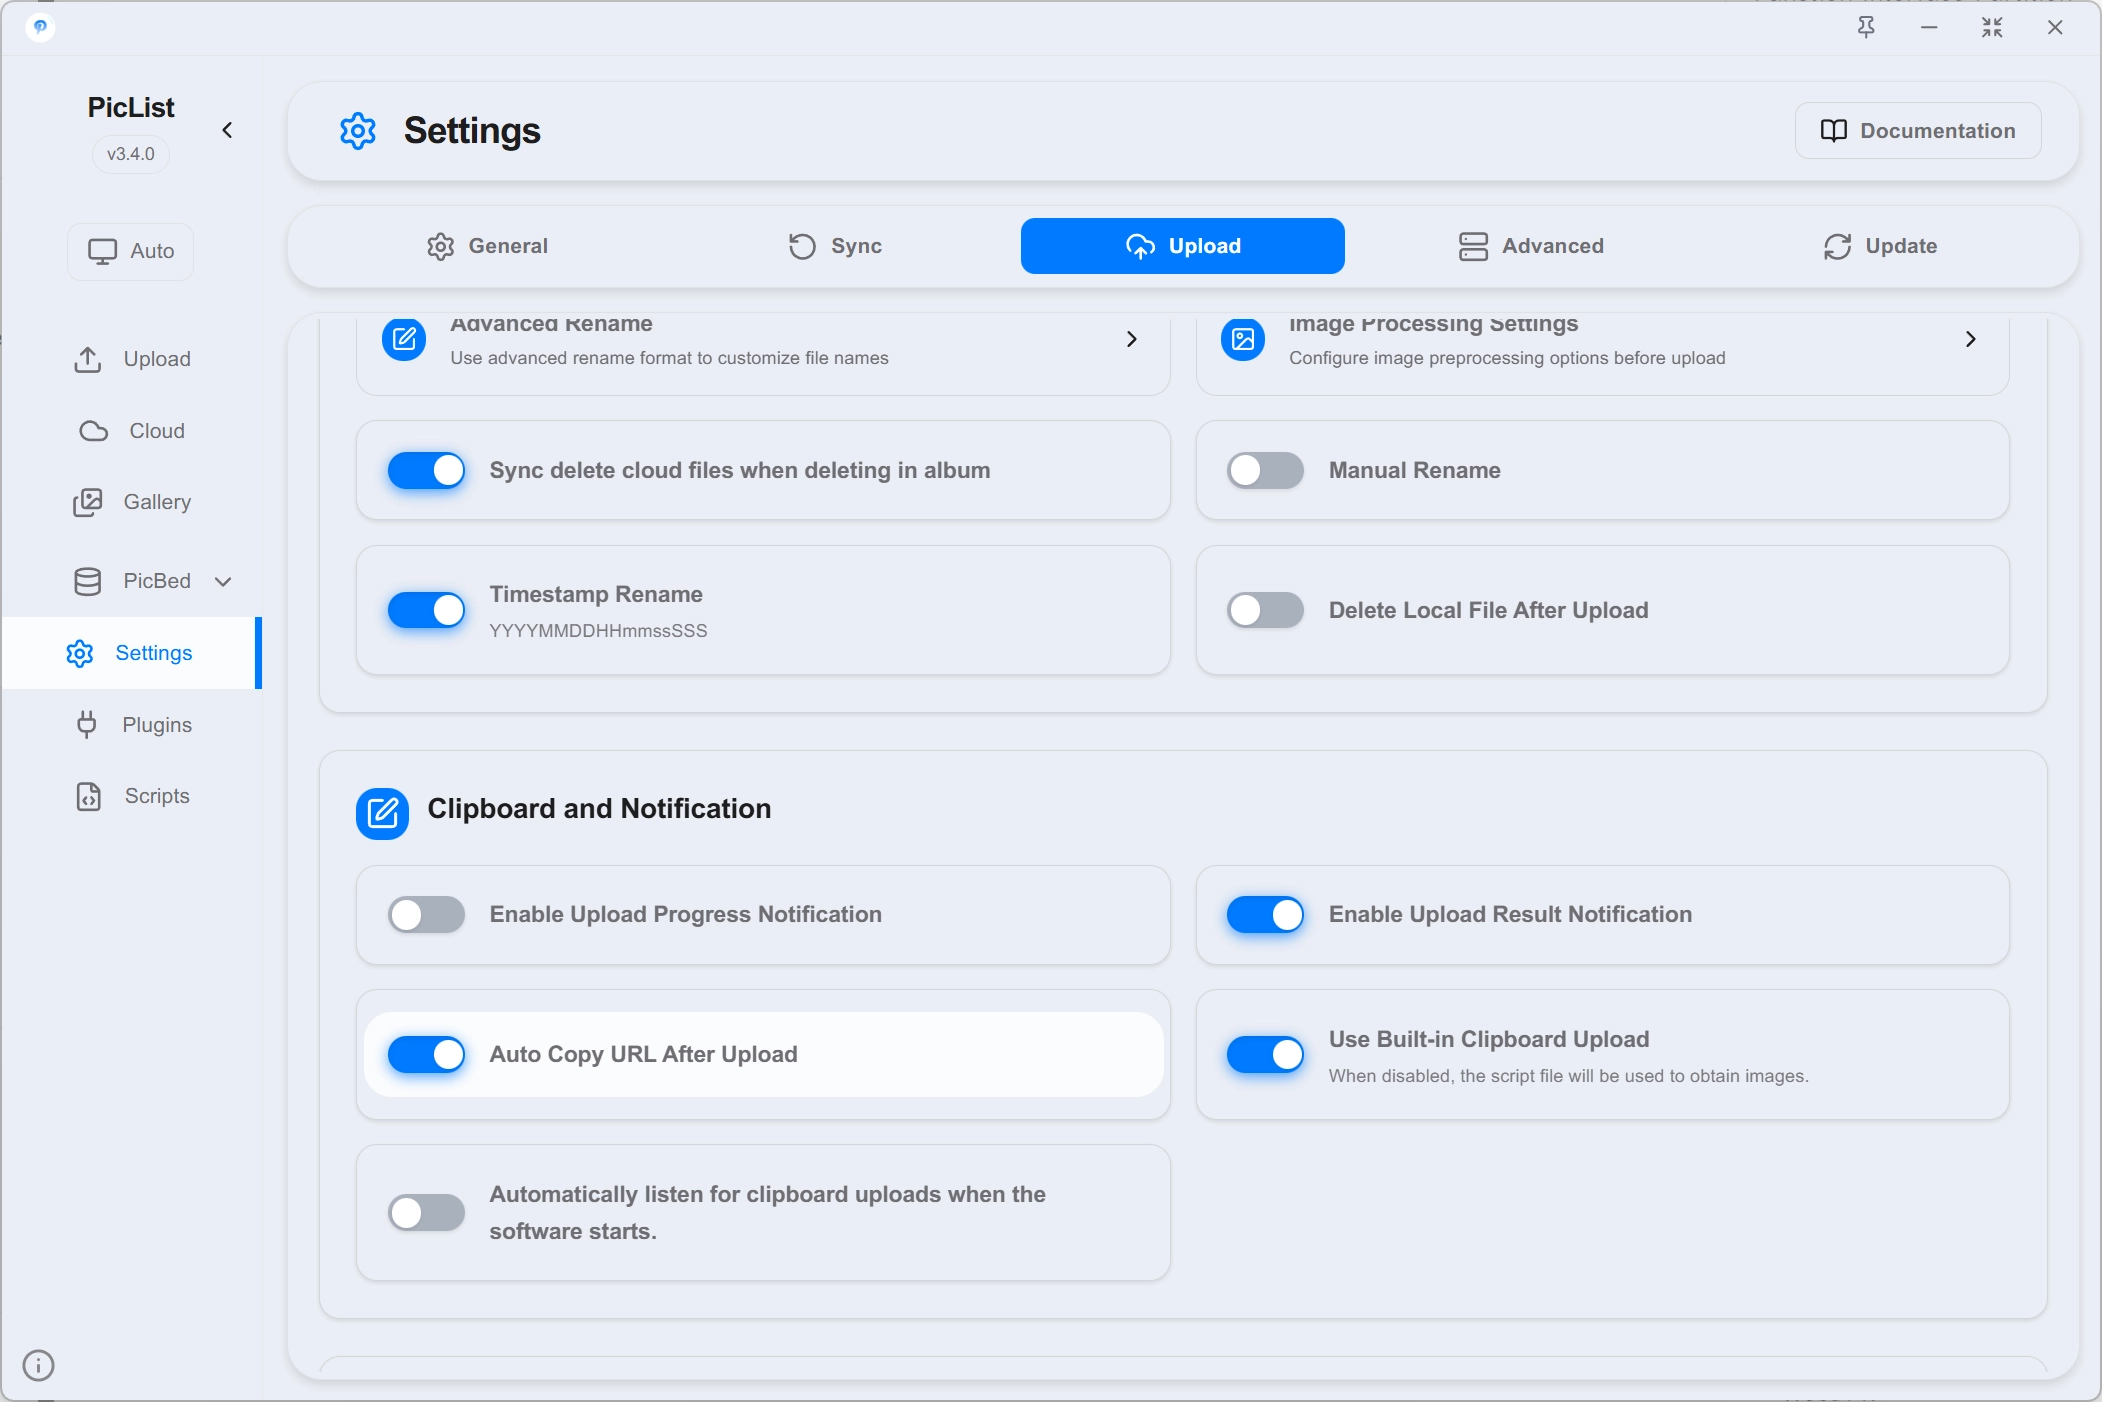
Synchronize cloud files when deleting from album PicList+
When turned on, when you delete a picture in the album, the cloud file will be automatically deleted.
You can also adjust the setting by clicking the Sync Delete Cloud button in the upper right corner of the album interface.
Upload Prompt
After opening, a prompt box will pop up every time you upload an image to indicate that it is uploading.
If you find that it has no effect after opening, please pay attention to whether you have turned off the system-level message notification option.
Set image watermark and compression-format conversion parameters
Please refer to Image Preprocessing Settings.
Manually rename before uploading
If you want to have a chance to change the file name of your image before uploading, you can choose to enable renaming before uploading.
After that, a small window will pop up when you upload, allowing you to rename the file.
If you do not want to rename, you can click OK, Cancel, or simply close the window. If you want to rename, enter the desired name in the input box, then click OK. This feature also supports batch uploading.
Automatic timestamp naming
When turned on, it will automatically replace the uploaded file name with a timestamp to avoid file name duplication or to protect privacy.
The timestamp format is YYYYMMDDHHmmSSS, for example, 202305232159473.
Advanced renaming
Tip
The priority of advanced renaming is lower than that of automatic timestamp naming. If automatic timestamp naming is turned on, advanced renaming will not take effect. Please do not turn on other renaming plugins at the same time, otherwise it may cause renaming failure.
Advanced renaming supports the following placeholders:
| Placeholder | Description |
|---|---|
{Y} | Year, 4 digits |
{y} | Year, 2 digits |
{m} | Month, 2 digits |
{d} | Date, 2 digits |
{h} | Hour, 2 digits |
{i} | Minute, 2 digits |
{s} | Second, 2 digits |
{ms} | Millisecond, 3 digits |
{timestamp} | Timestamp (ms) |
{timestampS} | Timestamp (seconds) |
{md5} | Random MD5 string |
{md5-16} | Random MD5 string (16) |
{sha1} | Random SHA1 string |
{sha1-num} | Random SHA1 string,num is a number, indicating the length of the string |
{sha256} | Random SHA256 string |
{sha256-num} | Random SHA256 string,num is a number, indicating the length of the string |
{uuid} | UUID string |
{ulid} | Random ULID string |
{str-number} | Random string, number is a number, indicating the length of the string, for example {str-8} is 8 bits |
{filename} | File name |
{localFolder:<number>} | The folder where the original file is located, number is a number, indicating the level of interception |
Please combine according to your own needs, for example:
{Y}{m}{d}-{md5-16}Delete local pictures after uploading
After turning on, PicList will automatically delete the local pictures after each successful upload.
Auto Copy URL After Upload
Enabled by default, it will automatically copy the URL to the clipboard after uploading.
Customize link format
PicList has built-in five link formats:
- Markdown:
 - HTML:
<img src="Image link" /> - URL:
Image link - UBB:
[img]Image link[/img] - Custom
Custom supports using three variables: $fileName, $extName, and $url, which represent the file name, file extension, and image link, respectively. For example, you can set it to $url?x-oss-process=image/resize,m_fill,h_100,w_100, so that the Alibaba Cloud OSS image processing function can be automatically added after uploading.
Shorten URL
You can choose from short link services:
- Short link service provided by c1n, you need to fill in the API Token when using this service.
- Self-built YOURLS short link service, you need to fill in the YOURLS domain name and signature when using this service.
- xyTom/Url-Shorten-Worker
- ccbikai/Sink
Encode URL when copying
Close by default. After turning on, the special characters in the URL will be escaped, such as # will be escaped to %23.
The built-in image hosting in PicList has been escaped when outputting the URL, so in most cases you don't need to turn on this option.
Use Built-in Clipboard to Upload
If you encounter problems with clipboard uploads, such as residual processes, you can consider enabling this option.
Automatically listen for clipboard uploads when the software starts
Closed by default. After turning on, the clipboard upload will be automatically monitored when the software starts.
Select the image hosting service to display
So in order to simplify the display, you can choose only the image bed you want to display, so that the sidebar will not have a scroll bar. However, it should be noted that this only shows/hides and does not remove the corresponding functionality. If you hide Qiniu Cloud, you can still upload images through Qiniu Cloud.
Advanced Settings
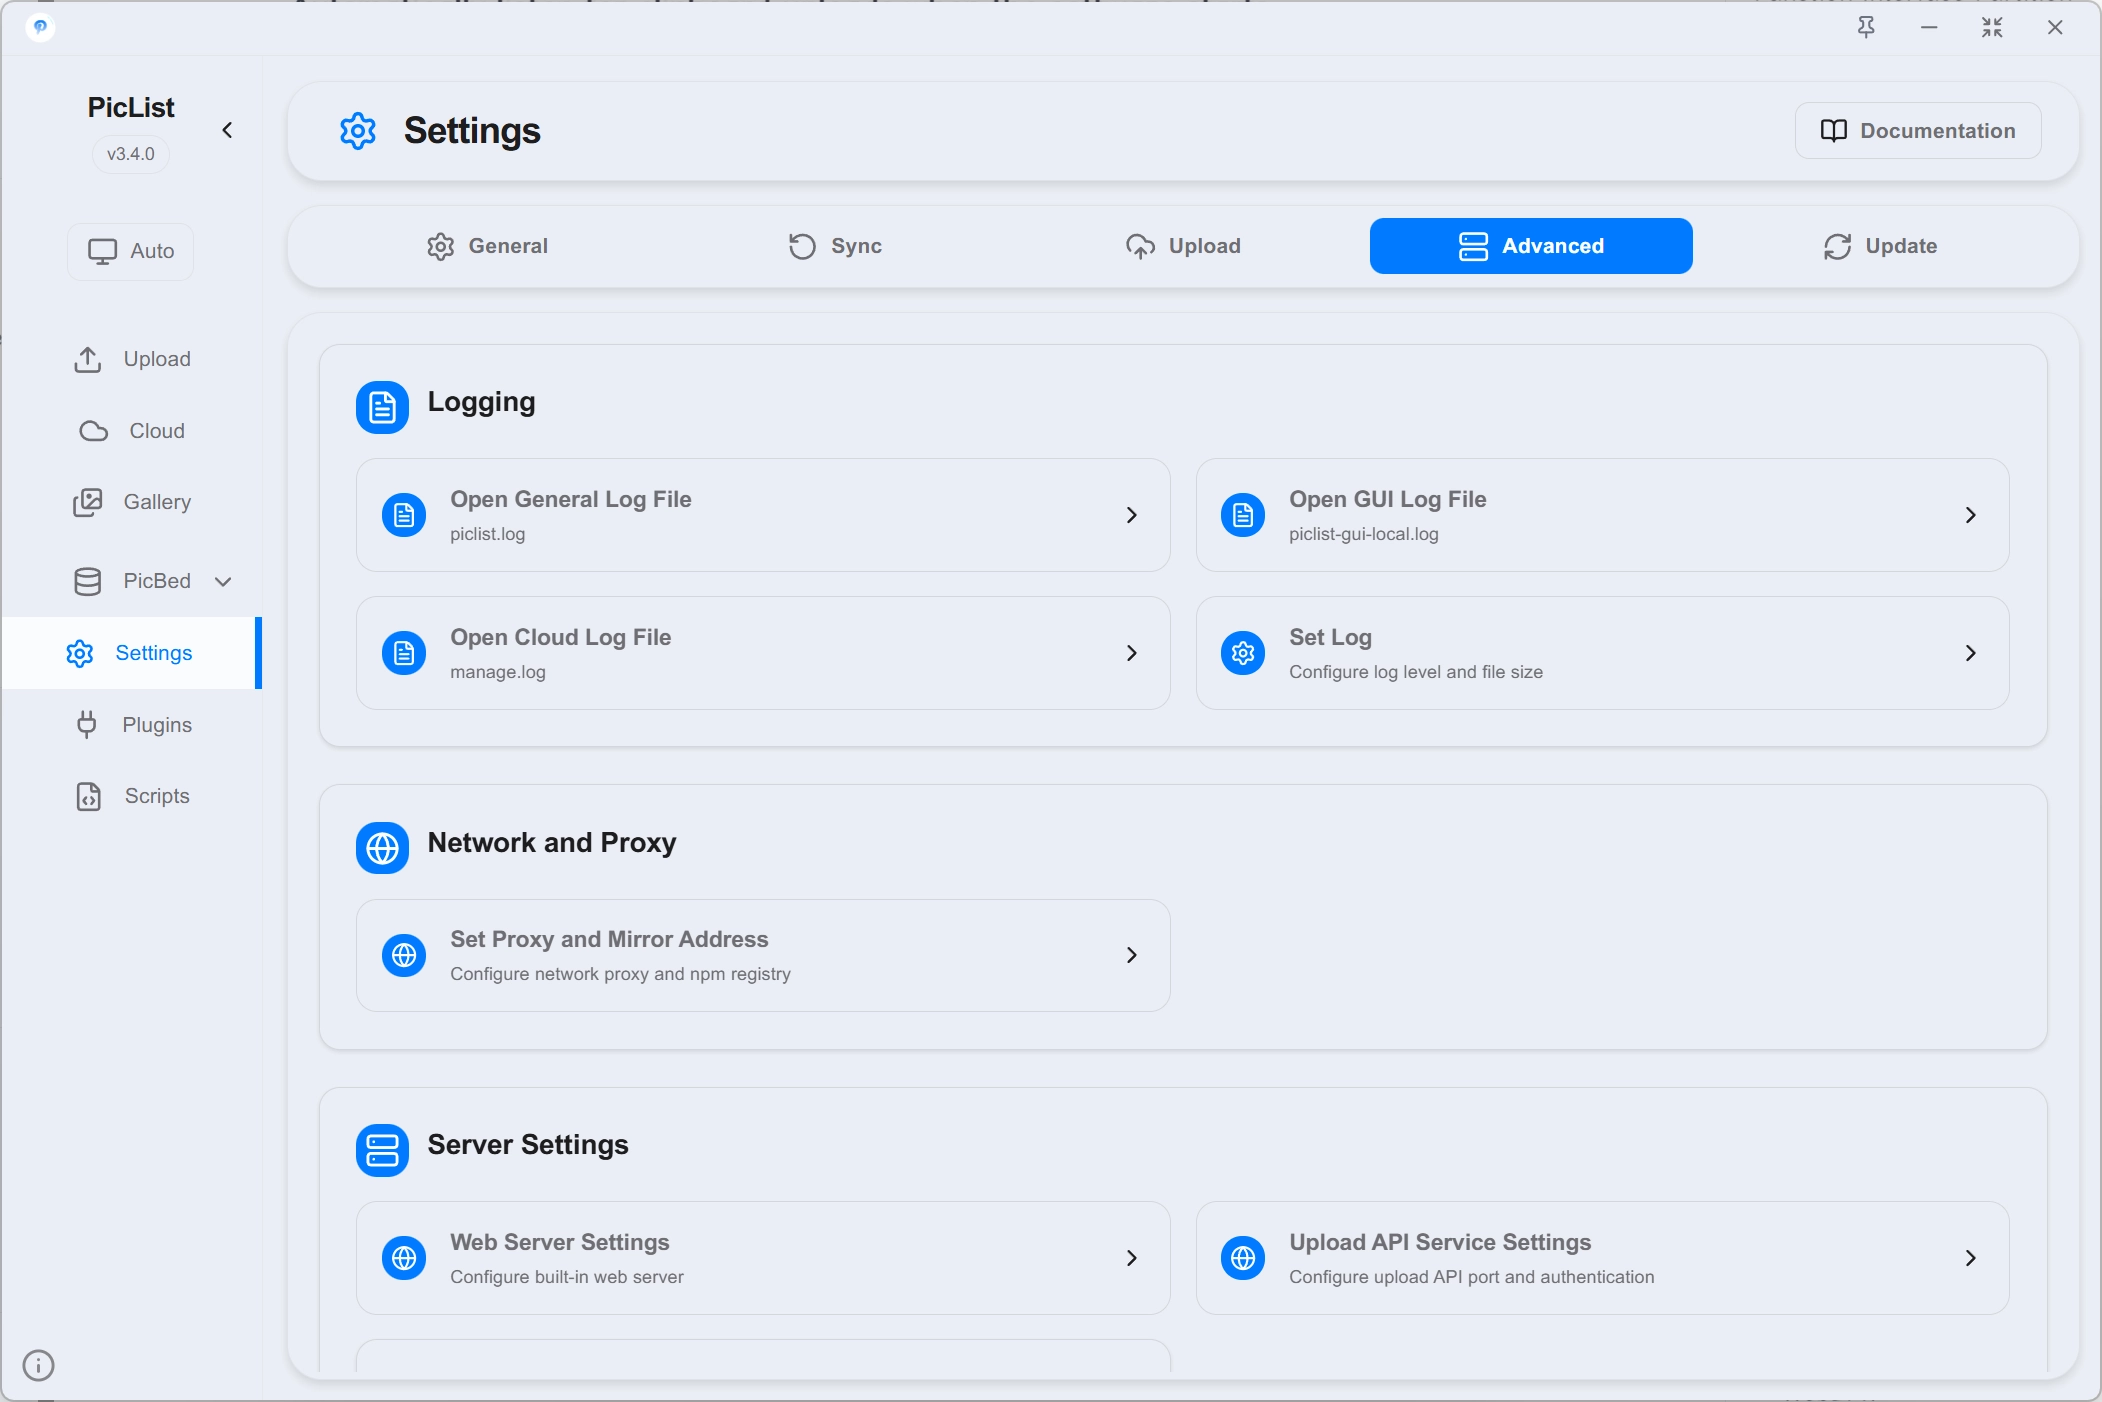
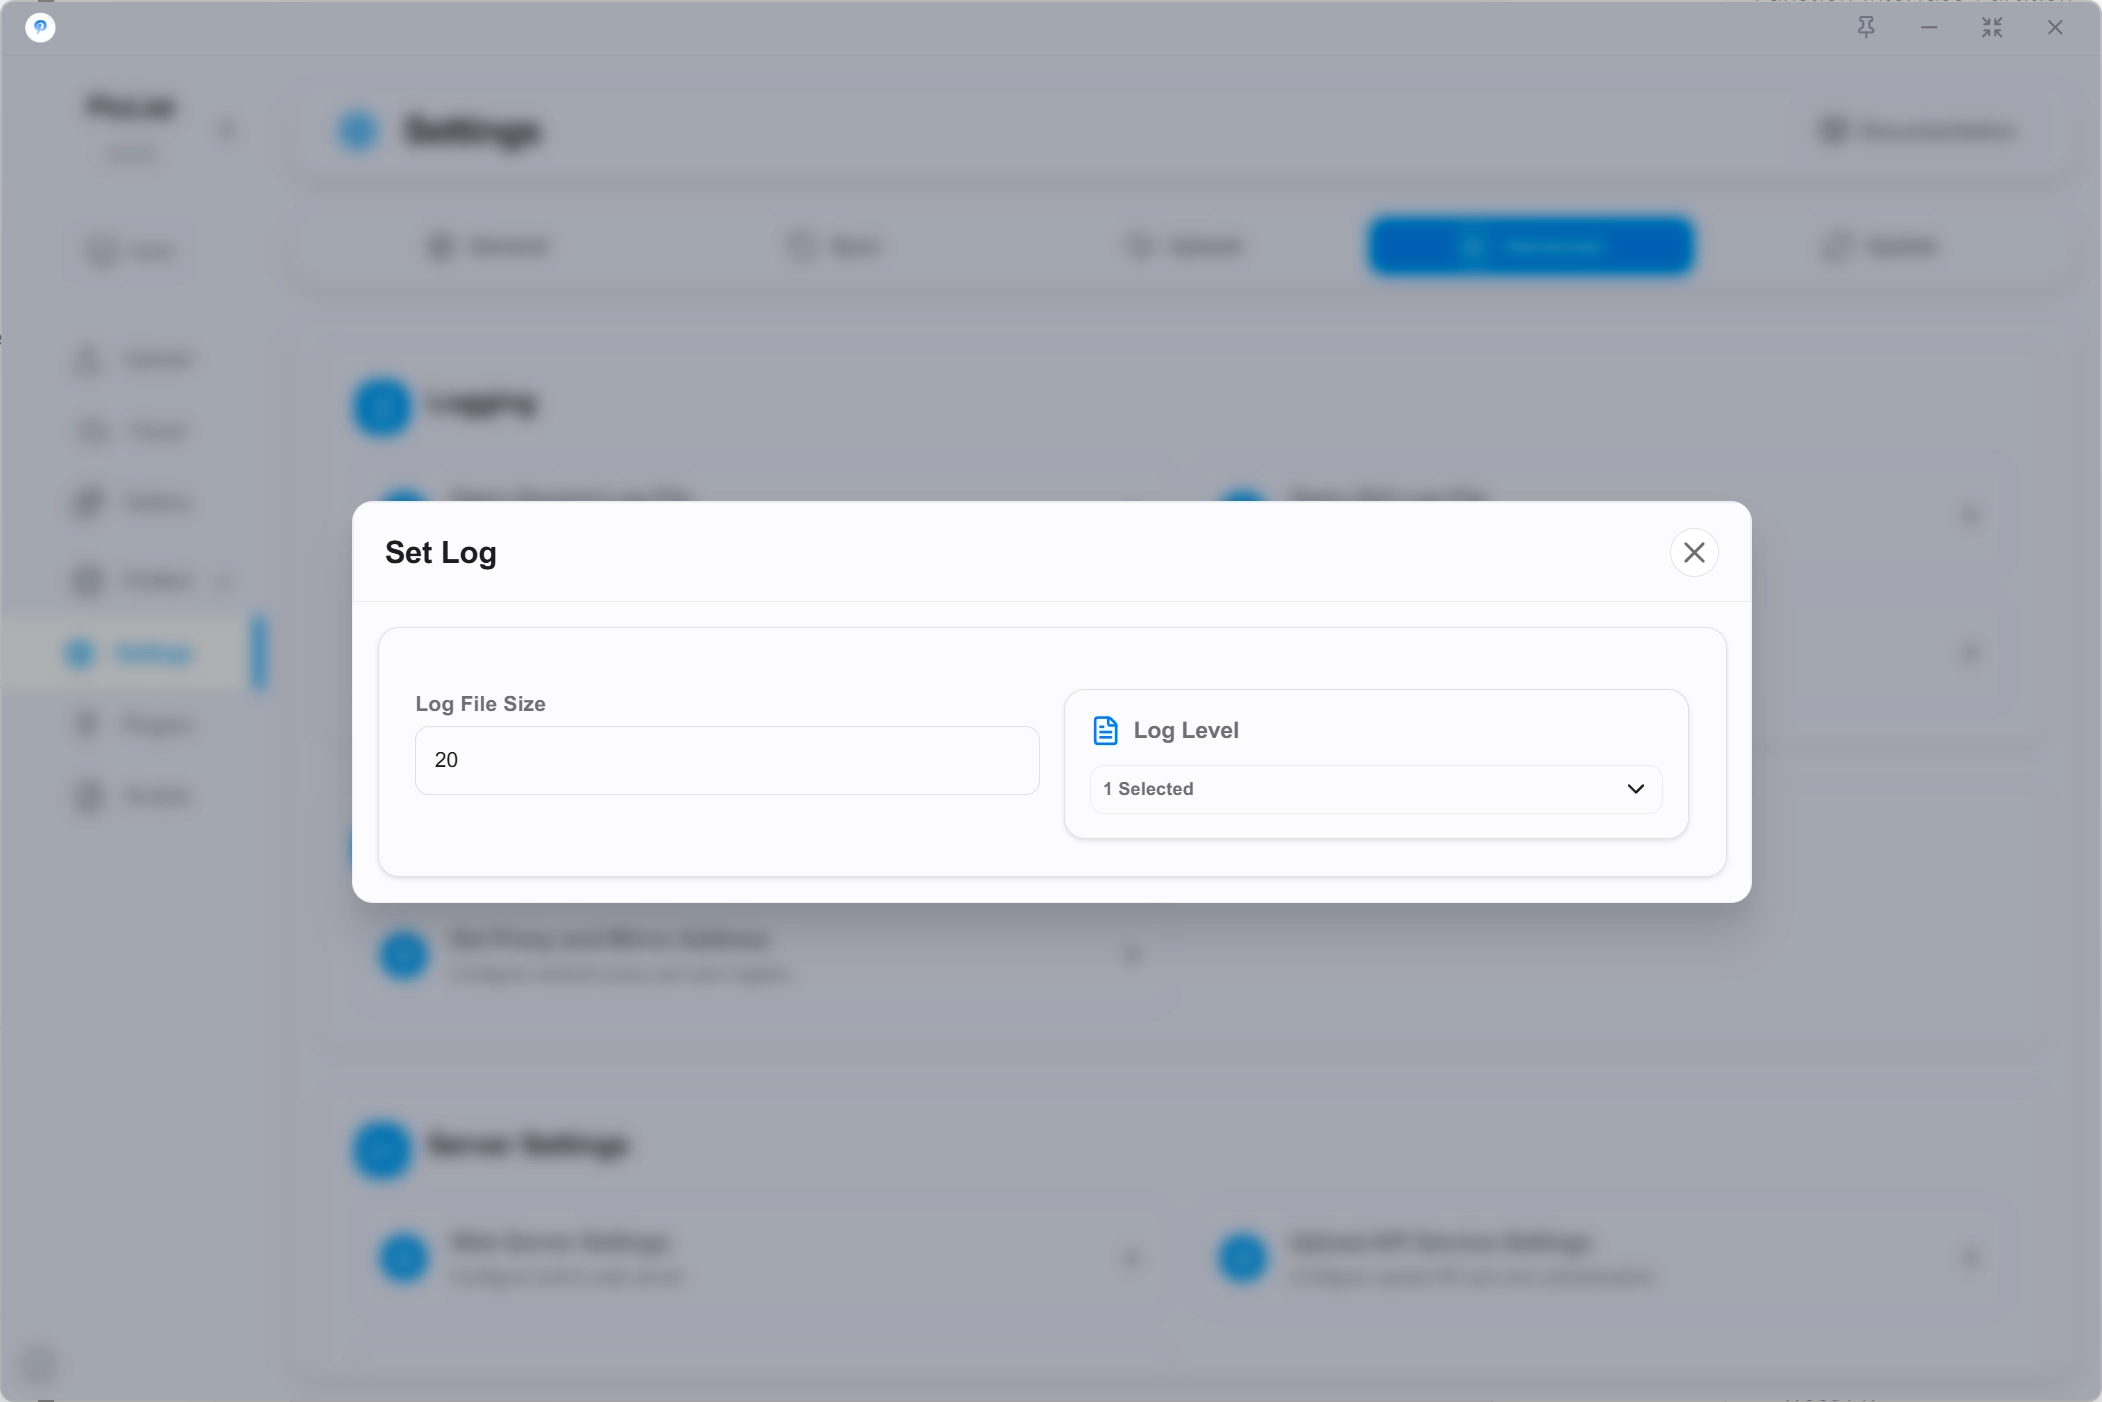
Set log file
You can open and view the log file in this setting, and also set the output log type (such as success, failure, or no output, etc.).
In addition, PicList will actively control the size of the log file, with a default maximum of 10MB, and will automatically clean up the log file after it exceeds this size.
Proxy Settings
Support simple HTTP proxy settings. Click on Set Proxy to access.
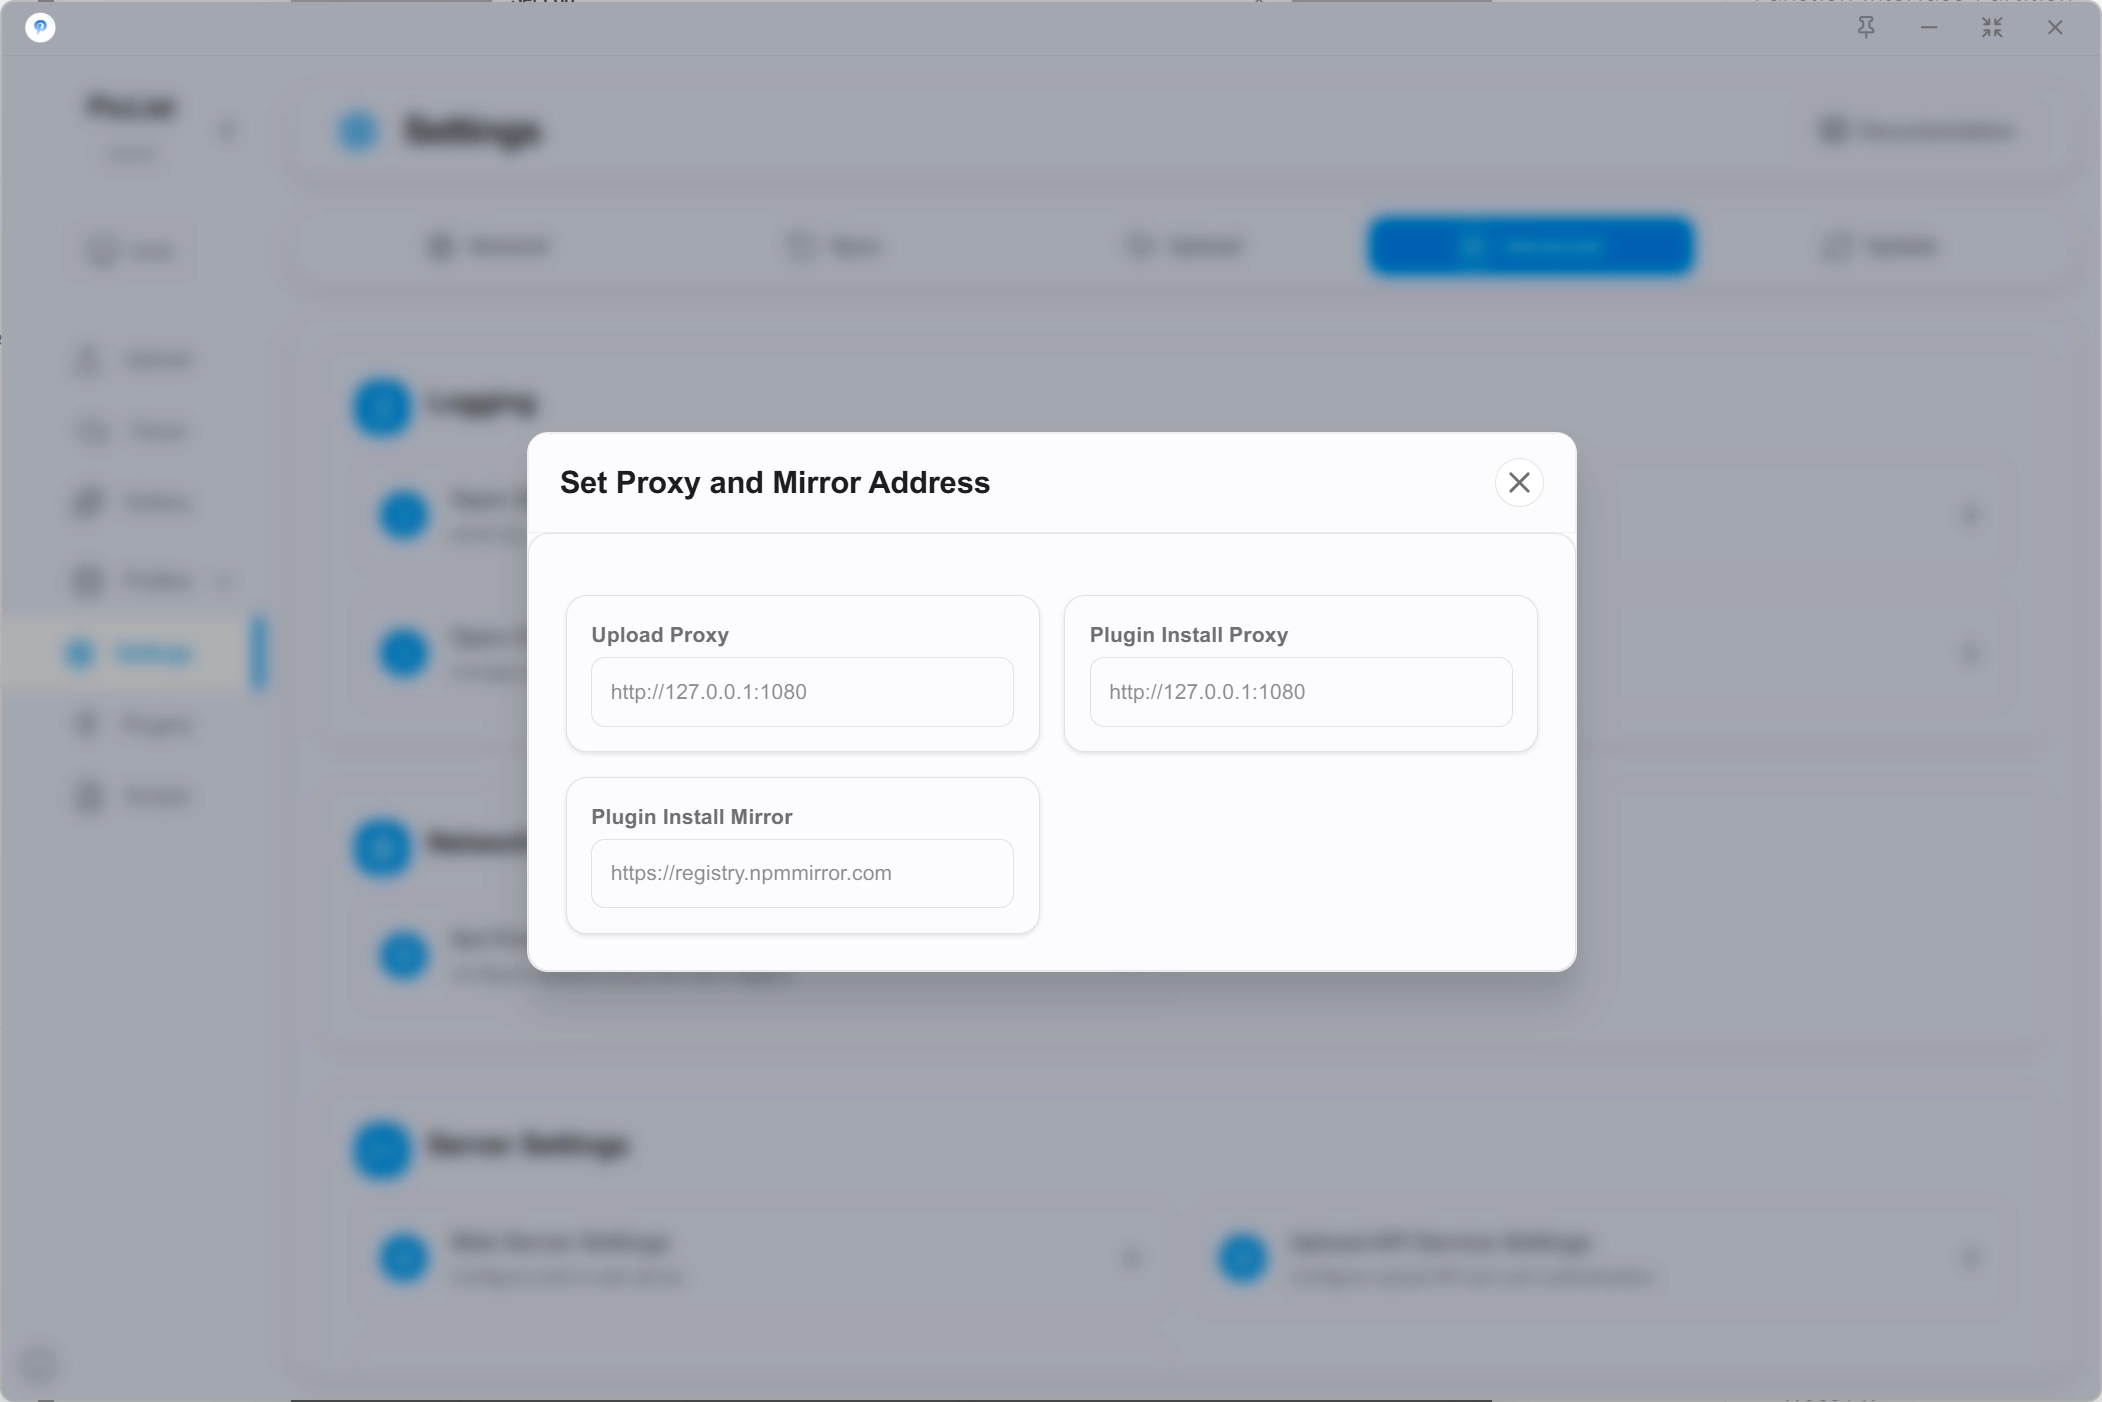
- For the proxy during upload, please configure
Upload Proxy - If it is for the proxy for plugin installation, please configure
Plugin Installation Proxy - If it is for the setting of the npm mirror source during plugin installation, you can set
Plugin Mirror Address
PicGo-Server Settings
PicList will internally enable a small server by default, which is used in conjunction with other applications to call for uploading. If you need to use applications such as Typora and Obsidian to upload images, you need to enable this feature.
The recommended listening address is the default 127.0.0.1 (local), and the recommended port is the default 36677.
Support setting the maximum number of concurrent uploads and the upload interval to avoid being restricted due to uploading too many images at once.
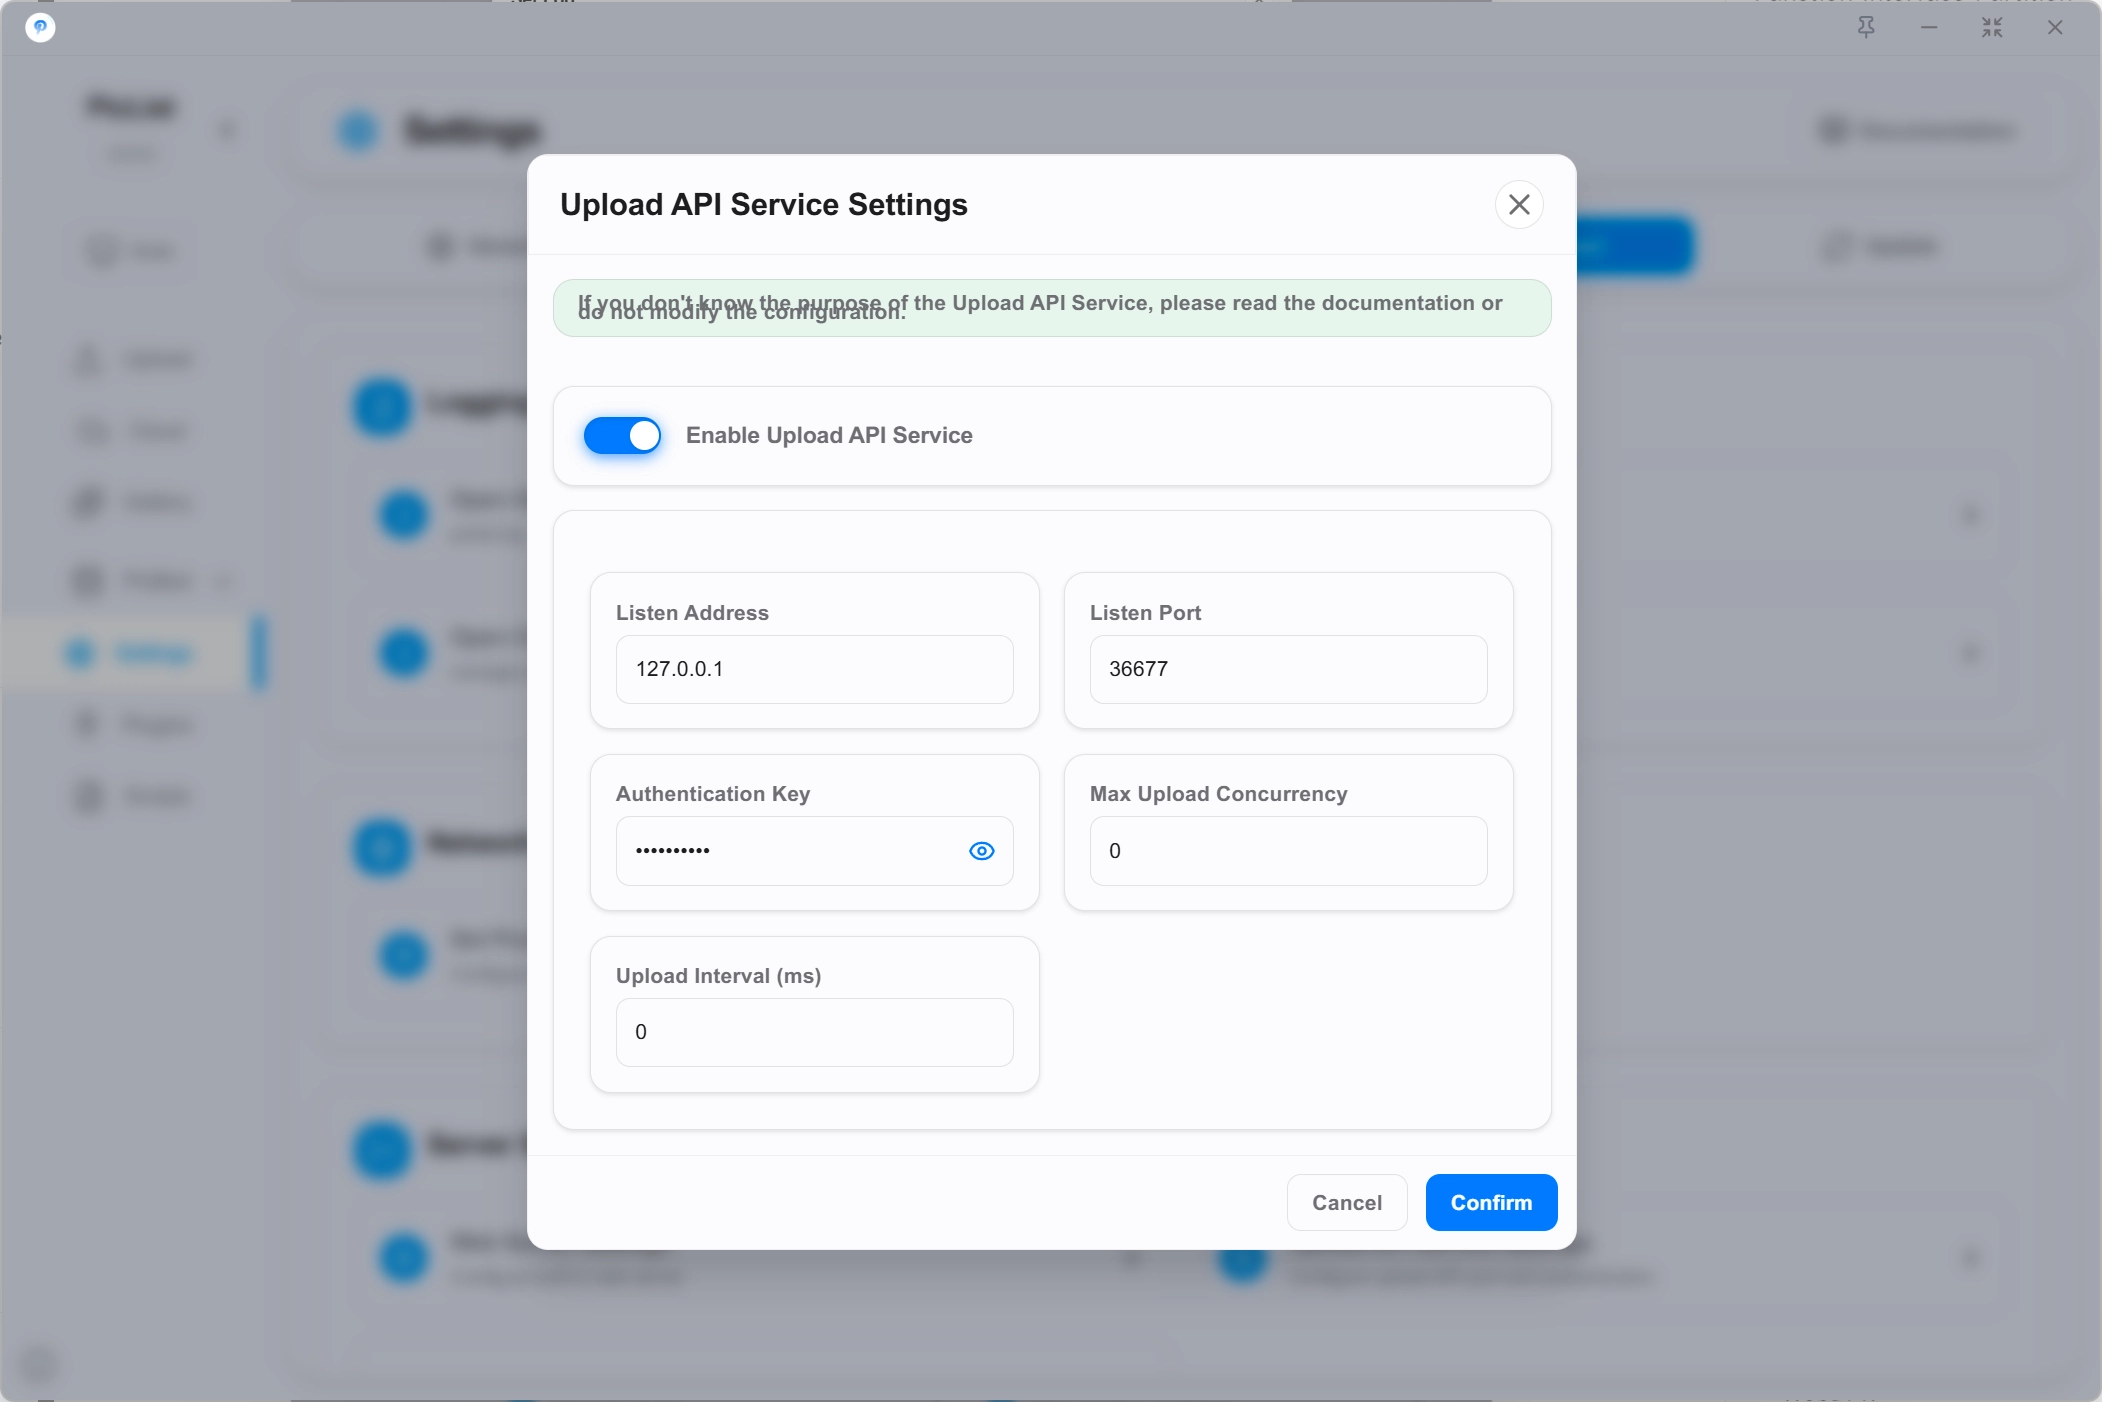
Encrypt key for server response
To ensure the security of the data returned by the interface, PicList will encrypt sensitive data returned by the interface. You can set the encryption key here.
Update Settings
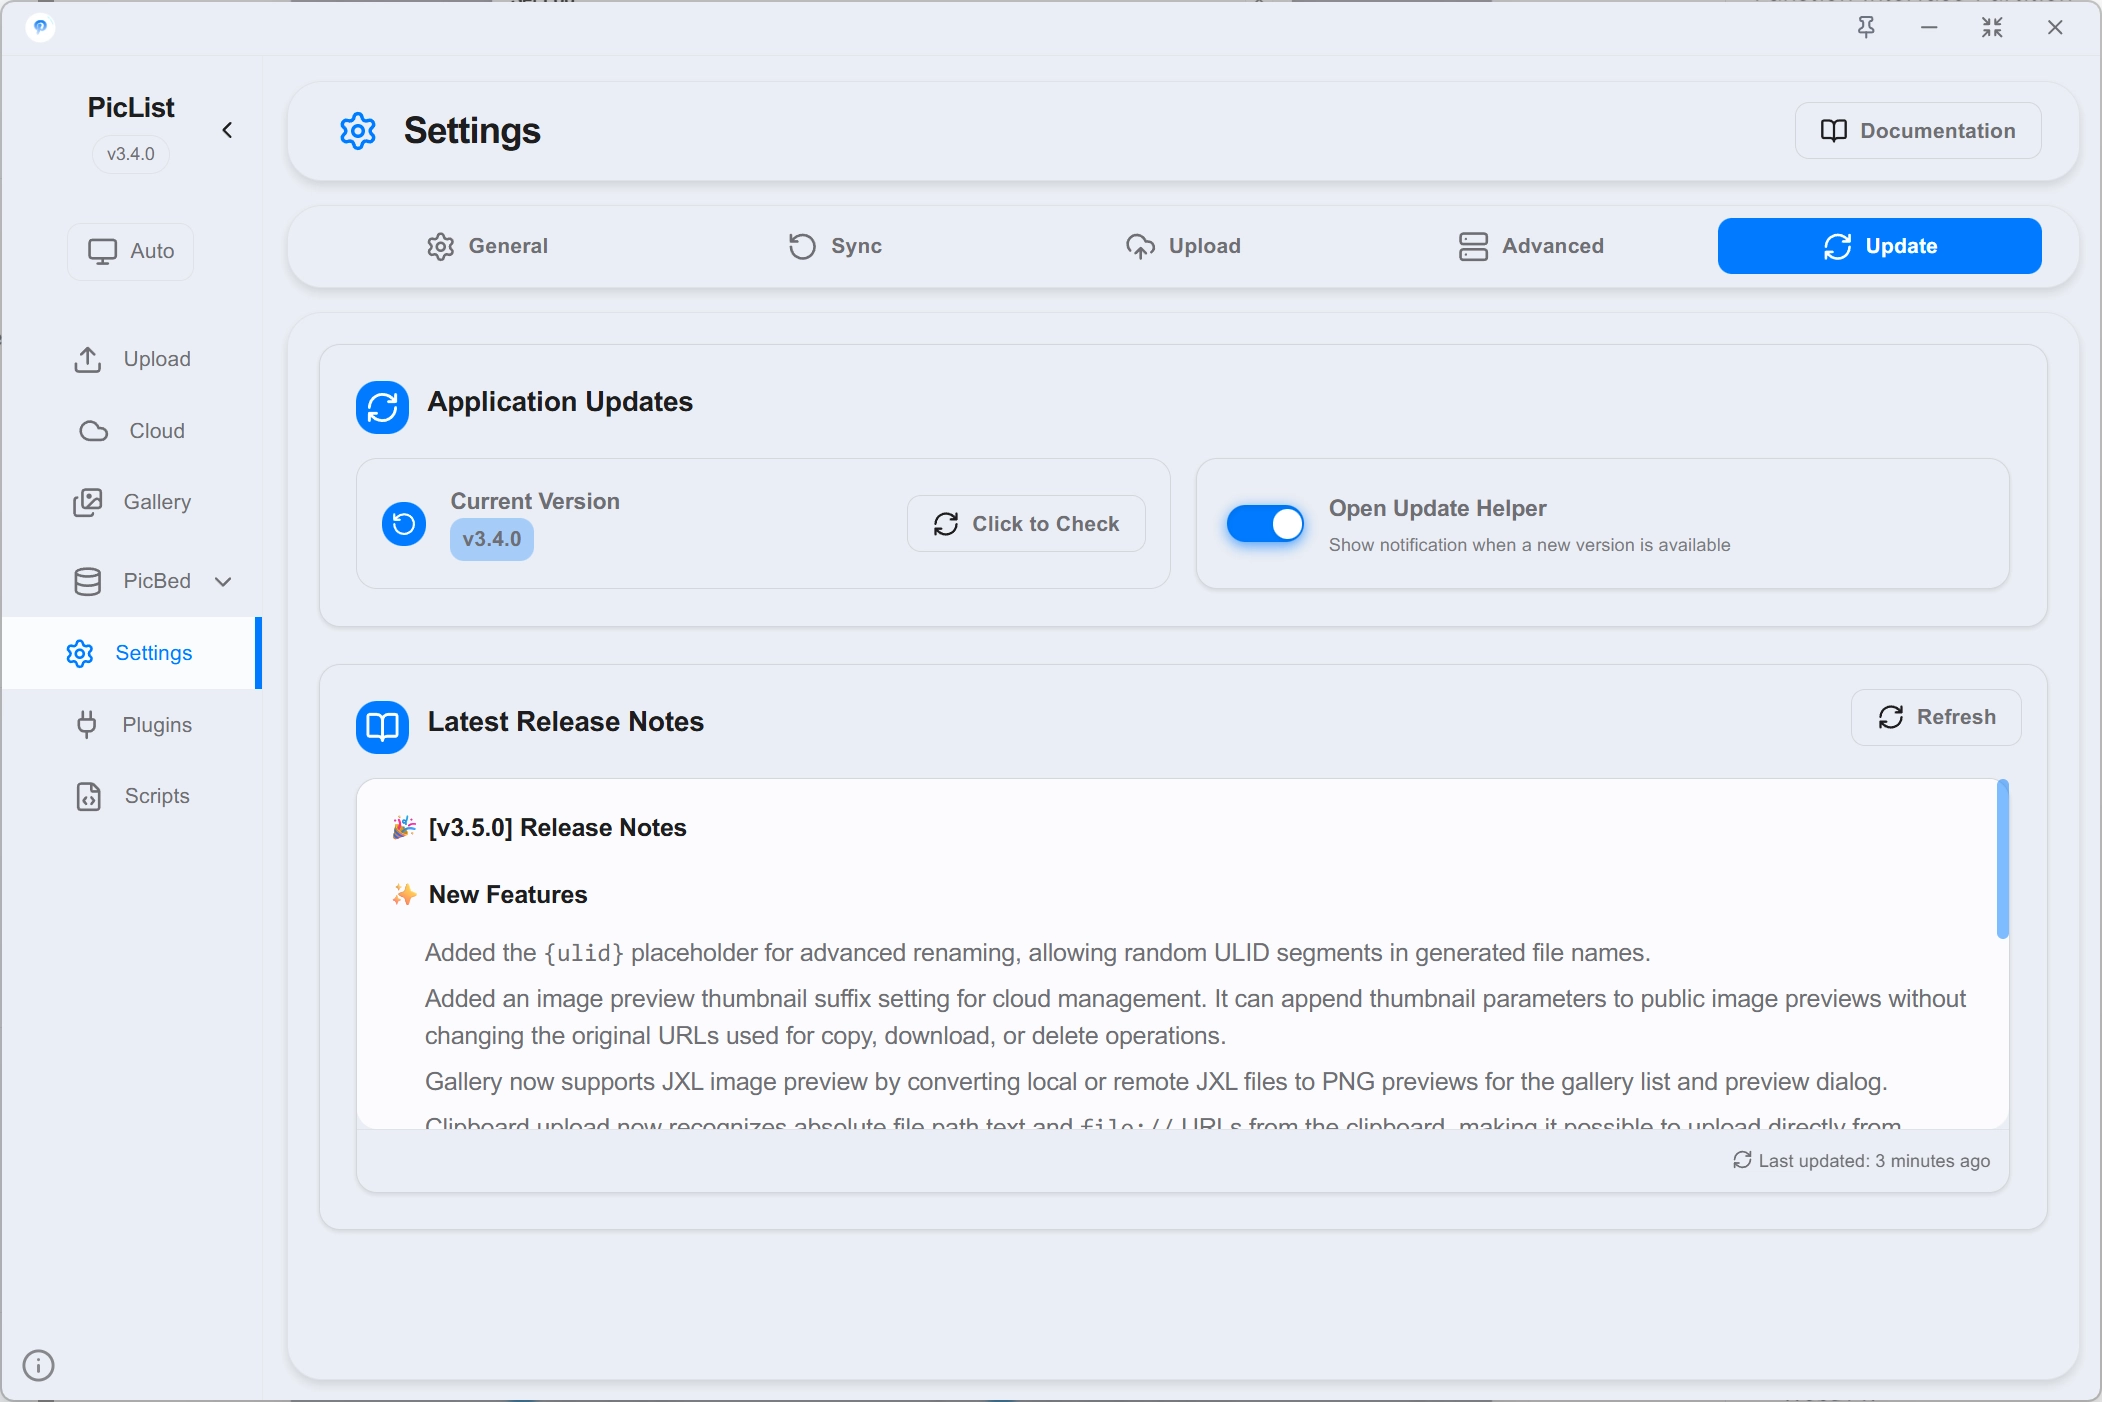
Check for Updates
Used to actively initiate update checks. If there is a new version, you will be prompted to update.
Switch update assistant
PicList will check for the latest version every time it starts. If the current version is lower than the latest version, you will be prompted to update. If you do not want to receive this message, you can turn off the Open update assistant option in settings.
Tip
It is recommended to turn on this feature, as new versions usually fix bugs and add new features.
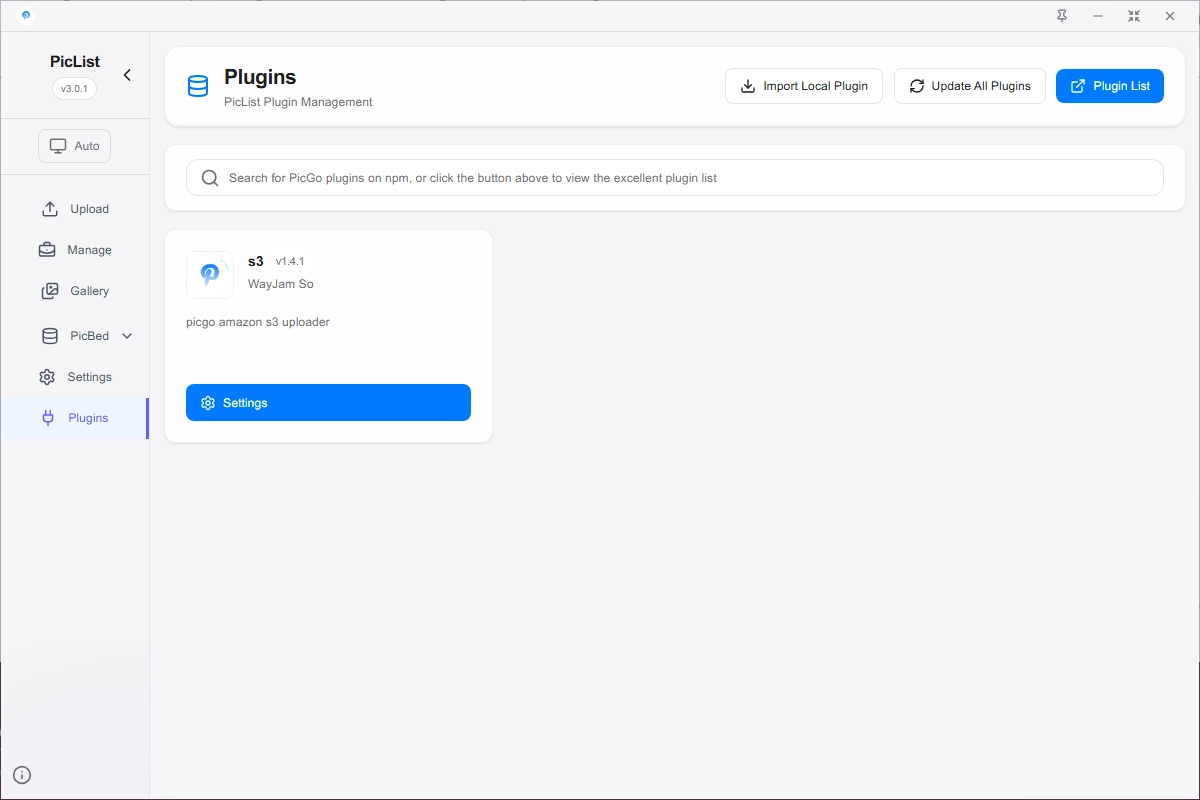
Plugin Settings
You can install, update, disable, uninstall, configure, and use all PicGo plugins through the Plugin page.
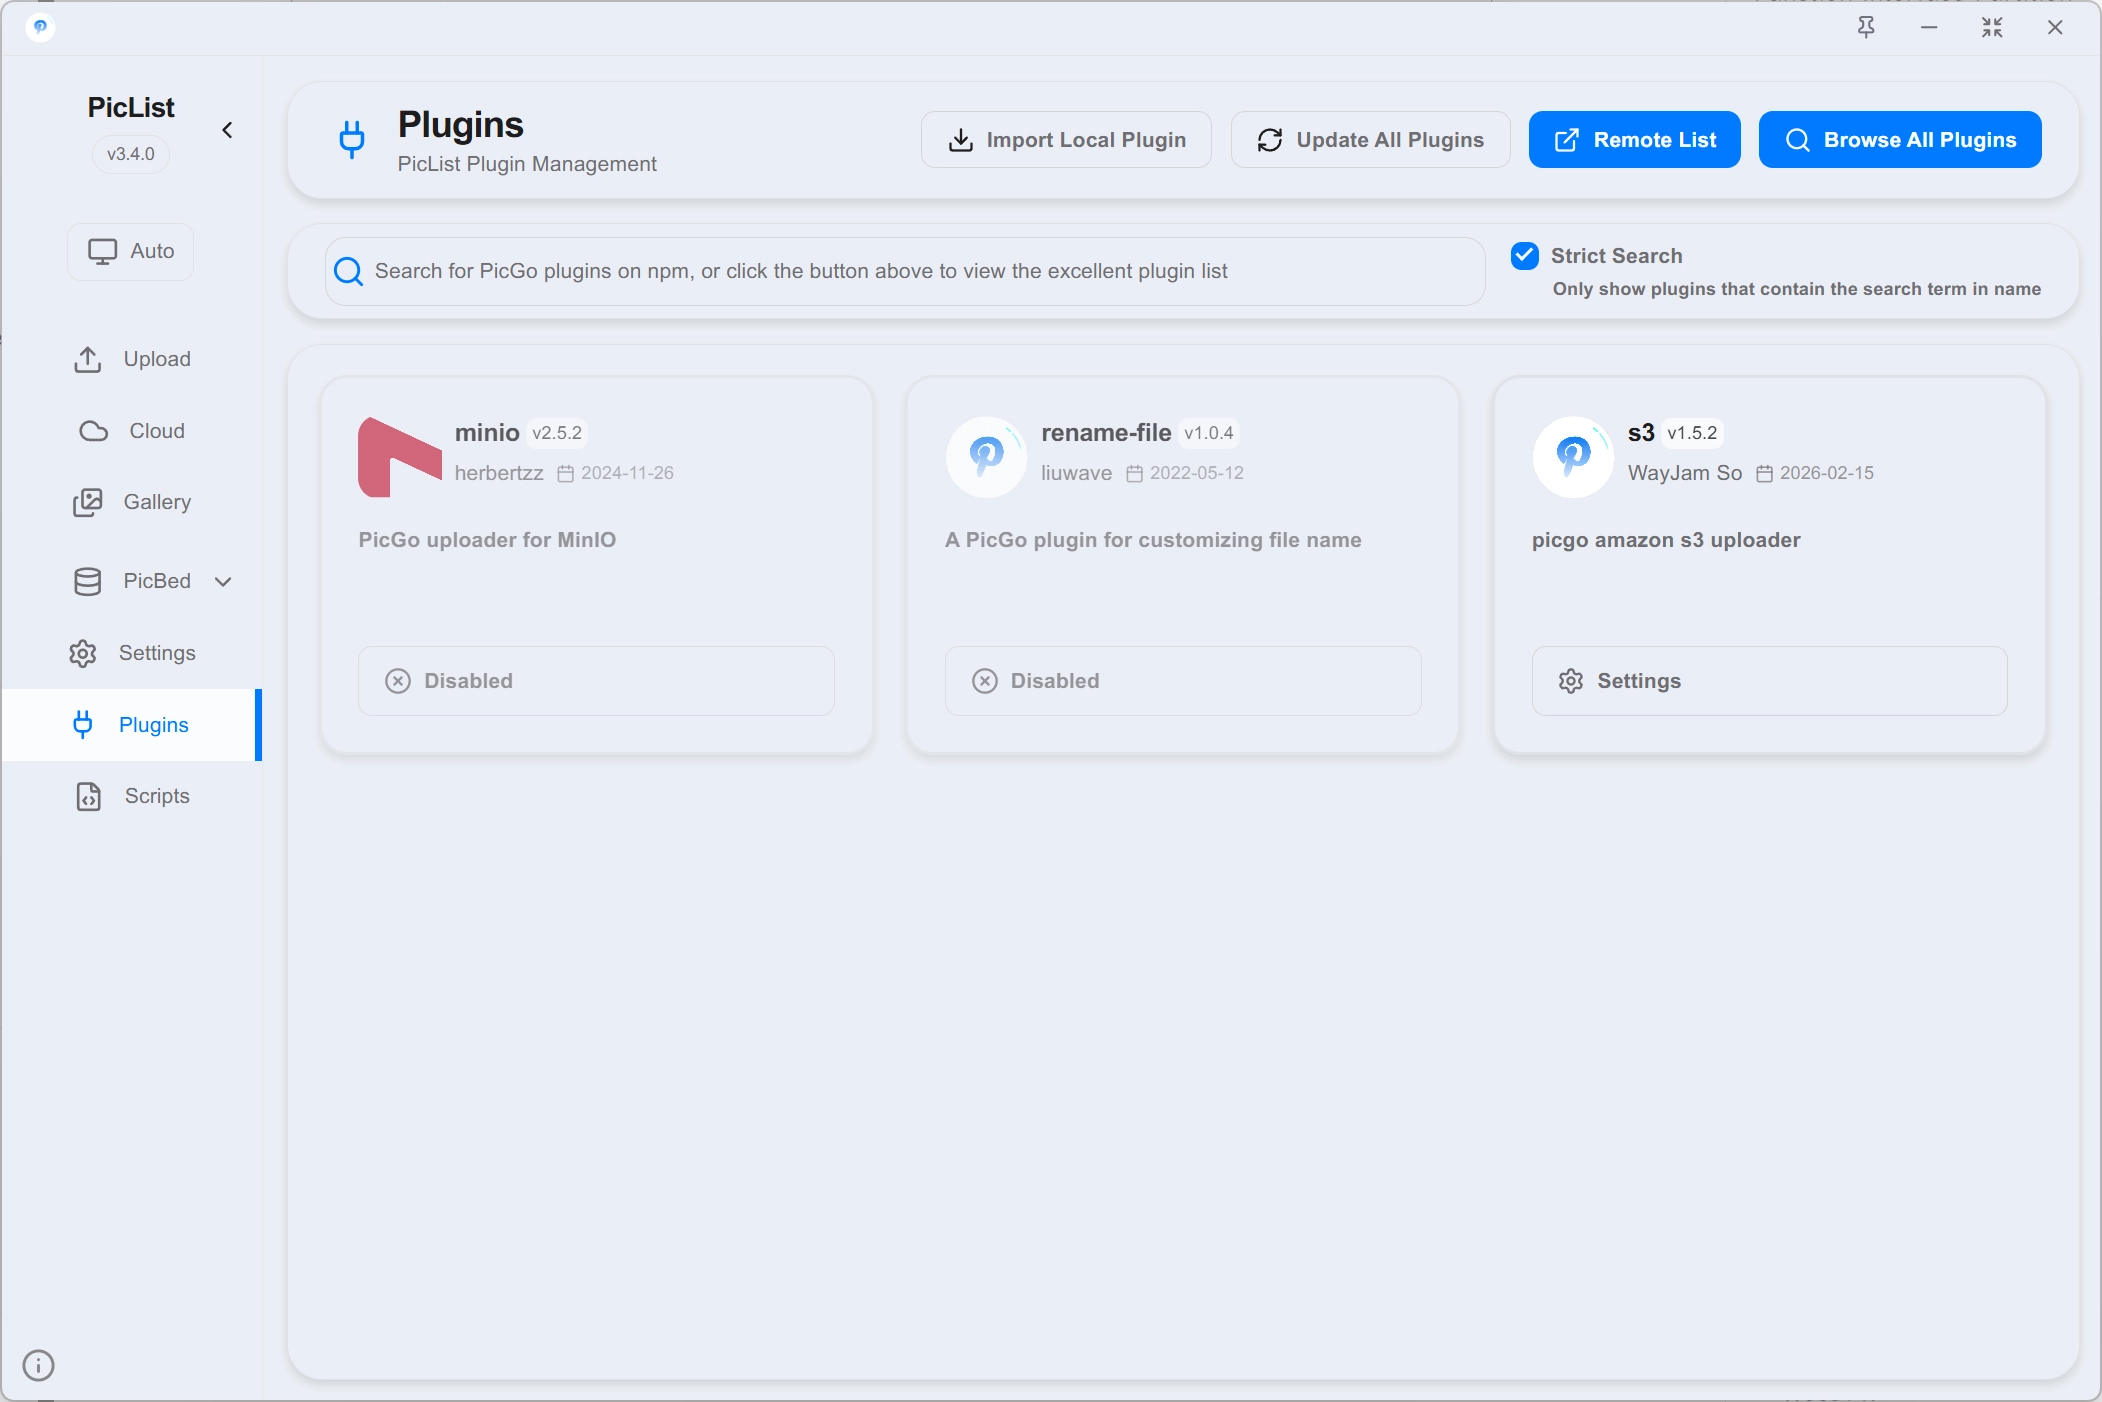
Install Plugins
Warning
You must install Node.js before you can install plugins, because PicList uses npm to install plugins.
Search for the plugin name in the search bar of the plugin interface. The plugin name starts with picgo-plugin-, so you only need to search for the name after the prefix. For example, a picgo-plugin-wow plugin, you only need to search for wow.
After finding the plugin, just click Install in the lower right corner. If you encounter the prompt that the plugin is not optimized for GUI, you can ask the plugin author whether the plugin is suitable for use in PicGo software, otherwise it may only be a command-line plugin.
Offline Installation
PicList supports importing local plugins (folders). The import requirement is a complete picgo plugin folder. It can be used to offline install picgo plugin packages or plugin developers for self-testing. The entry for importing plugins is on the right side of the title bar in the Plugin Settings page.
Update Uninstall and Disable
All of them can be selected in the menu that pops up when you click the gear button in the lower right corner of the plugin.
Warning
But if you choose Update, you need to restart it once to use the updated plugin. PicList will give a Restart button on the plugin page, click it. Just closing the main window and opening it again is not enough, you must completely exit the PicList process and open it again.
Plugin Configuration
Some plugins have configuration items or their own menu items, which can be configured directly by clicking the gear in the lower right corner:
Look for more plugins
You can find super awesome PicGo plugins in the Awesome-PicGo of PicGo official, and PicList is compatible with all these plugins.
Plugin Development
If you want to develop plugins, you can refer to the plugin development documentation of PicGo.