
Advanced Usage
This document covers PicList's advanced features, including command-line usage, built-in HTTP server, file web server, and more.
Command Line Upload
PicList supports command-line image uploading, which is particularly useful for automation scripts and batch processing tasks.
Supported Commands
upload- Upload images from clipboardupload <image-path>- Upload a specific image file
Platform-specific Usage
Windows
# Basic usage
"<PicList-Installation-Path>\PicList.exe" upload

# Upload specific file
"<PicList-Installation-Path>\PicList.exe" upload "C:\path\to\image.jpg"
macOS
# Basic usage
/Applications/PicList.app/Contents/MacOS/PicList upload

# Upload specific file
/Applications/PicList.app/Contents/MacOS/PicList upload "/path/to/image.jpg"
Linux
# Basic usage
"<PicList-Installation-Path>/PicList.AppImage" upload

# Upload specific file
"<PicList-Installation-Path>/PicList.AppImage" upload "/path/to/image.jpg"
Built-in HTTP Server
PicList includes a powerful built-in HTTP server that receives upload requests from other applications or remote hosts. This allows PicList to function as an image hosting service.
Server Configuration
- Default listening address:
0.0.0.0(listens on all network interfaces) - Default listening port:
36677 - Access URL:
http://127.0.0.1:36677 - Maximum concurrent uploads: Can be set to limit the number of simultaneous uploads
- Upload interval: Can be set to specify the delay between each upload
Interface Authentication
When exposing the server to the public internet, it's strongly recommended to enable interface authentication to prevent malicious uploads.
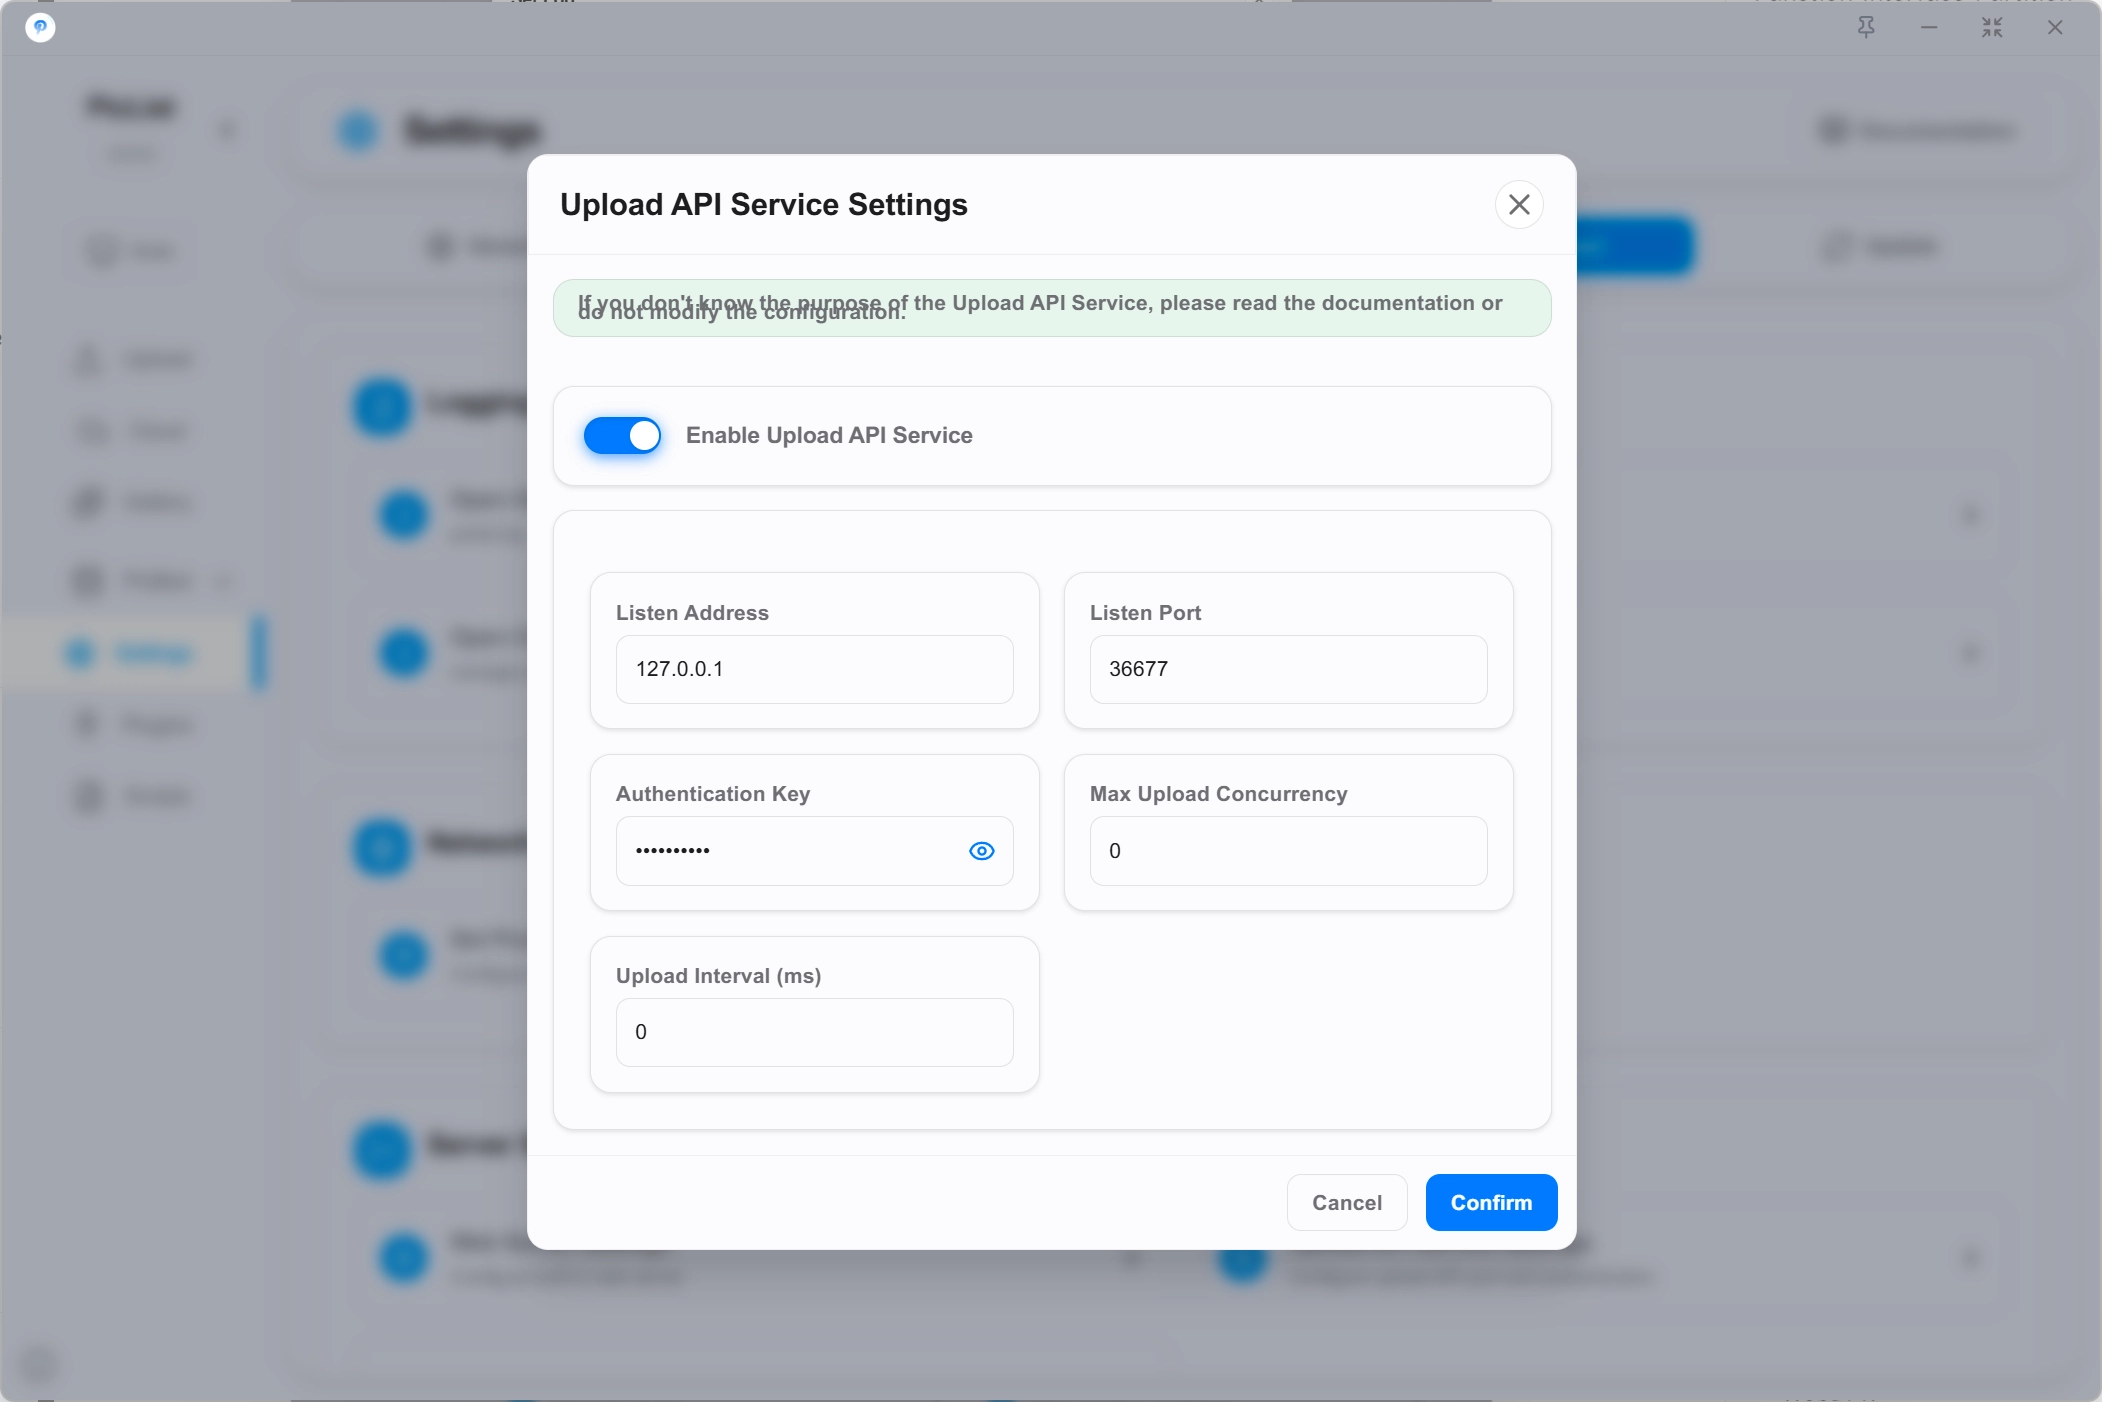
When sending requests, you need to add the query parameter key in the URL:
http://127.0.0.1:36677/upload?key=your-secret-keyAPI Endpoints Overview
1. Form Upload v2.6.3+
Request Information:
- Method:
POST - URL:
http://127.0.0.1:36677/upload - Content-Type:
multipart/form-data - File Field: Any field name with image file as value
Example Request:
curl -X POST \
  -F "image=@/path/to/your/image.jpg" \
  http://127.0.0.1:36677/upload
Response Data:
{
  "success": true,
  "result": ["https://example.com/uploaded-image.jpg"],
}
2. Upload Clipboard Images
Request Information:
- Method:
POST - URL:
http://127.0.0.1:36677/upload - Content-Type:
application/json - Request Body:
{}(empty JSON object)
Example Request:
curl -X POST \
  -H "Content-Type: application/json" \
  -d "{}" \
  http://127.0.0.1:36677/upload
Response Data:
{
  "success": true,
  "result": ["https://example.com/clipboard-image.png"],
}
3. Upload Specific Path Images
Request Information:
- Method:
POST - URL:
http://127.0.0.1:36677/upload - Content-Type:
application/json - Request Body:
{"list": ["image-path1", "image-path2", ...]}
Example Request:
curl -X POST \
  -H "Content-Type: application/json" \
  -d '{"list": ["/path/to/image1.jpg", "/path/to/image2.png"]}' \
  http://127.0.0.1:36677/upload
Response Data:
{
  "success": true,
  "result": [
    "https://example.com/image1.jpg",
    "https://example.com/image2.png"
  ]
}
Advanced Features
Specify Image Bed and Configuration
PicList supports specifying specific image beds and configuration files through URL query parameters:
Parameter Description:
picbed: Specify image bed type (e.g.,aws-s3,qiniu,upyun, etc.)configName: Specify configuration file name
Example:
http://127.0.0.1:36677/upload?picbed=aws-s3&configName=piclist-testThis will use the aws-s3 image bed and piclist-test configuration file for uploading.
4. Delete Images
Request Information:
- Method:
POST - URL:
http://127.0.0.1:36677/delete - Content-Type:
application/json - Request Body:
{"list": [fullResult object array]}
Example Request:
curl -X POST \
  -H "Content-Type: application/json" \
  -d '{"list": [{"imgUrl": "https://example.com/image.jpg", "delete": "delete-token"}]}' \
  http://127.0.0.1:36677/delete
Response Data:
{
  "success": true,
  "message": "Deletion successful"
}
5. Health Check
Request Information:
- Method:
GETorPOST - URL:
http://127.0.0.1:36677/heartbeat
Example Request:
curl http://127.0.0.1:36677/heartbeatResponse Data:
{
  "success": true,
  "result": "alive"
}
6. API Documentation
Request Information:
- Method:
GET - URL:
http://127.0.0.1:36677orhttp://127.0.0.1:36677/upload
Access the above URLs directly in your browser to view the complete API documentation and testing interface.
Built-in File Web Server
PicList provides a built-in file web server that allows accessing the local file system via HTTP protocol. This feature is similar to the python -m http.server command or EasyWebServer software.
Server Configuration
- Default listening address:
0.0.0.0(all IP addresses on the local machine) - Default listening port:
37777 - Default root directory:
- Windows:
C:\Users - macOS/Linux:
/(root directory)
- Windows:
How to Enable
- Open PicList settings
- Navigate to
Settings→Advanced Settings→Set Web Service - Enable the file web server feature
- Configure listening address, port, and root directory
Usage
After enabling the server, access http://127.0.0.1:37777 in your browser to browse and access local files.
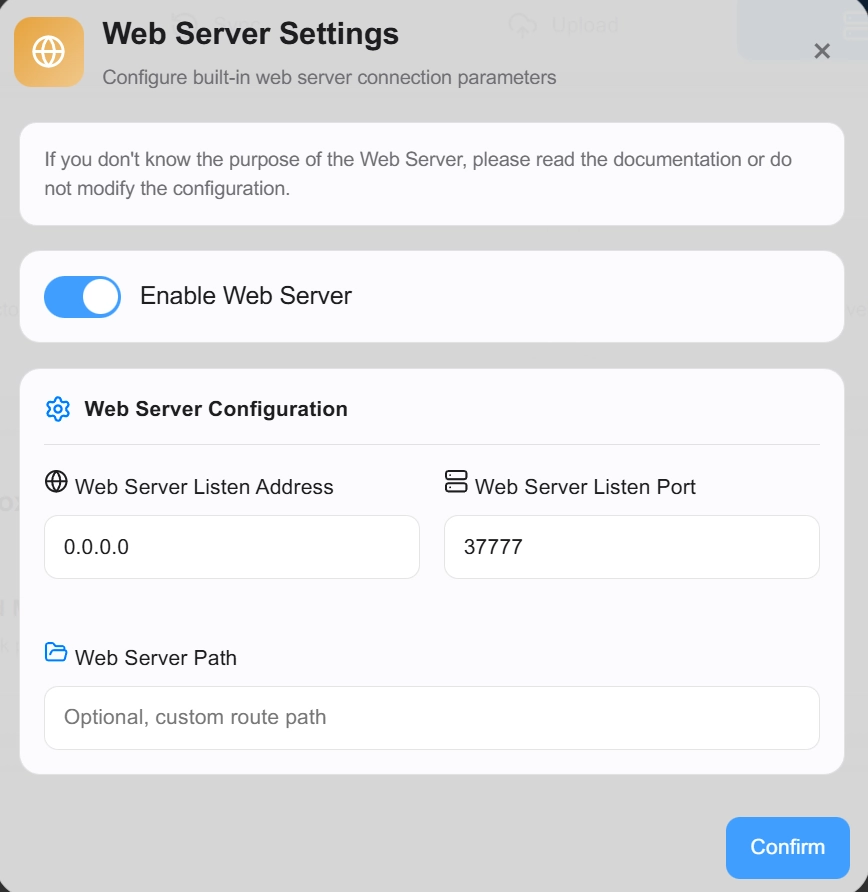
Warning
Do not set the port to 36677 as this port is already occupied by PicList's built-in HTTP server.
Security Tips
- The file web server exposes all files in the specified directory
- Be cautious when setting the root directory in public network environments
- It's recommended to use this feature only in trusted network environments
Mobile Client Integration - PicHoro
If you want to use PicList-like functionality on mobile devices, you can install the companion mobile app: PicHoro.
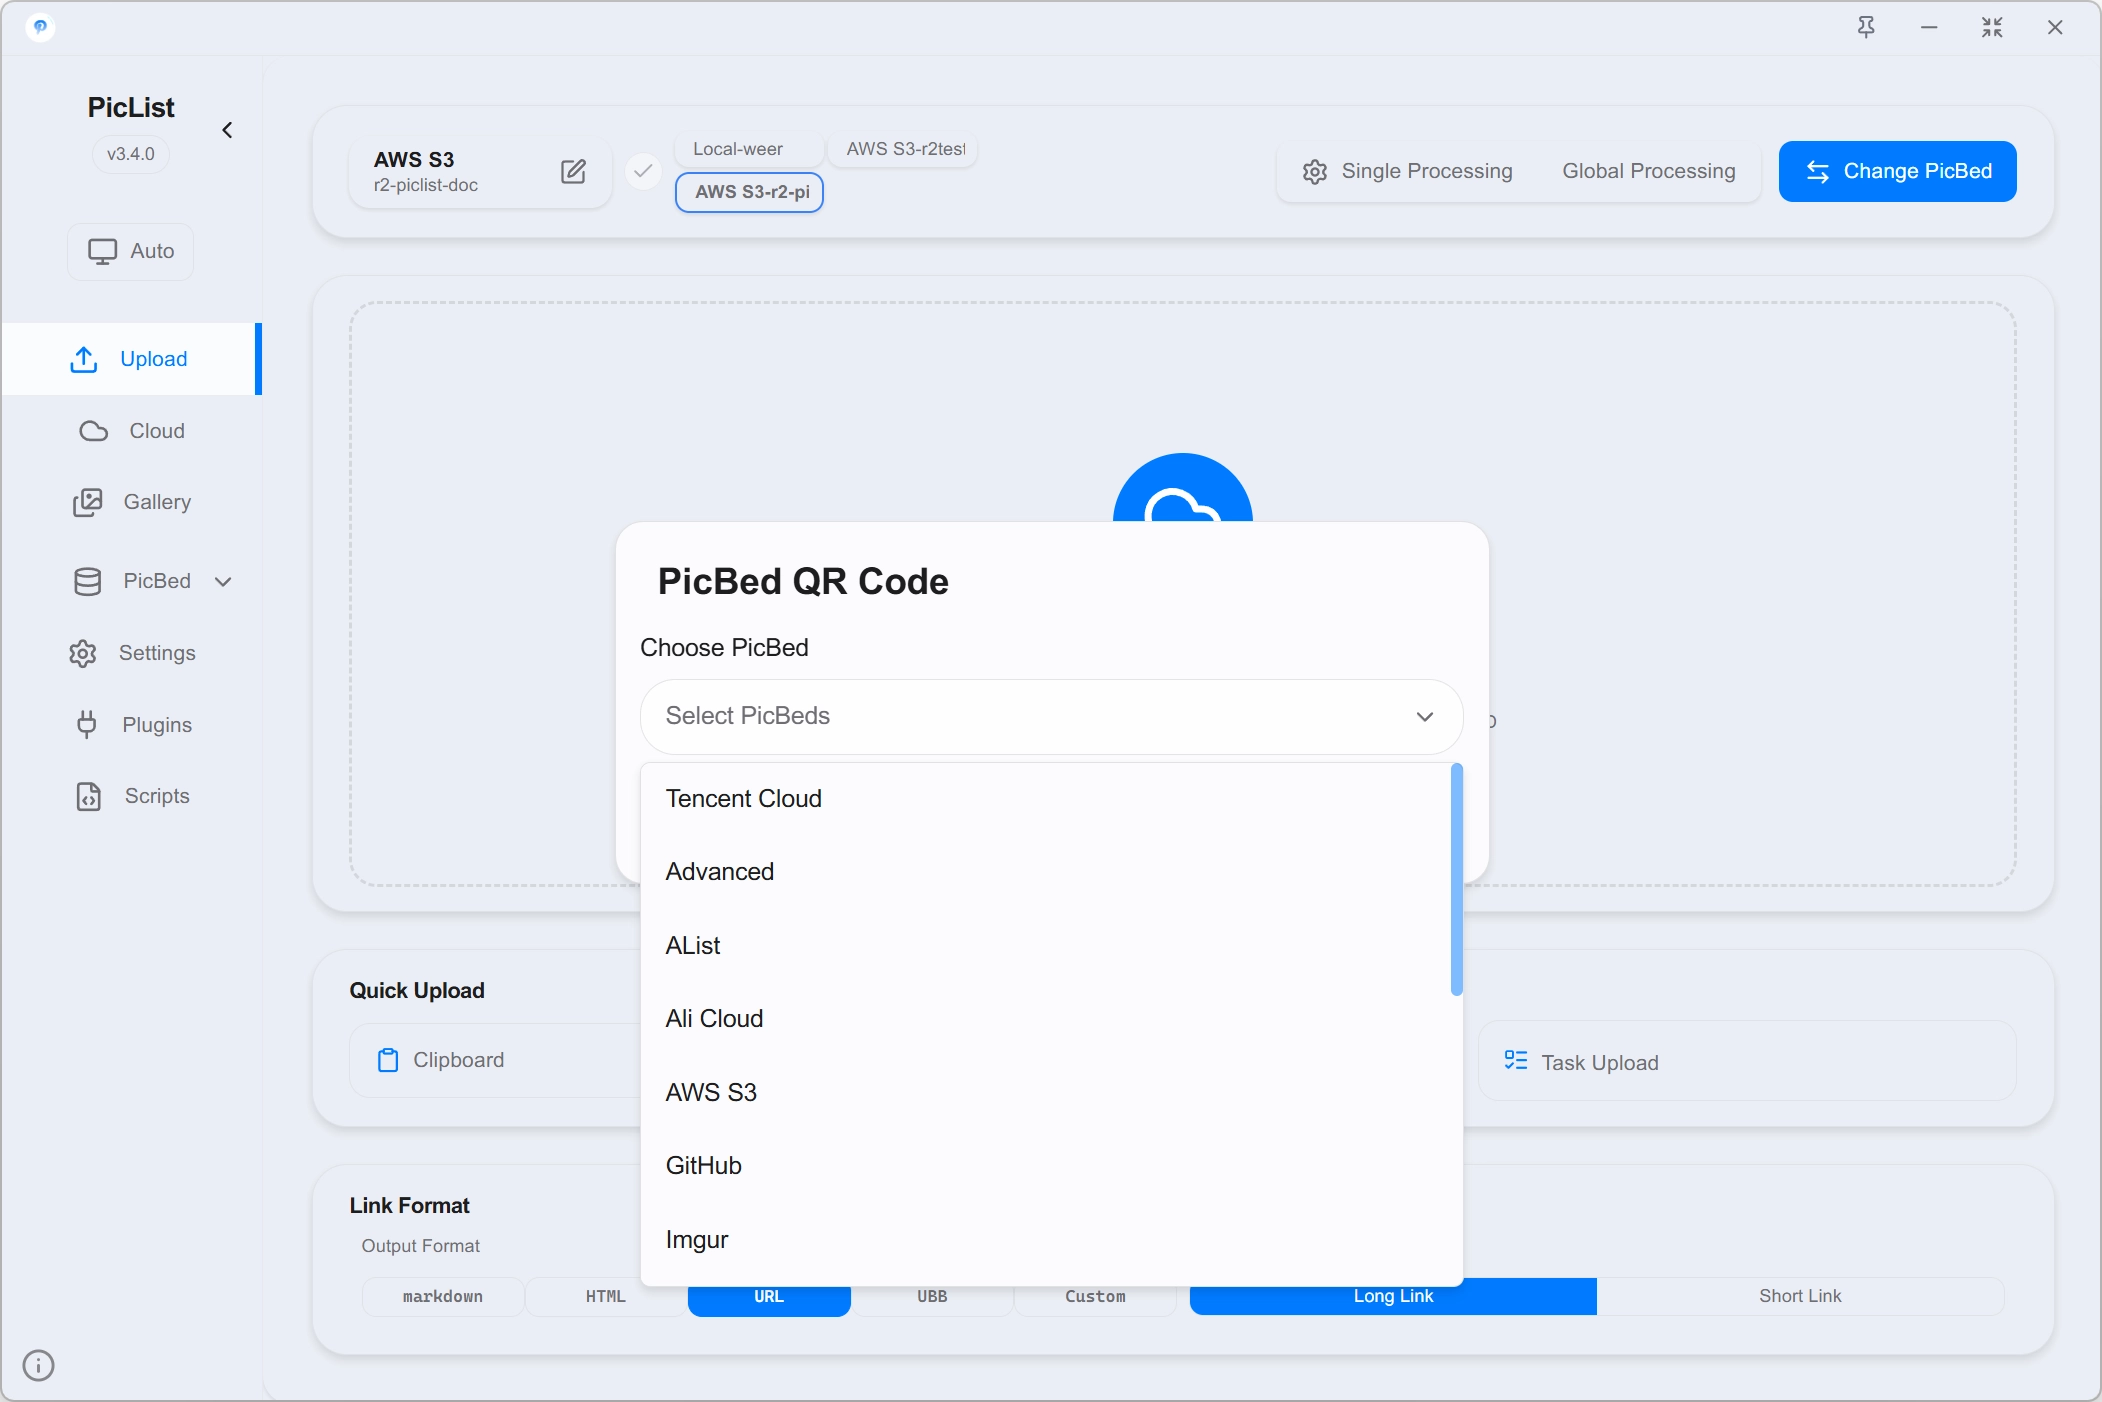
Configuration Sync Feature
PicList supports quick configuration import to PicHoro via QR code:
- Click the information bar button in the lower left corner of the PicList main window
- Select the "Generate PicBed Config QR Code" menu
- Use PicHoro's scanning function to scan the QR code
- One-click import of image bed configuration
PicHoro Features
- Supports multiple mainstream image hosting services
- Batch image upload
- History management
- Fully compatible with PicList configurations
- Supports Android and iOS platforms
Through this method, you can seamlessly sync image bed configurations between desktop and mobile devices, achieving a consistent cross-device experience.