
Meet and install PicList
PicList combines file uploads, image processing, link copying, upload history, and cloud file management in a desktop application. A typical writing workflow is simple: drop an image into PicList, copy its Markdown link, and paste it into your editor.
If this is your first visit, follow the local practice exercise in Quick start, then connect your online storage.
Where does an uploaded image go?
PicList connects your computer to a destination you configure. The actual file lives in that storage service, repository, server, or local directory. The gallery keeps a record so you can find the result later.
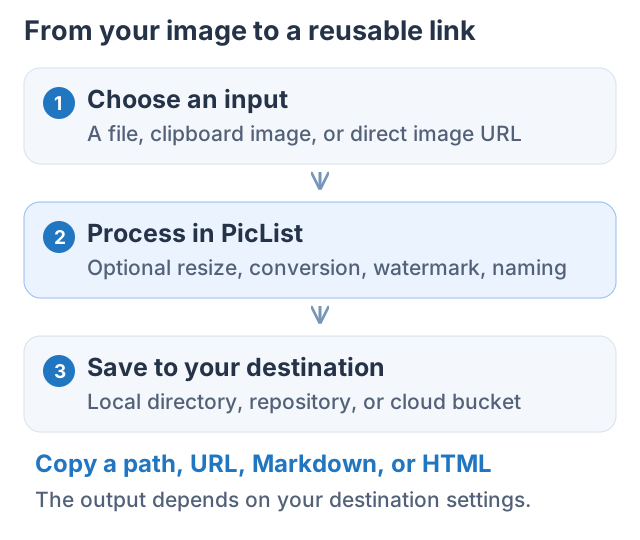
For example, after an R2 upload, an article uses the image address on your public R2 domain. Closing PicList does not remove that cloud file. A file from the local practice exercise stays on your computer.
Choose your interface
| What you want to do | Interface | Start here |
|---|---|---|
| Drop files, process images, and browse a gallery | PicList desktop app | Quick start |
| Upload from a terminal or server | PicList-Core | Install Core |
| Call upload functions in a Node.js program | PicList-Core API | Node.js API |
| Upload from a phone | PicHoro | Mobile integration |
| Upload images while writing in an editor | PicList and an editor integration | Typora and VS Code |
The desktop application includes its runtime. You do not need to install Node.js for ordinary desktop uploads. Independent Core installations have their own Node.js requirements.
Download and install
Open PicList Releases, find the version you want, expand Assets, and choose a package for your operating system and processor.
| Platform | Choose a package | Install |
|---|---|---|
| Windows | Usually x64 for Intel / AMD; ARM64 for Windows on ARM. An .exe is an installer; .zip / .7z is a portable archive | Run the installer, or extract the entire portable archive before launching PicList |
| macOS | ARM64 for Apple Silicon; x64 for Intel; choose a .dmg | Open the disk image, drag PicList into Applications, and launch it there |
| Linux | Choose AppImage, deb, rpm, or the appropriate snap, and check the architecture | Follow your distribution's installation process; AppImage needs executable permission |
Package managers are another option. A newly published release can take longer to appear there:
winget install Kuingsmile.PicListbrew install --cask piclistThe portable build's data directory stores your settings and gallery. Keep it when upgrading or moving the application. See Configuration for installed builds' data locations.
First launch
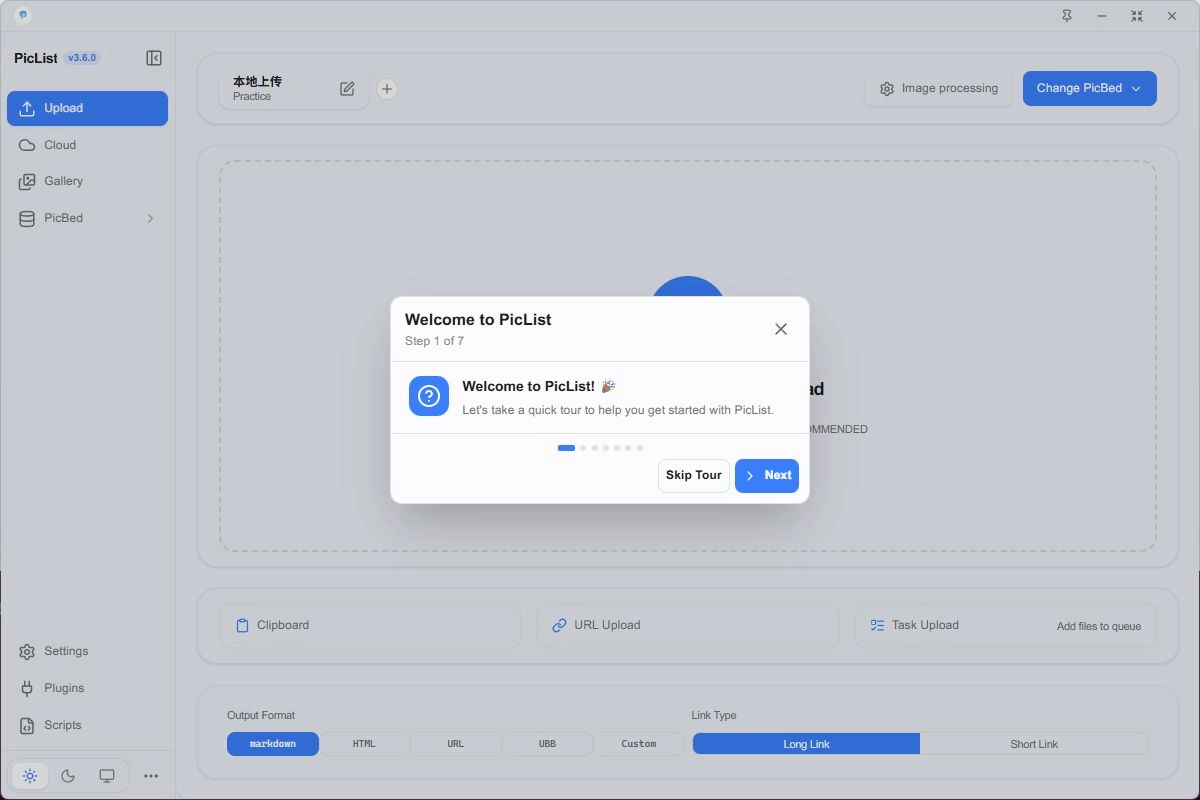
The first launch displays a welcome dialog. Read it, enter the main window, and create your own upload configuration. The initially selected provider still needs a working account.
Meet the workspace
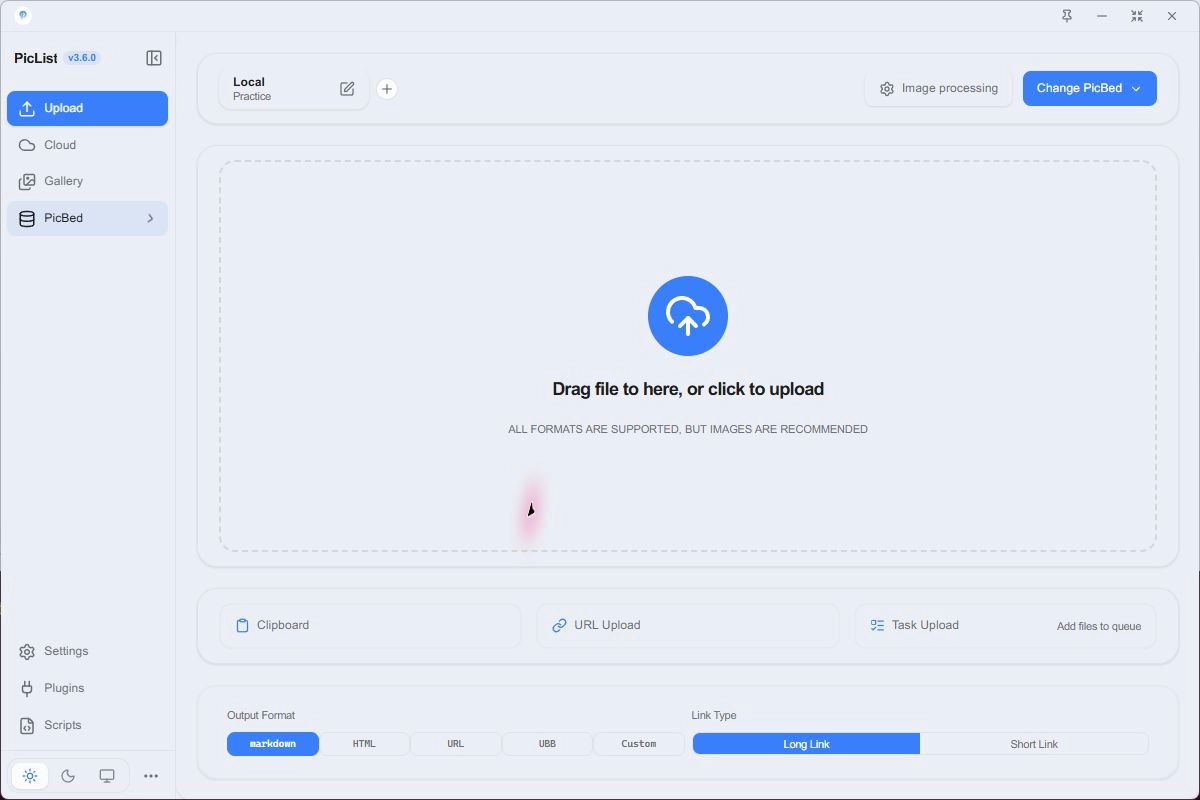
| Entry point | What happens here |
|---|---|
| Upload | Drop files, use the clipboard, import URLs, or open upload tasks |
| PicBed | Create, edit, and select named upload configurations |
| Image processing | Compress, resize, convert, watermark, and name images |
| Gallery | Find previous uploads, copy links again, and preview files |
| Cloud | Connect a management account and browse actual remote files |
| Settings | Language, shortcuts, upload behavior, backups, and the HTTP server |
| Plugins and Scripts | Add storage services and custom automation |
Start with a small exercise
- Create a Local configuration that writes into your own directory.
- Upload a small image, check the saved file, and find its gallery record.
- Connect R2, GitHub, or another online service and verify a public image URL.
- Add image processing or an editor integration when you need it.
Quick start walks through each step. This order lets you learn the application before dealing with an online service's credentials and permissions.
If you get stuck
Record your version, operating system, provider, and failing step, then open Troubleshooting. Upload failures, inaccessible links, and failed previews have different checks.
Before sharing screenshots, check configuration values, logs, and QR codes for credentials.